Although Booknetic Appointment Booking Plugin is designed for all businesses, particular forms may be required in some business processes. For example, you can ask your clients to fill special fields before coming to the appointment. Or you can ask your client to upload a special document to the system before arranging an appointment. Maybe you can request the links to customers' social media accounts. Or you can ask them to fill out a short test before the appointment.
Booknetic Appointment Booking Plugin has developed a Form Builder to solve such problems. Moreover, you don't need to know any code or HTML for building such custom forms. Even you will not need to waste your extra disk space by installing the most used 3rd party form plugins.
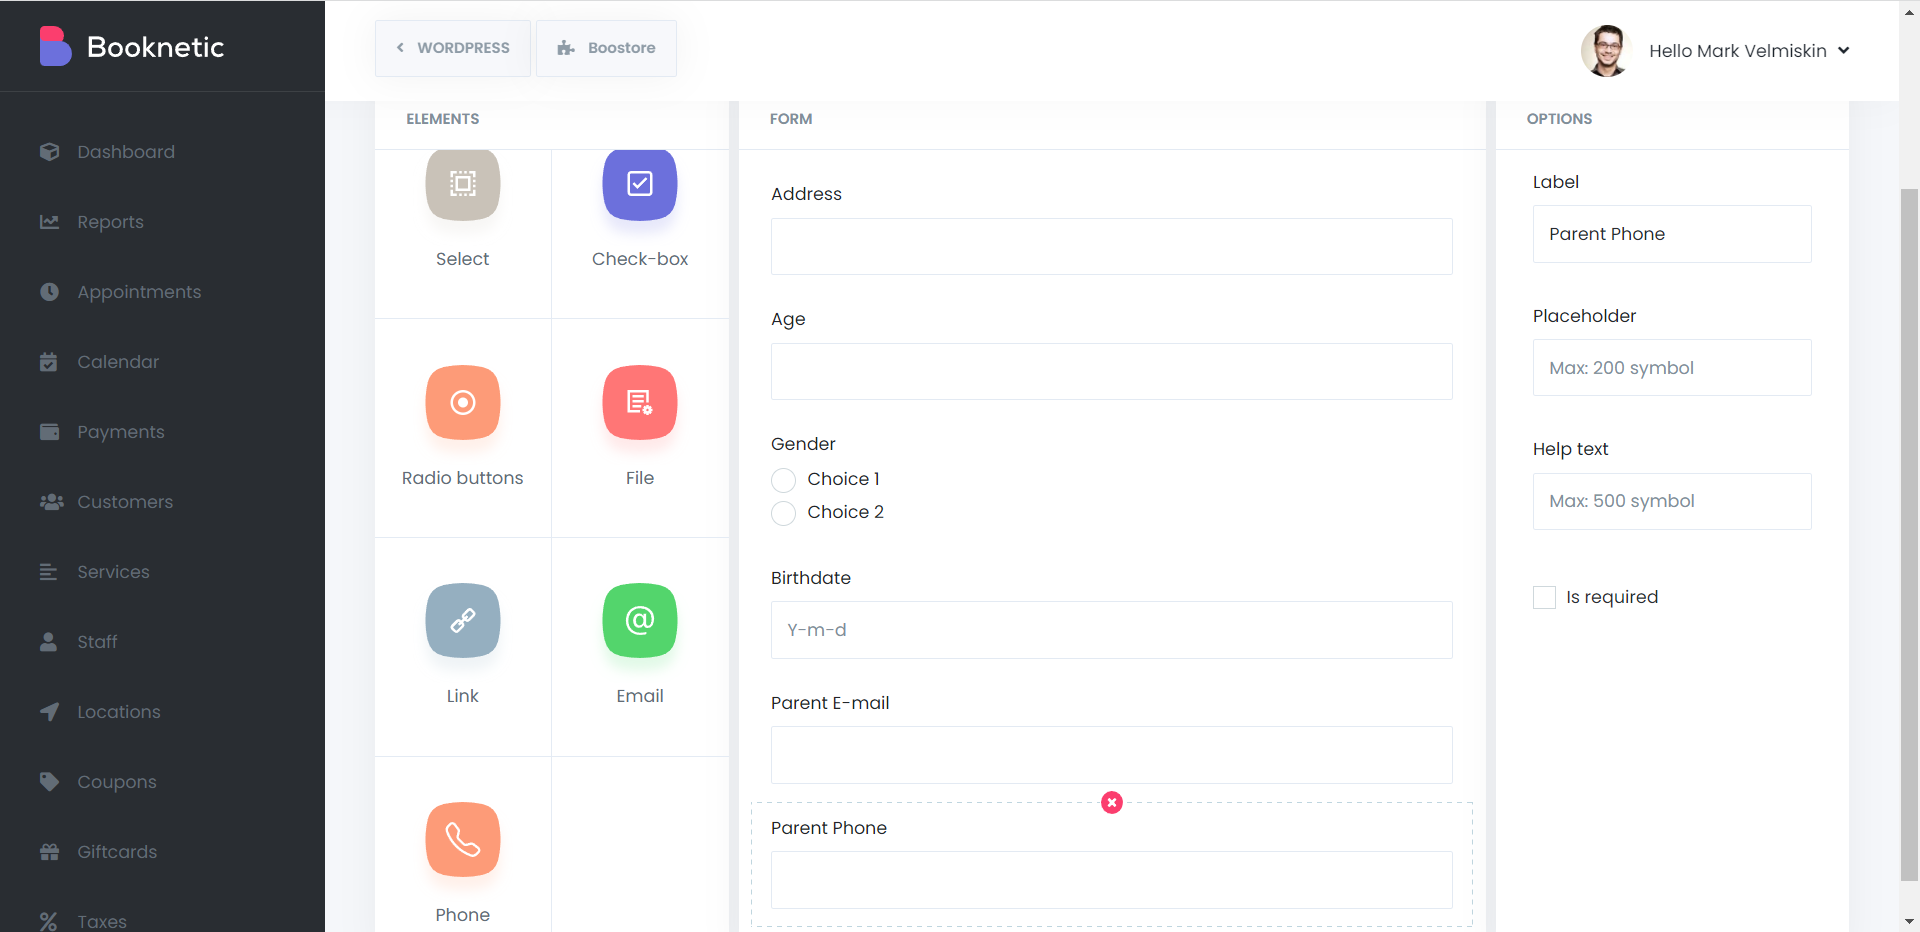
With the help of this module, you can customize your custom fields for your business by using the multi-function Form Builder for your Front-end booking panel. You can use several forms at the same time. Following input types can be used on collecting additional information from your customers.
Label - This field will not contain any labels that are desired in your form. There will be no functionality available. You can simply add text labels.
Text input - This input can be used if you want a piece of brief information about customers consisting of a short sentence or a single word.
Text area - If you require more information, this entry will be suitable for you.
Number input - If you want your customers to let you know any number, this input is exactly what you are looking for!
Date input - Your customers can send you information including birth date or any other date with the help of this form.
Time input - Do your customers need to tell you any additional hours? You can use that input!
Select - This input allows your customers to choose from multiple selections.
Checkboxes - Checkboxes adds the checkboxes that customers marks on to your form. It can be used for terms and conditions.
Radio buttons - Using the radio buttons, you can ask your customers to choose from multiple selections.
File - Do customers need to send you any files? It can be an image or any file. You can determine the file format.
Link - You can use this field if you want to add a link to your form.
Email - You can add an Email field to your Information section and request the additional email address from your customer. Notifications can be sent to this email address automatically.
Phone - You can add a Phone field to your Information section and request the additional phone number from your customer. Notifications can be sent to this phone number automatically.
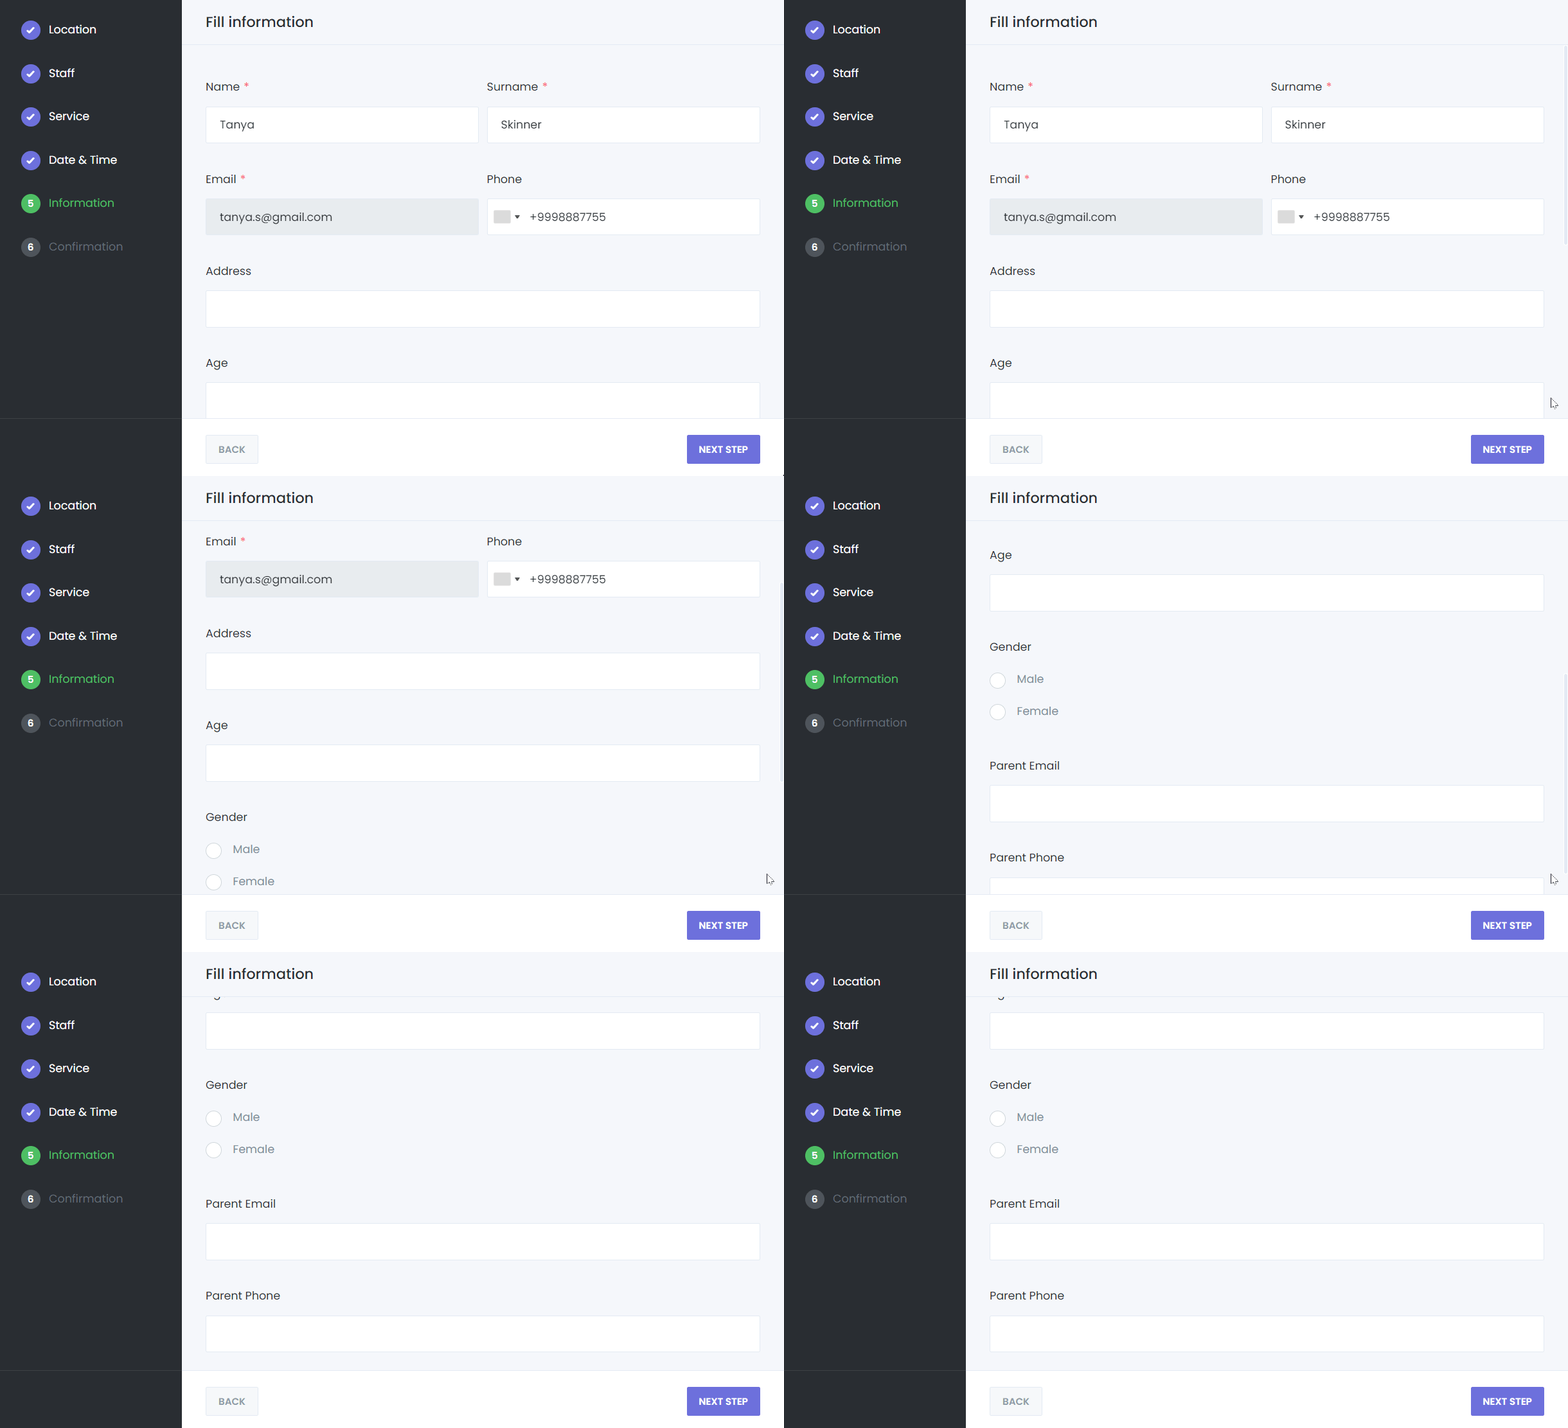
After finishing and saving the form, you can display the Information step of the front-end interface of the Booknetic Appointment Plugin. After the client completes the appointment, the form will come to your system with other information.
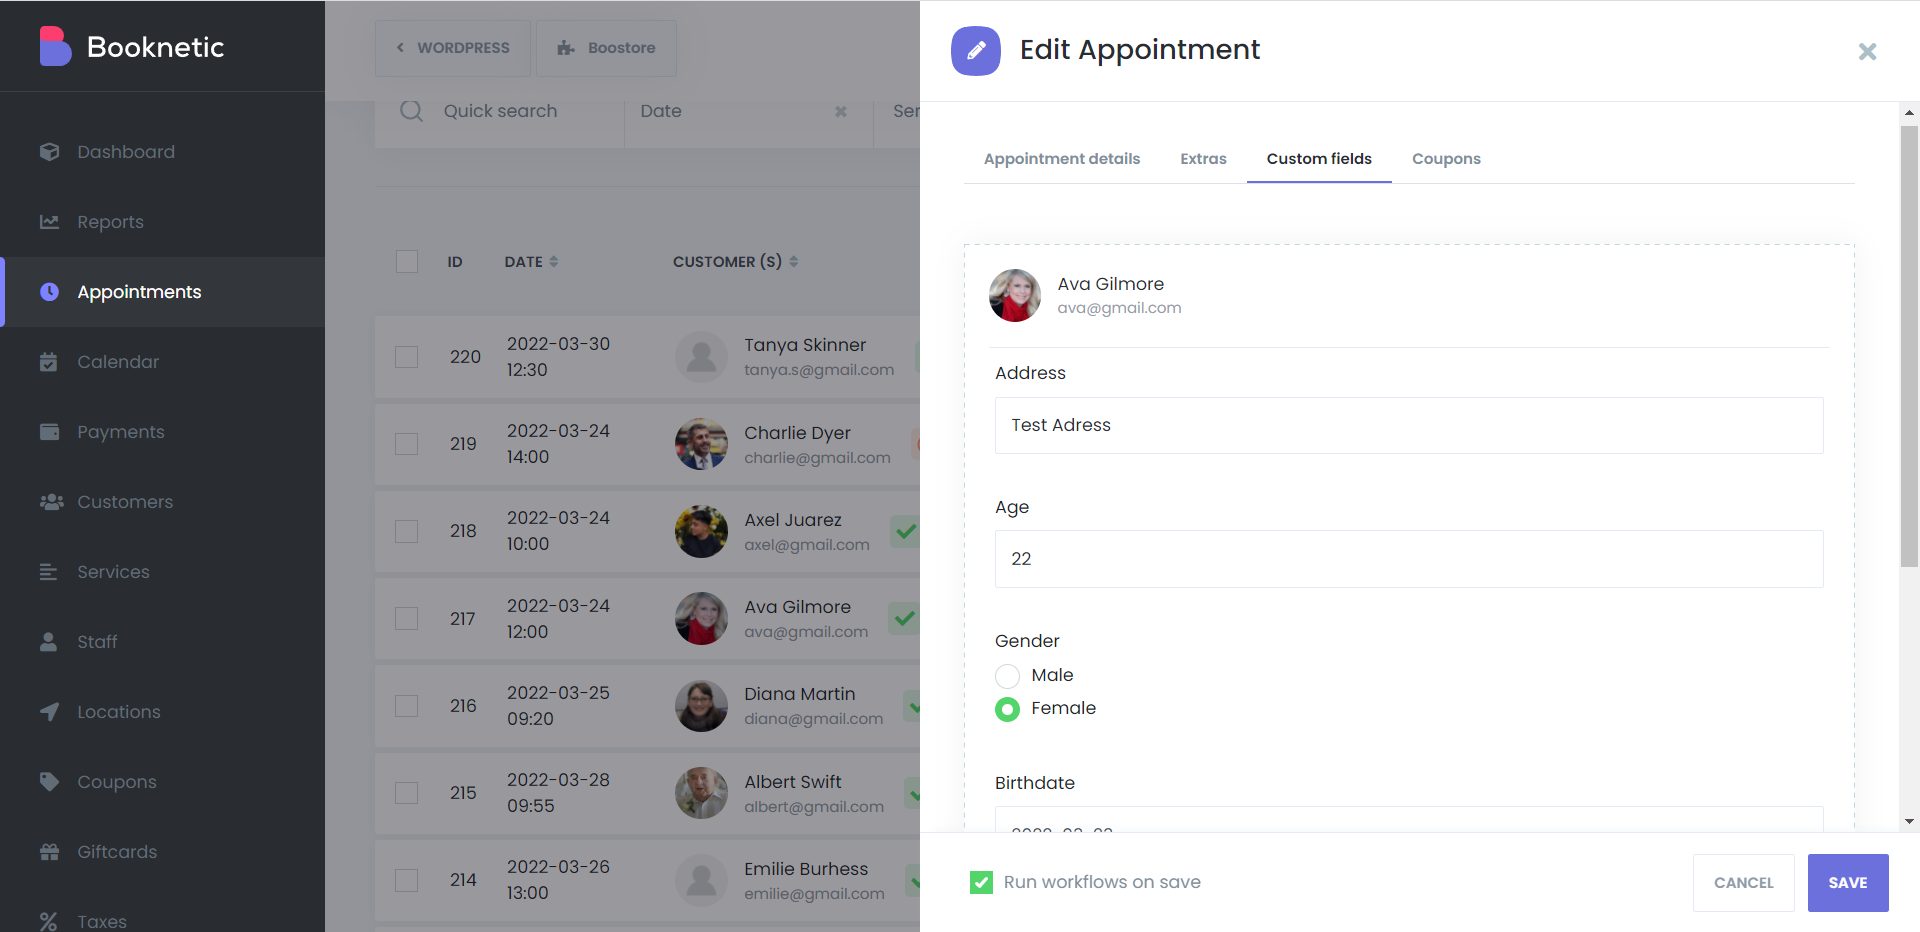
Staff members and admins will be able to fill in Custom Forms information or change existing information while creating and editing appointments.
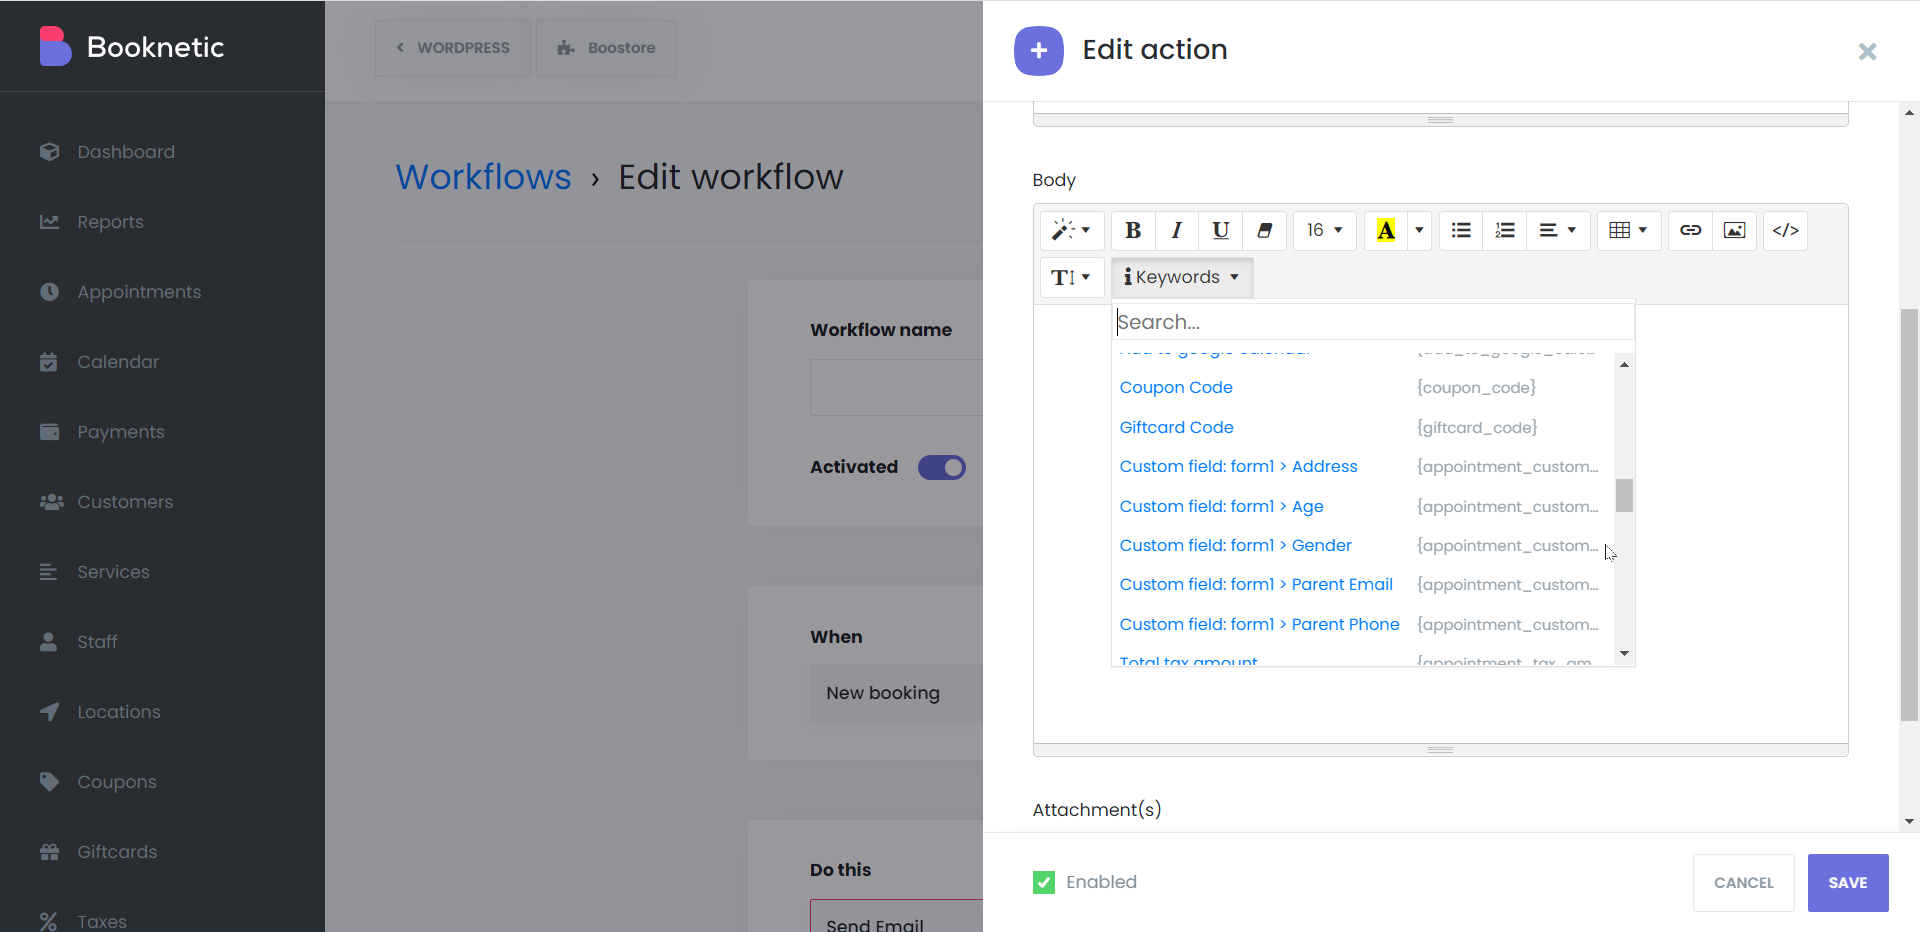
Whether the customer makes an appointment using the booking panel or the staff member creates a manual appointment from the admin panel, the information specified in the custom forms can be sent to both staff members and customers with the help of keywords. It is possible to include custom form information in all fields where it is possible to use keywords (Notifications, Invoices, Google Calendar event, WooCommerce order description, etc.). When you look at the keywords, you will see that there is a different keyword for each custom form.
At the same time, it is possible to send automatic notifications to the email address and phone numbers obtained from the customer by using the Email and Phone field of Custom Forms.
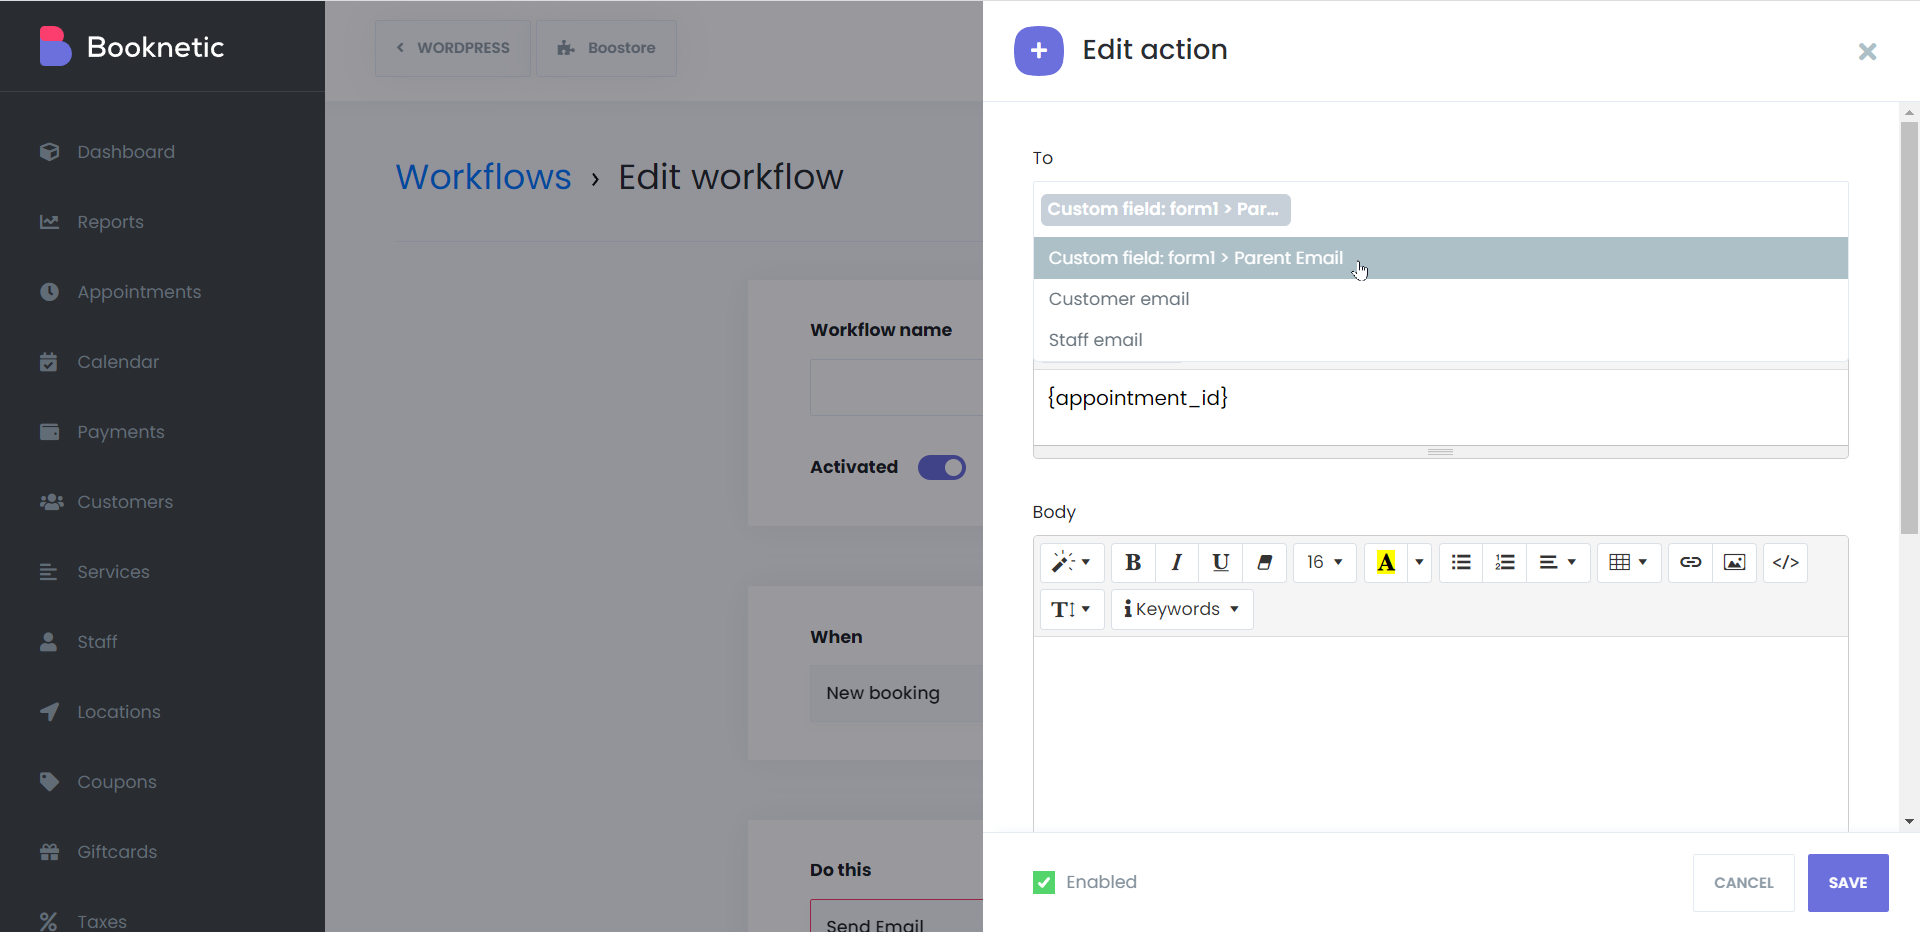
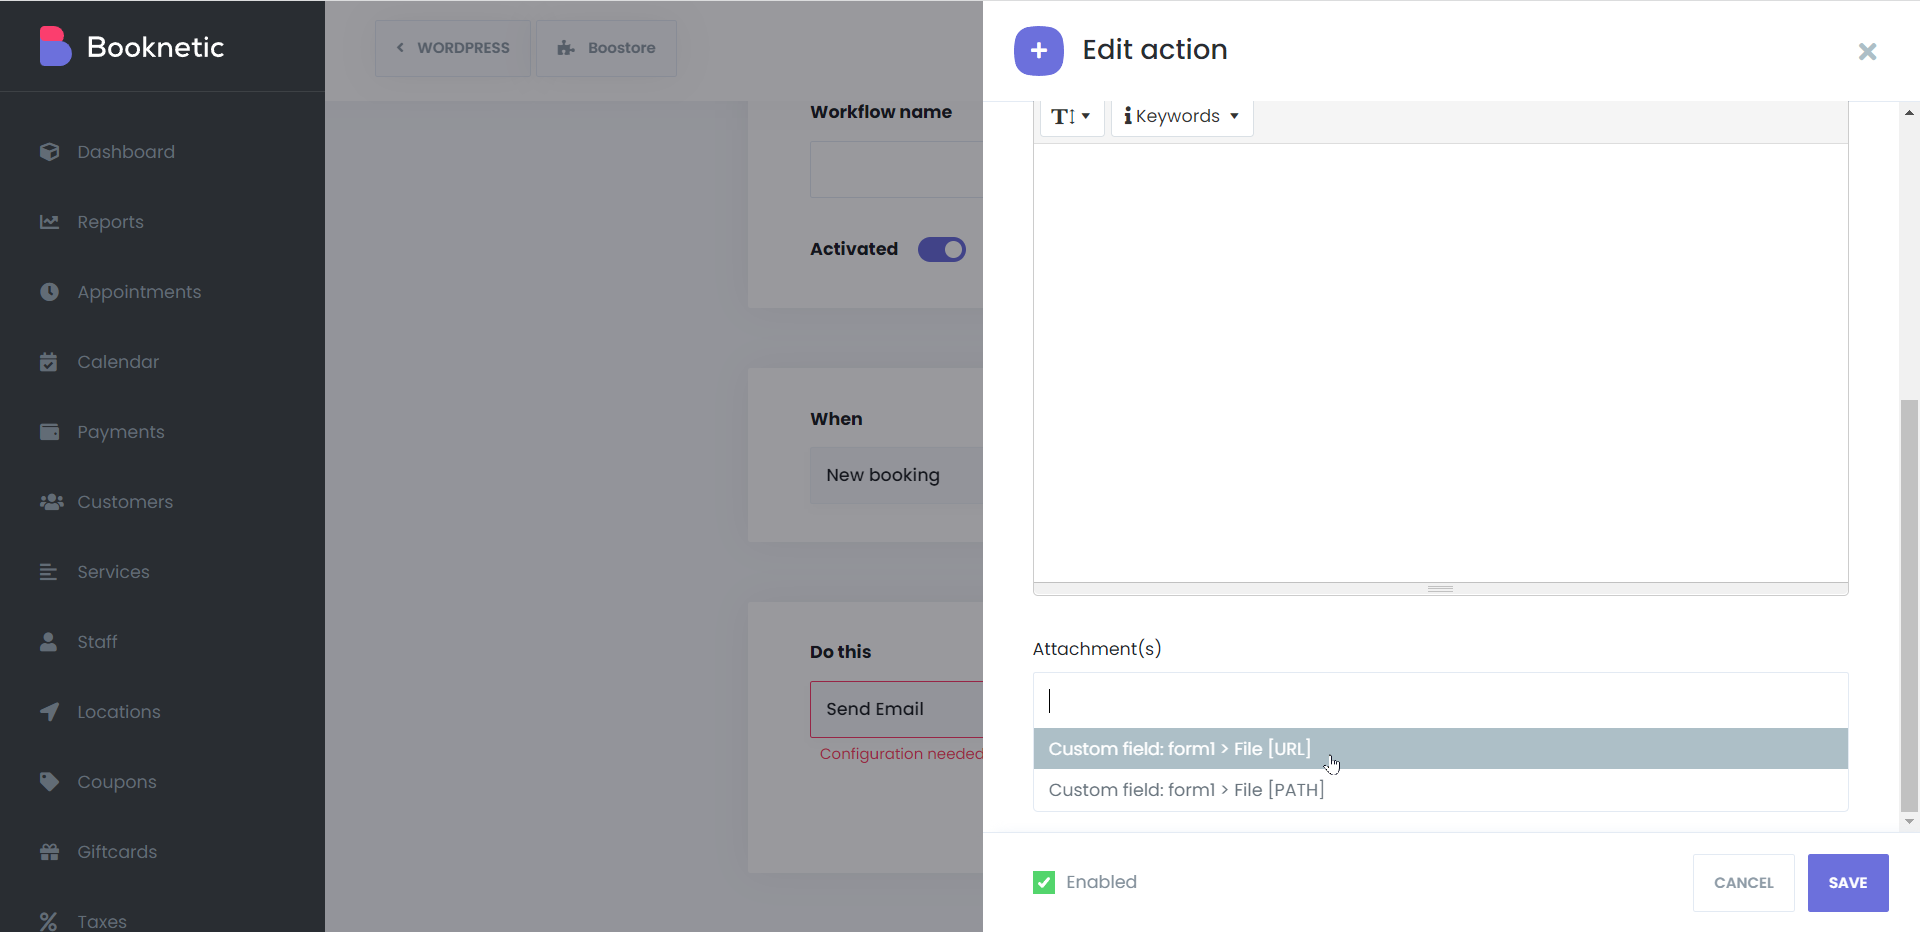
In addition, it is also possible to send the file received with the help of the File form to the relevant people by adding it to the Attachment section of the Notifications.
Conditional Fields
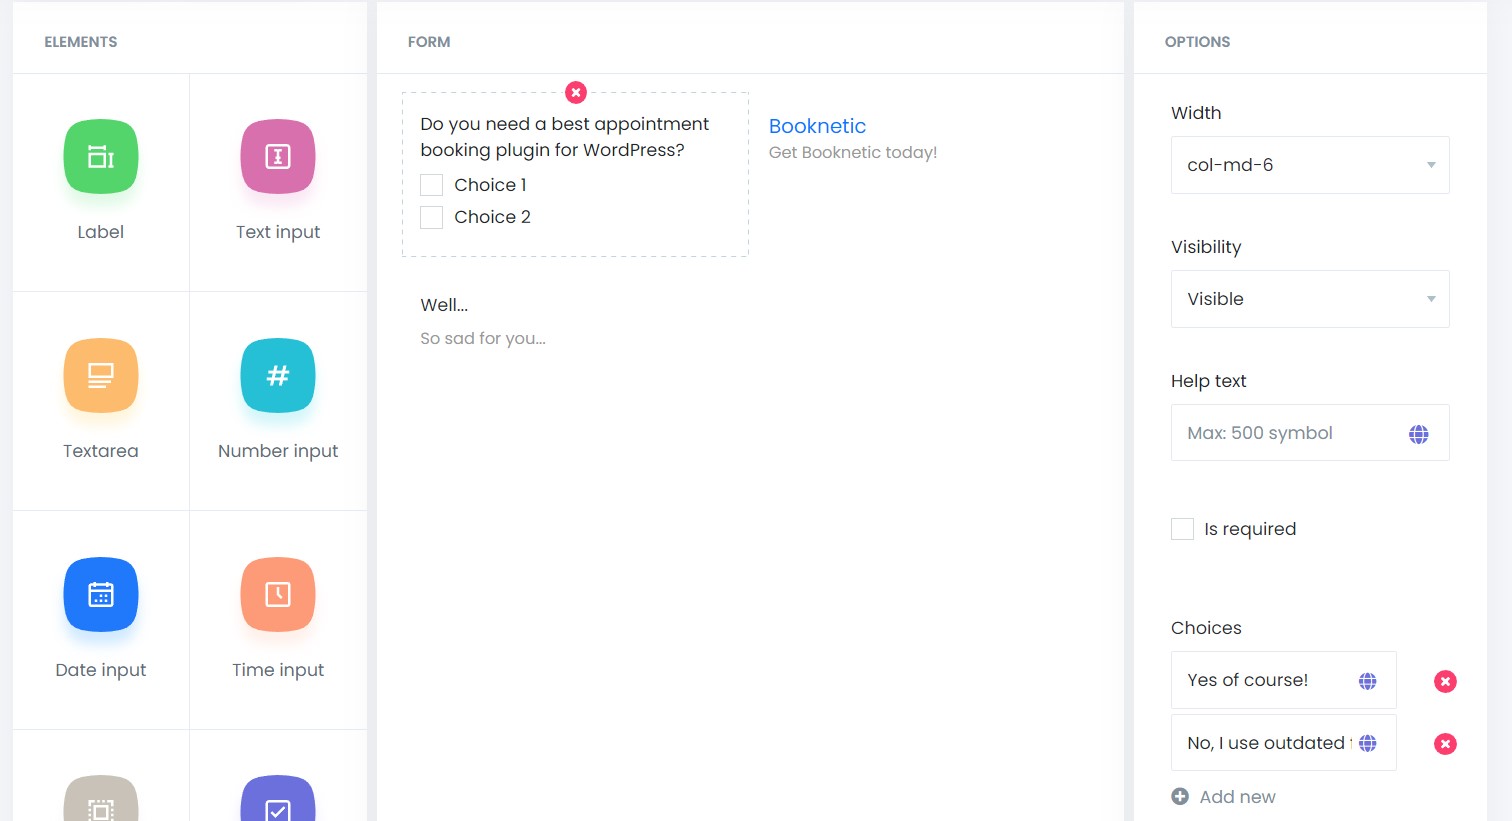
It is possible to set conditions for the fields to appear only in certain situations. You are with a more comprehensive conditional fields feature than all the conditional fields you can find in the market. It is possible to set conditions for almost all fields. Many terms used in coding can be used here. To give a short example, you can create a form and show/hide or even set a value for that form only when a certain checkbox is checked. Let's get to see how it works via screenshots. First, let's create a checkbox/radio field to offer choices to customers.
Then, let's create two additional form fields according to the customers' answers.
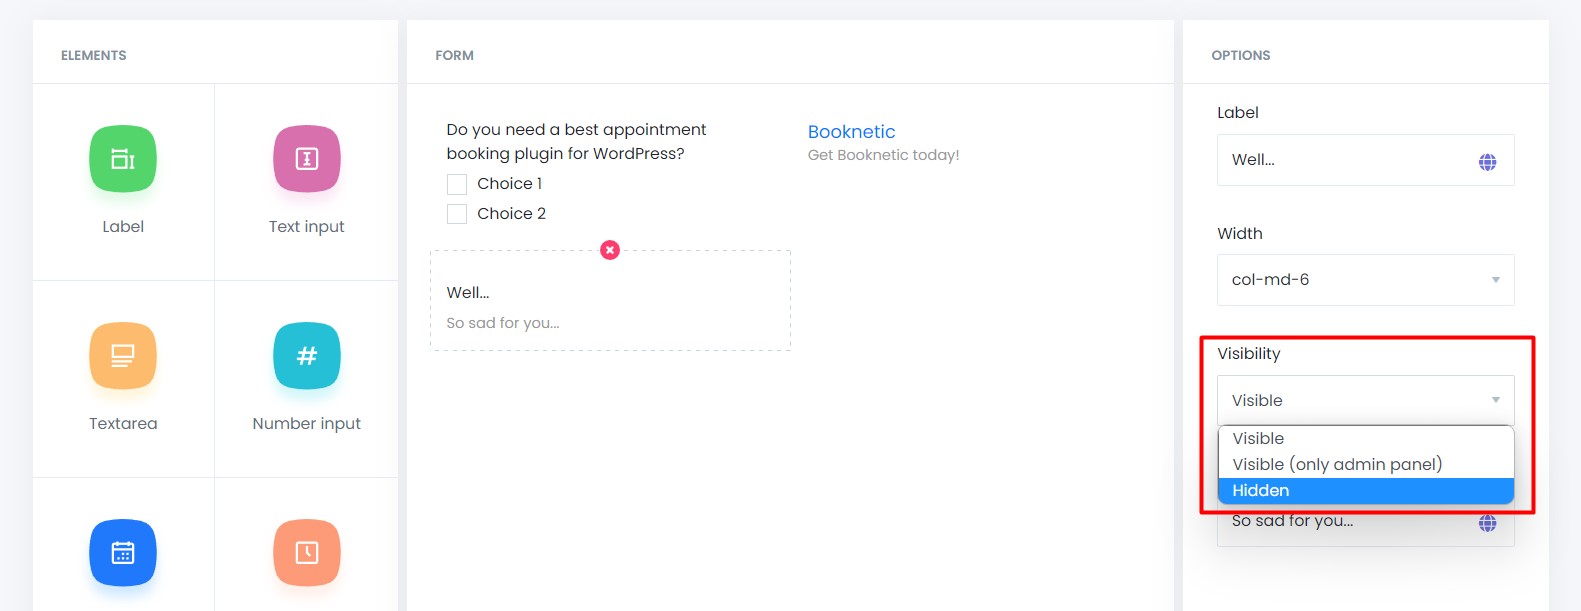
So, if you want to hide these forms and show them only according to the customers' answers, please change the visibility to "Hidden"
Conditions are very rich, and any thinkable combination can be made. In the conditions section, you can set such a condition:
WHEN
Field - Do you need a best appointment booking plugin for WordPress?
Value = Yes of course!
DO
Show - Booknetic
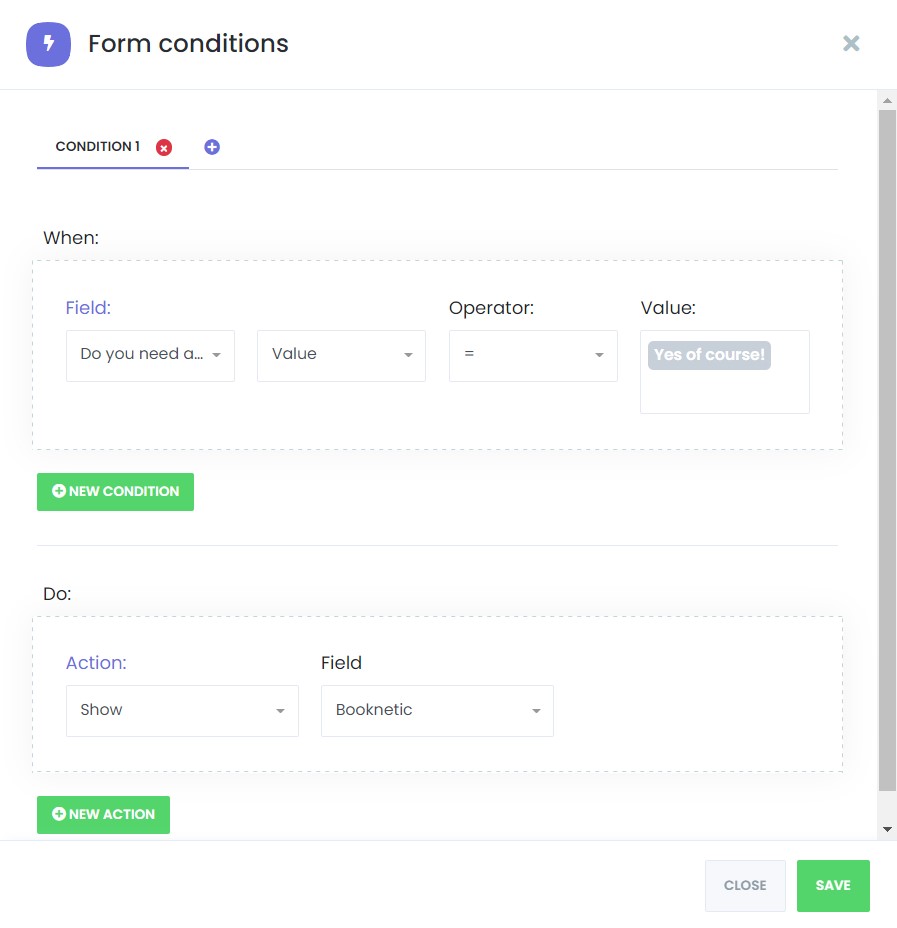
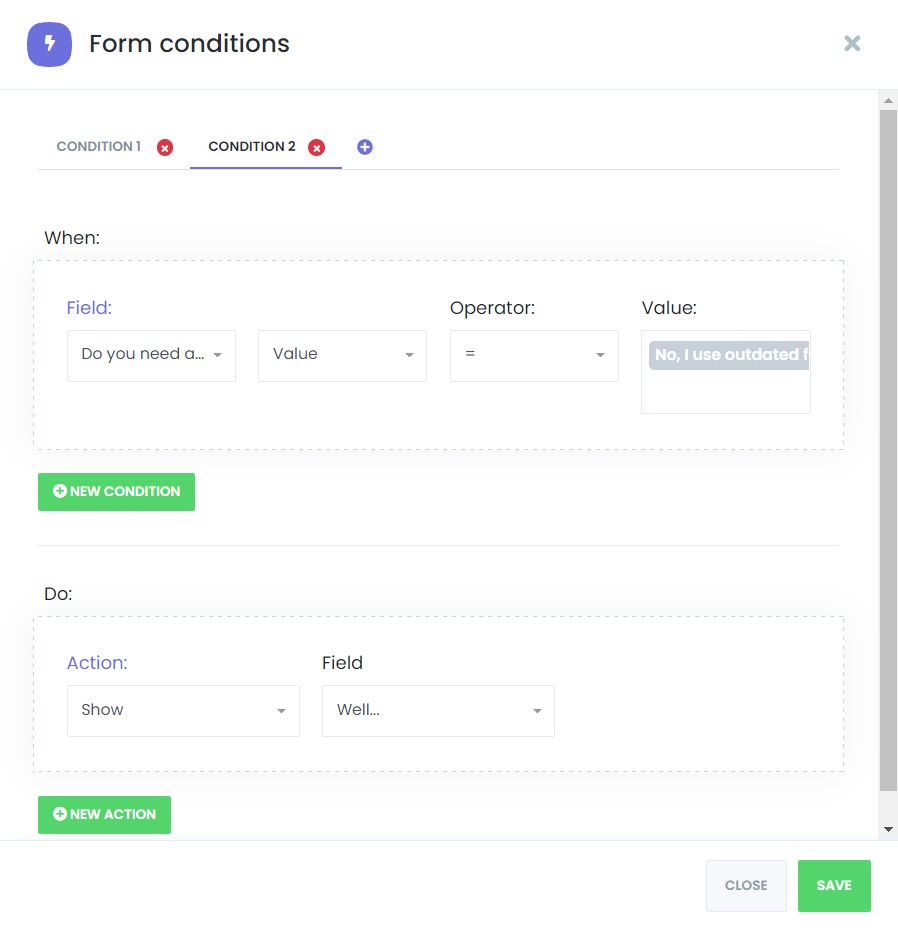
It is possible to create as many conditions as you want. So, let's create another condition for the other answer.
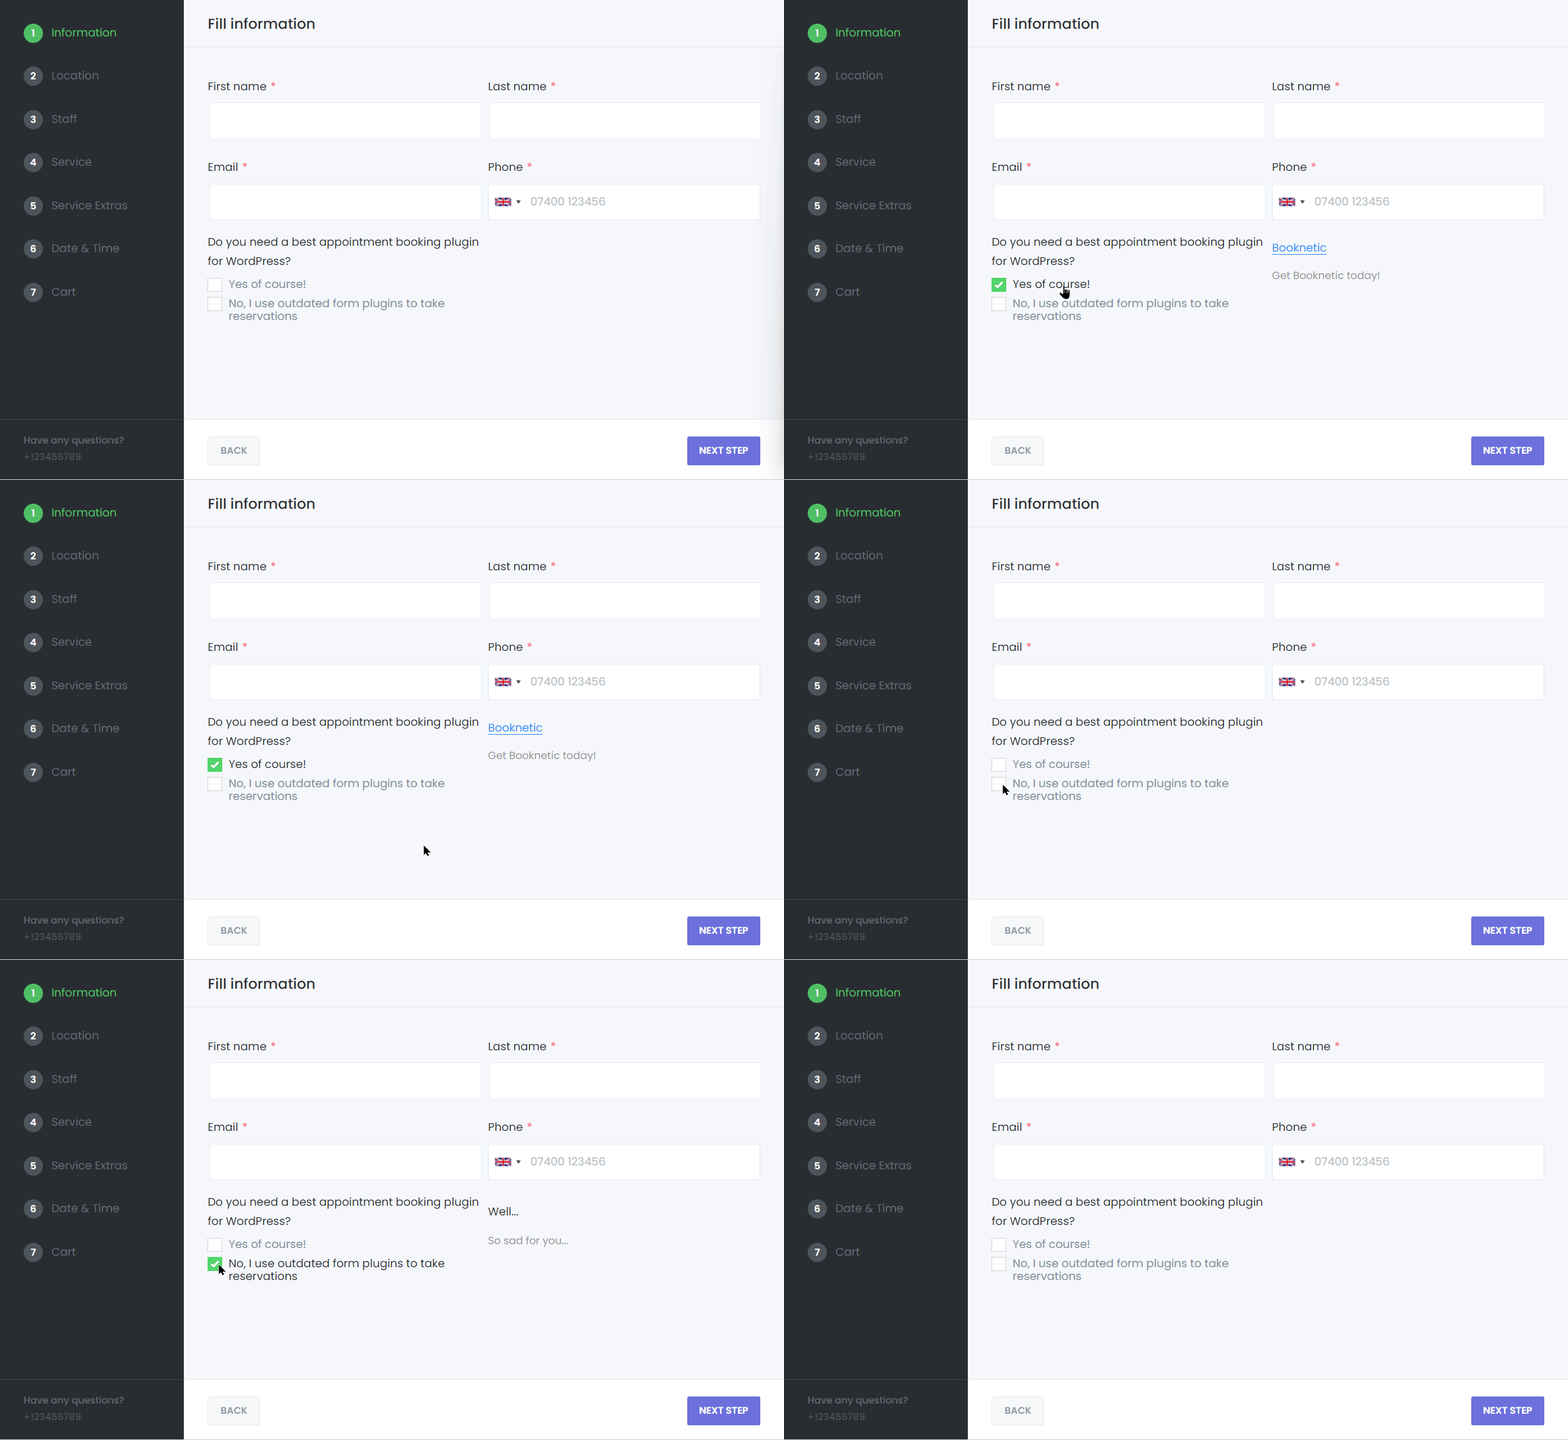
Now, let's see how it works in the front-end booking panel. We tried to show you how the feature works with a very simple example. There is no limit to what you can do and the conditions you can create using this feature.
It is also possible to set the form fields to appear only in the admin panel and cannot appear in the booking panel when the customers make appointments. When staff adds or edit the appointment, they can fill these form fields according to the appointment. Maybe it can trigger something in the workflow to do something good :) There is a specific shortcodes for each custom form which you can add to your workflow action content by adding {appointment_custom_field_ID} shortcode to your content. Set it as visible (only admin panel) to show this form field in the admin panel only. If you set it as Hidden, then this form field can only appear according to the conditions.


