Stripe payment integration
Stripe payment Integration for Booknetic Appointment Booking Plugin
We use cookies on our website to provide you with the best possible user experience. By using our website or services, you agree to their use.
Stripe payment Integration for Booknetic Appointment Booking Plugin
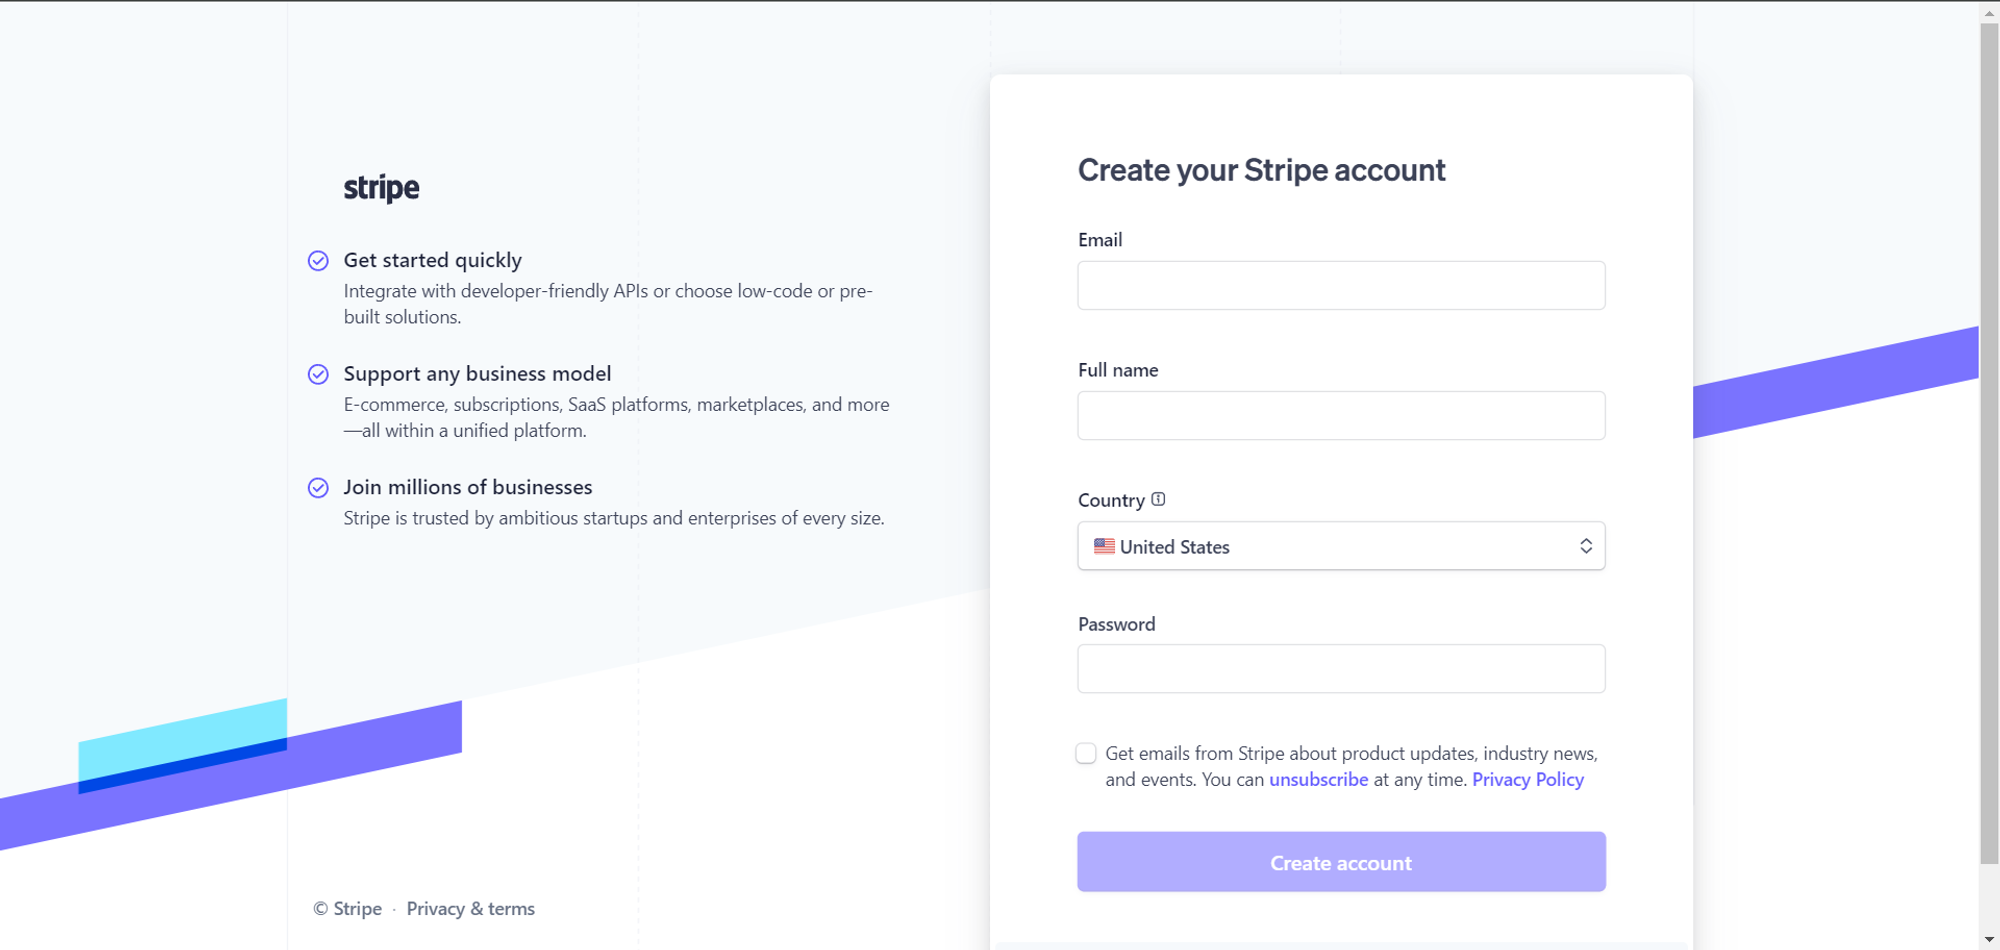
First, we have to go to the link below, to register a new Stripe account, that we will later use to receive payments from our customers for our Booknetic services:
https://dashboard.stripe.com/register
After entering the necessary information, Stripe then sends us an email, to verify our email address:

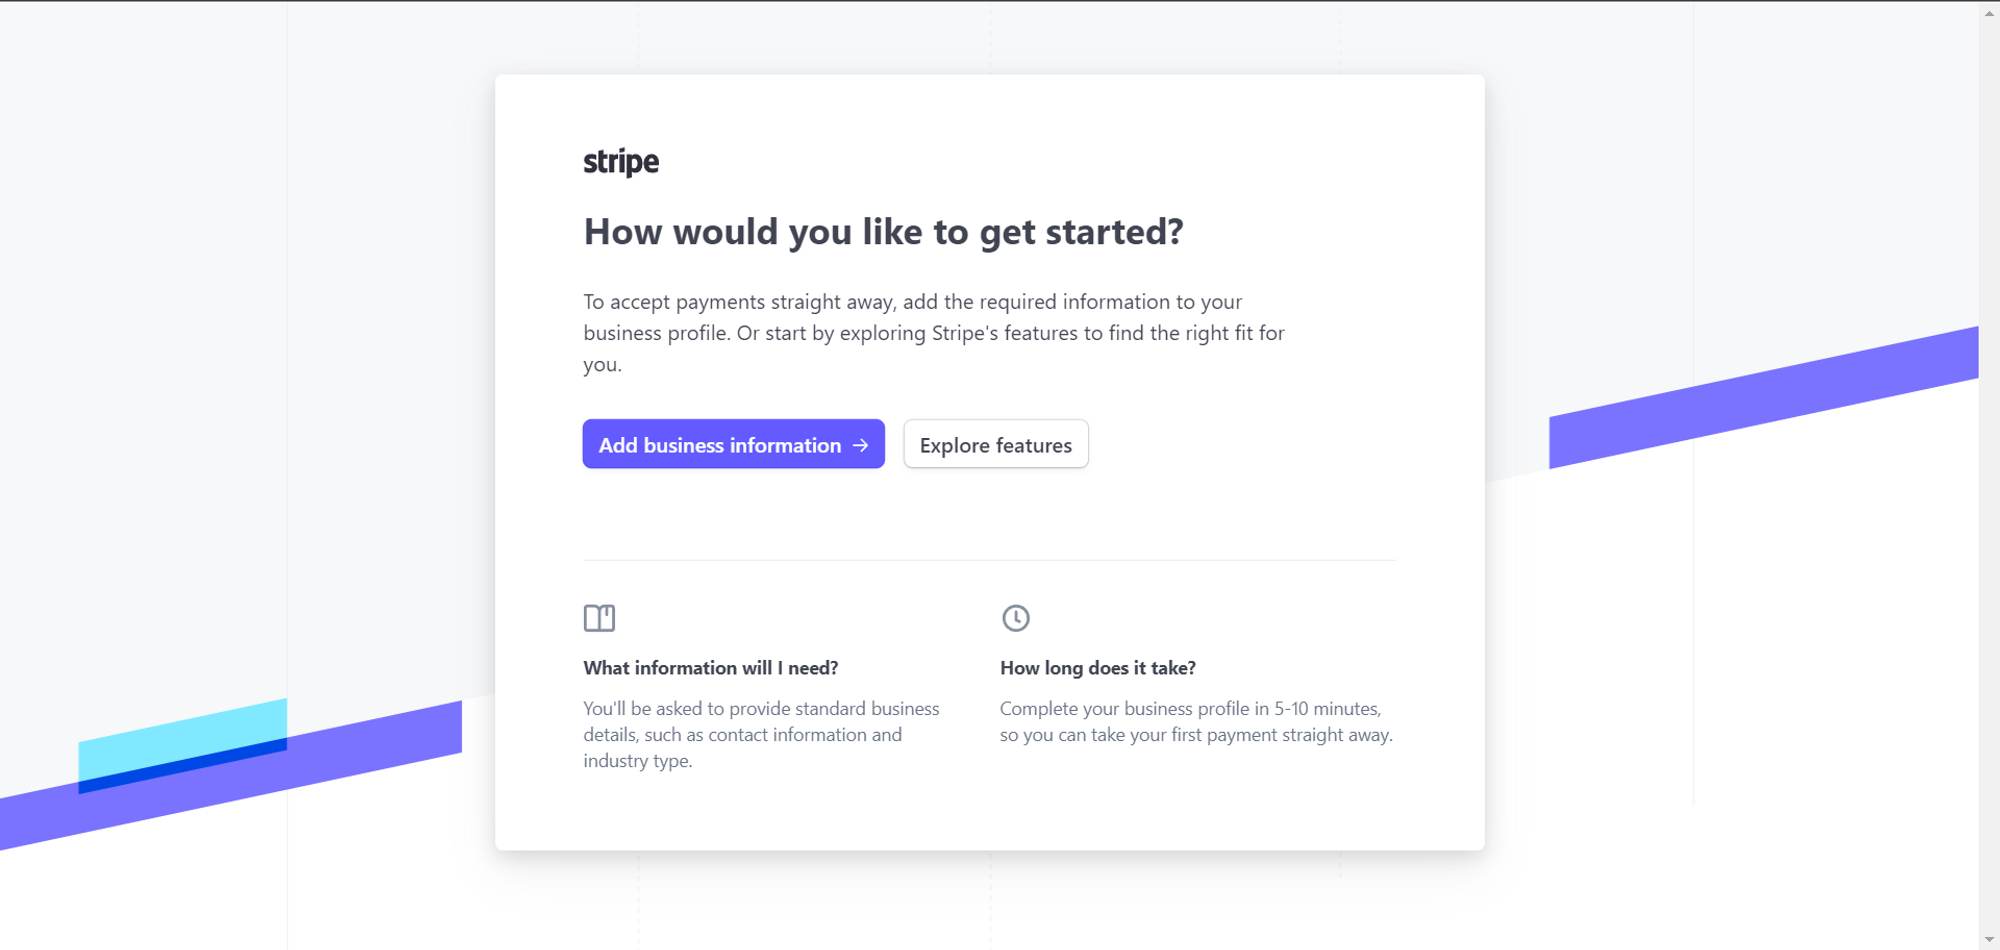
After clicking on the link that is sent to you by the email, you will see the page similar to the one below:
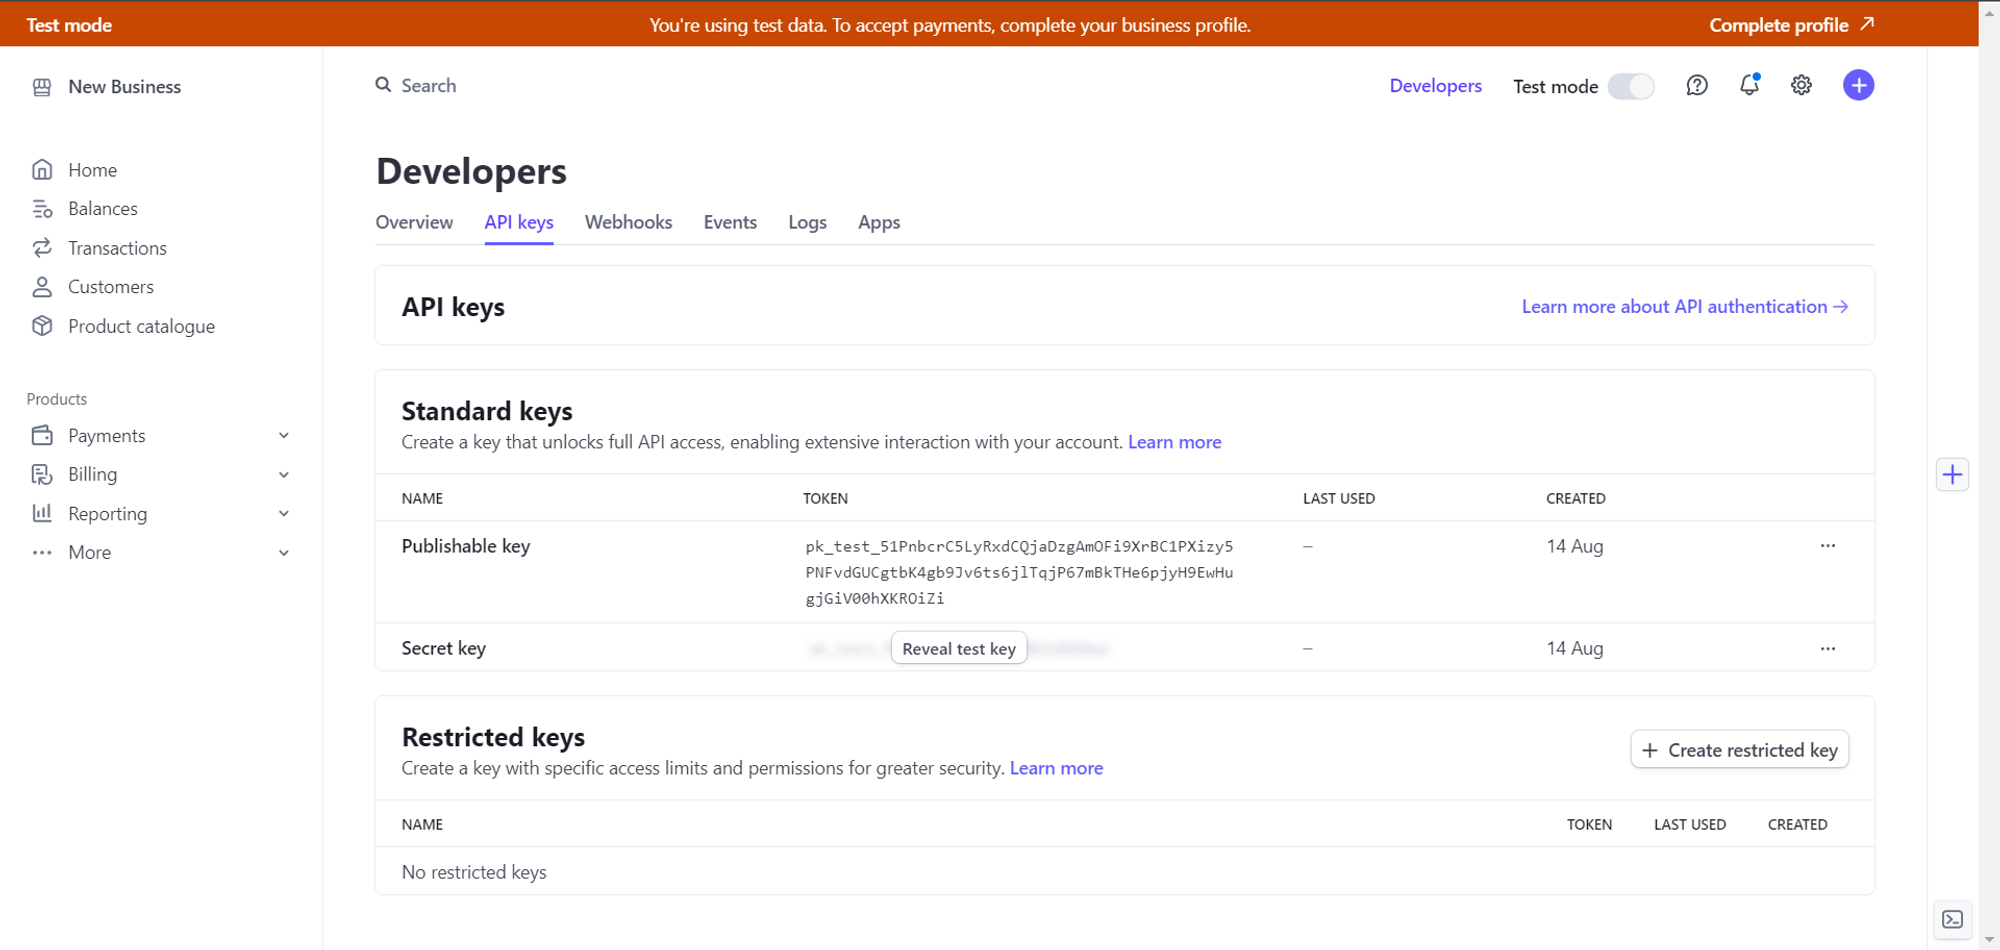
However, before you go on and confirm your account to accept real payments, you can use Stripe’s test credentials for now. For that purpose, simply visit the link https://dashboard.stripe.com/test/apikeys
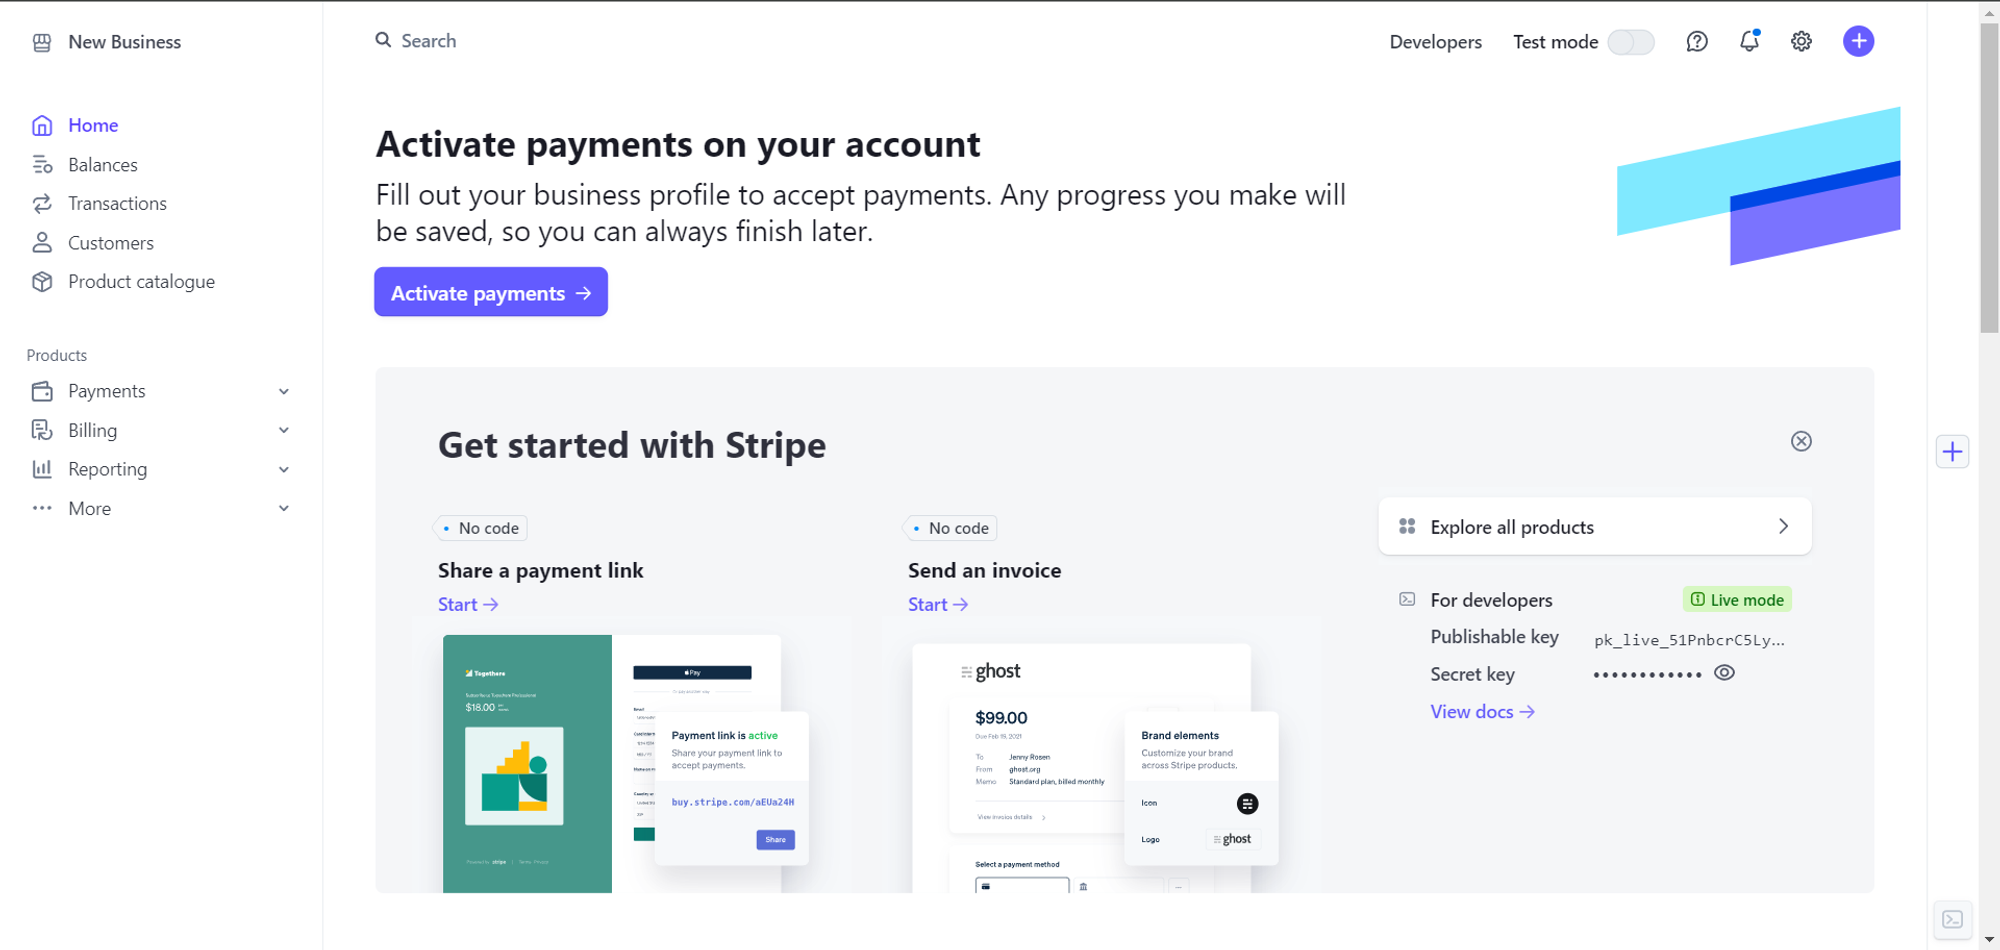
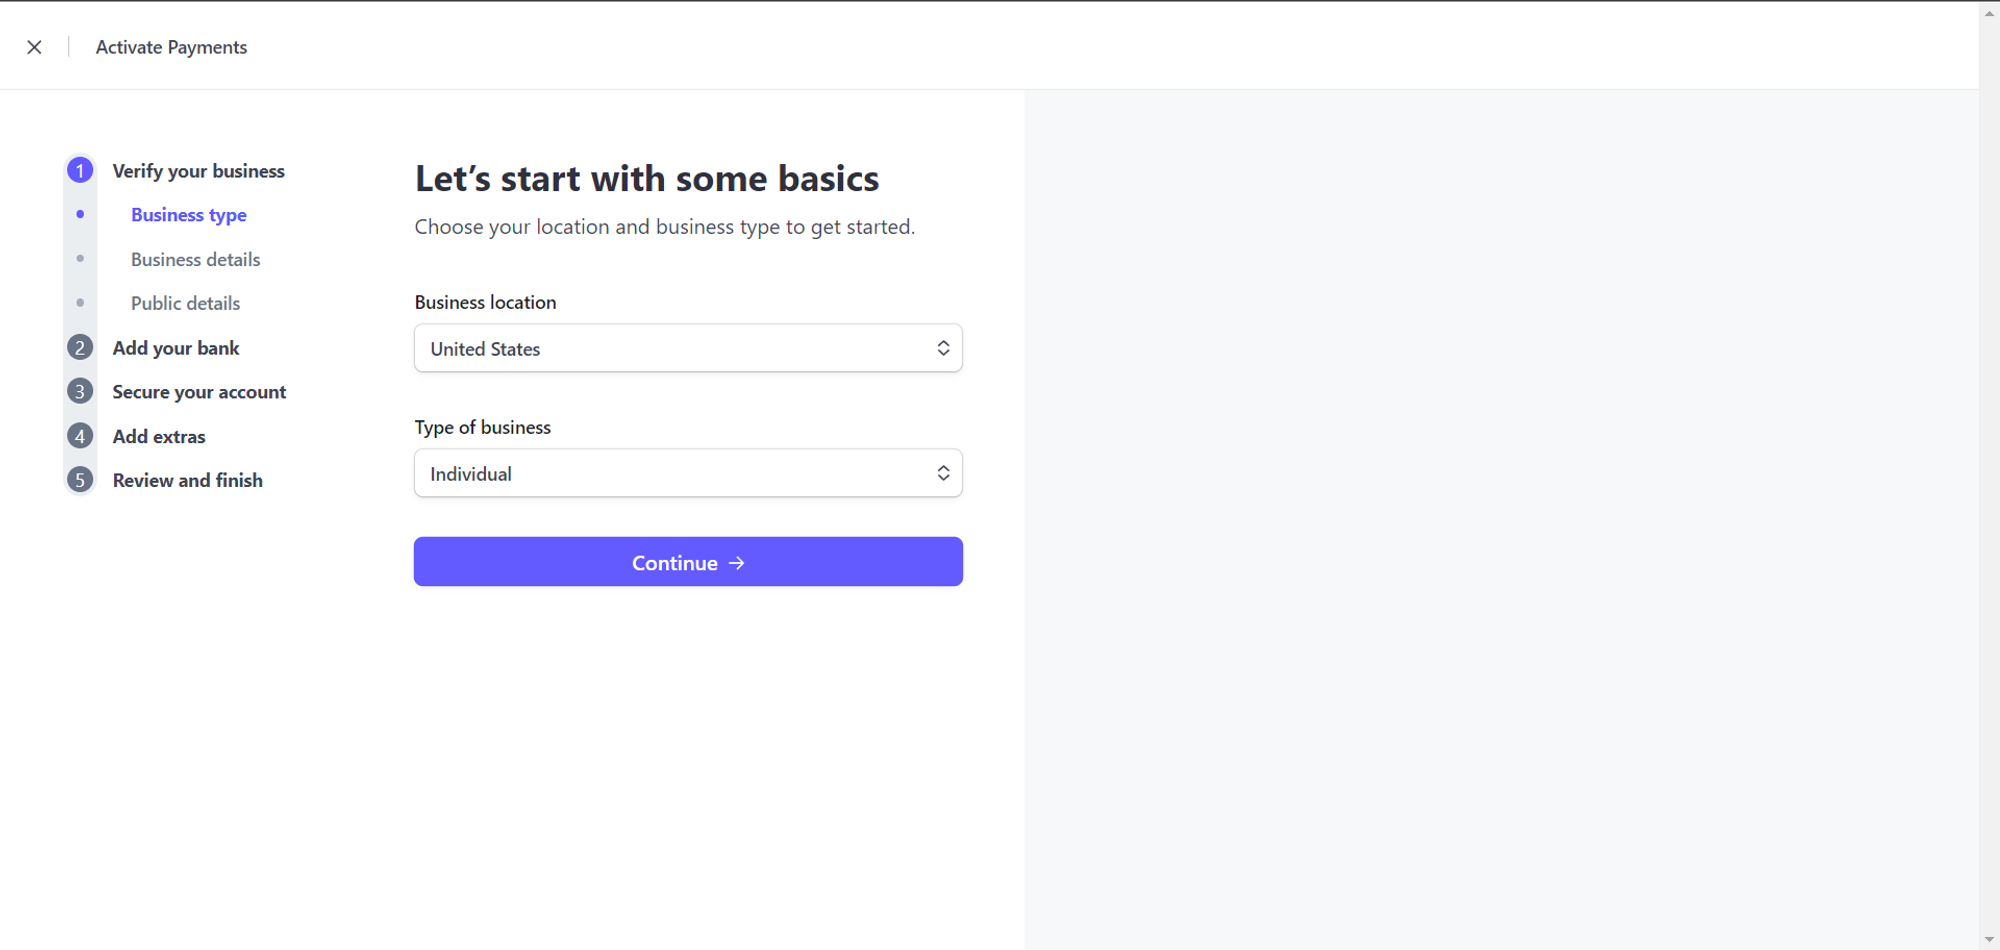
But, if you want to receive real payments made by your customers, you can go back to the link https://dashboard.stripe.com/dashboard and then click on the button “Activate Payments”
After you click on the “Activate Payments” button, you will be asked to fill out some legal information to confirm your identity, and to make sure that you can receive payments
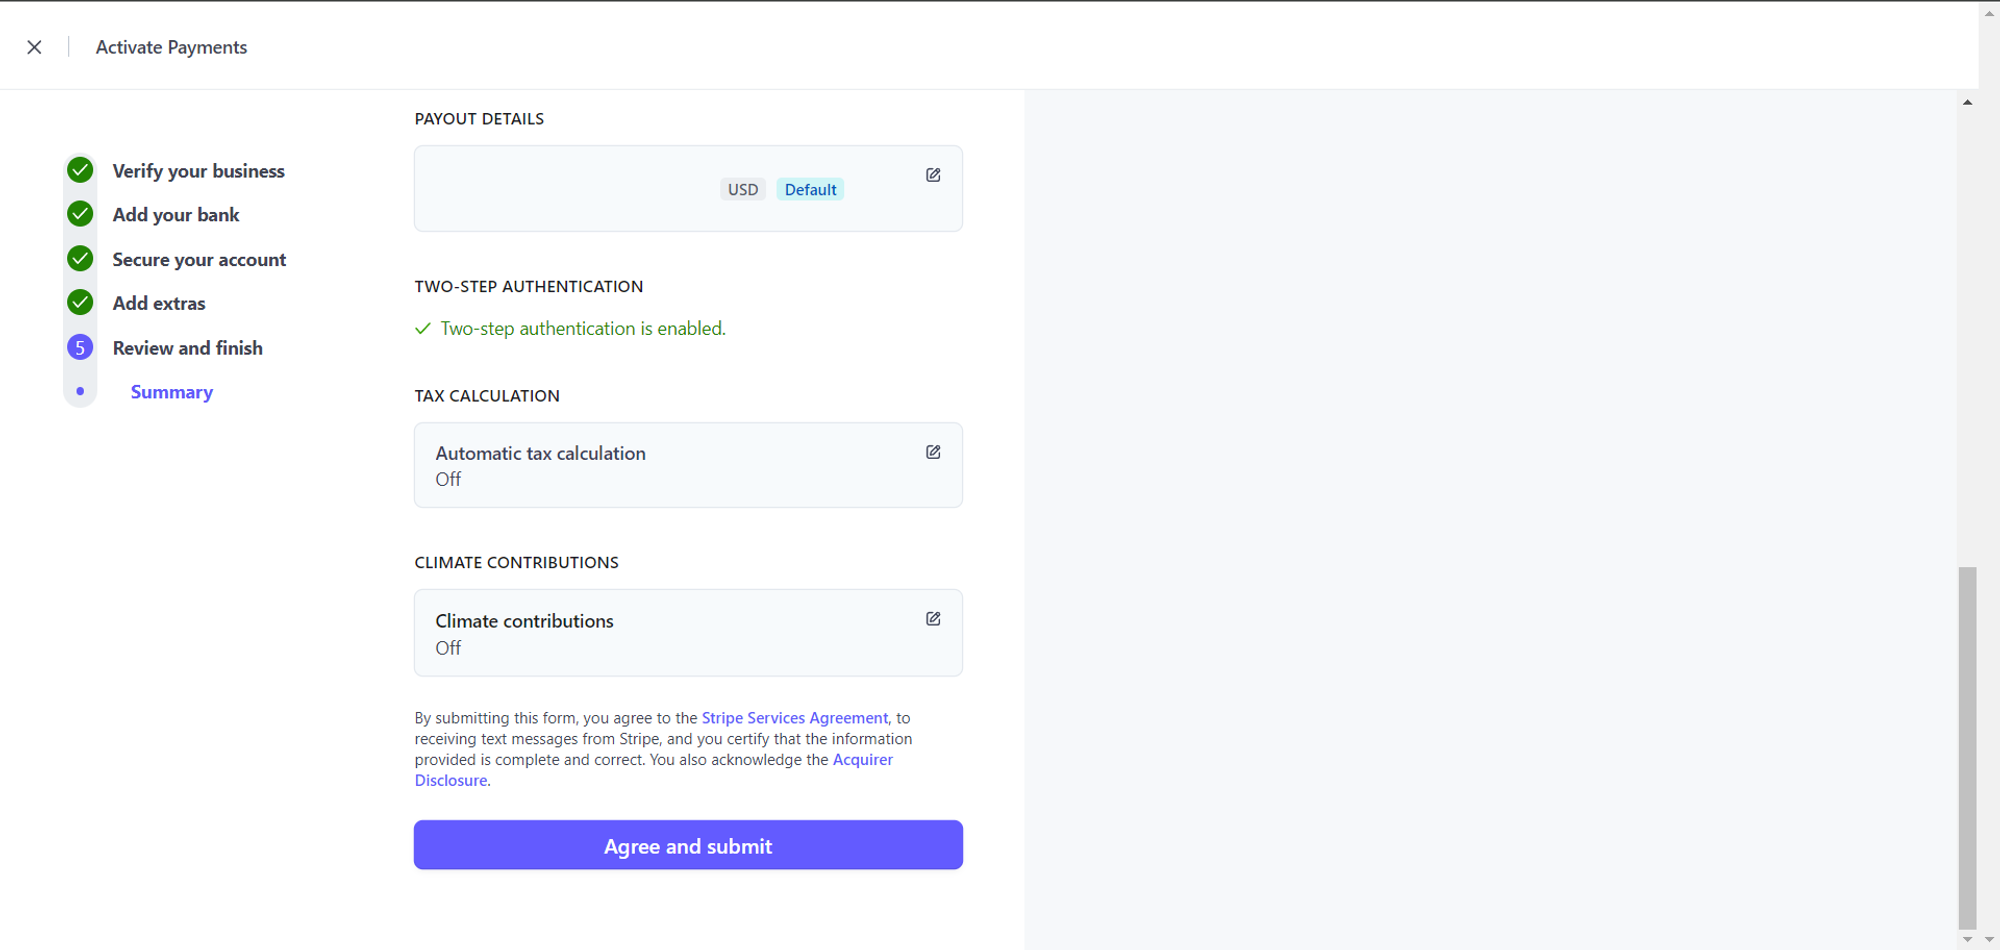
After you finish with all of the steps, you will have to click on the “Agree and submit” button on the Summary step.
After that, you will be able to go to the link https://dashboard.stripe.com/apikeys and use real keys for accepting real payments from your customers.
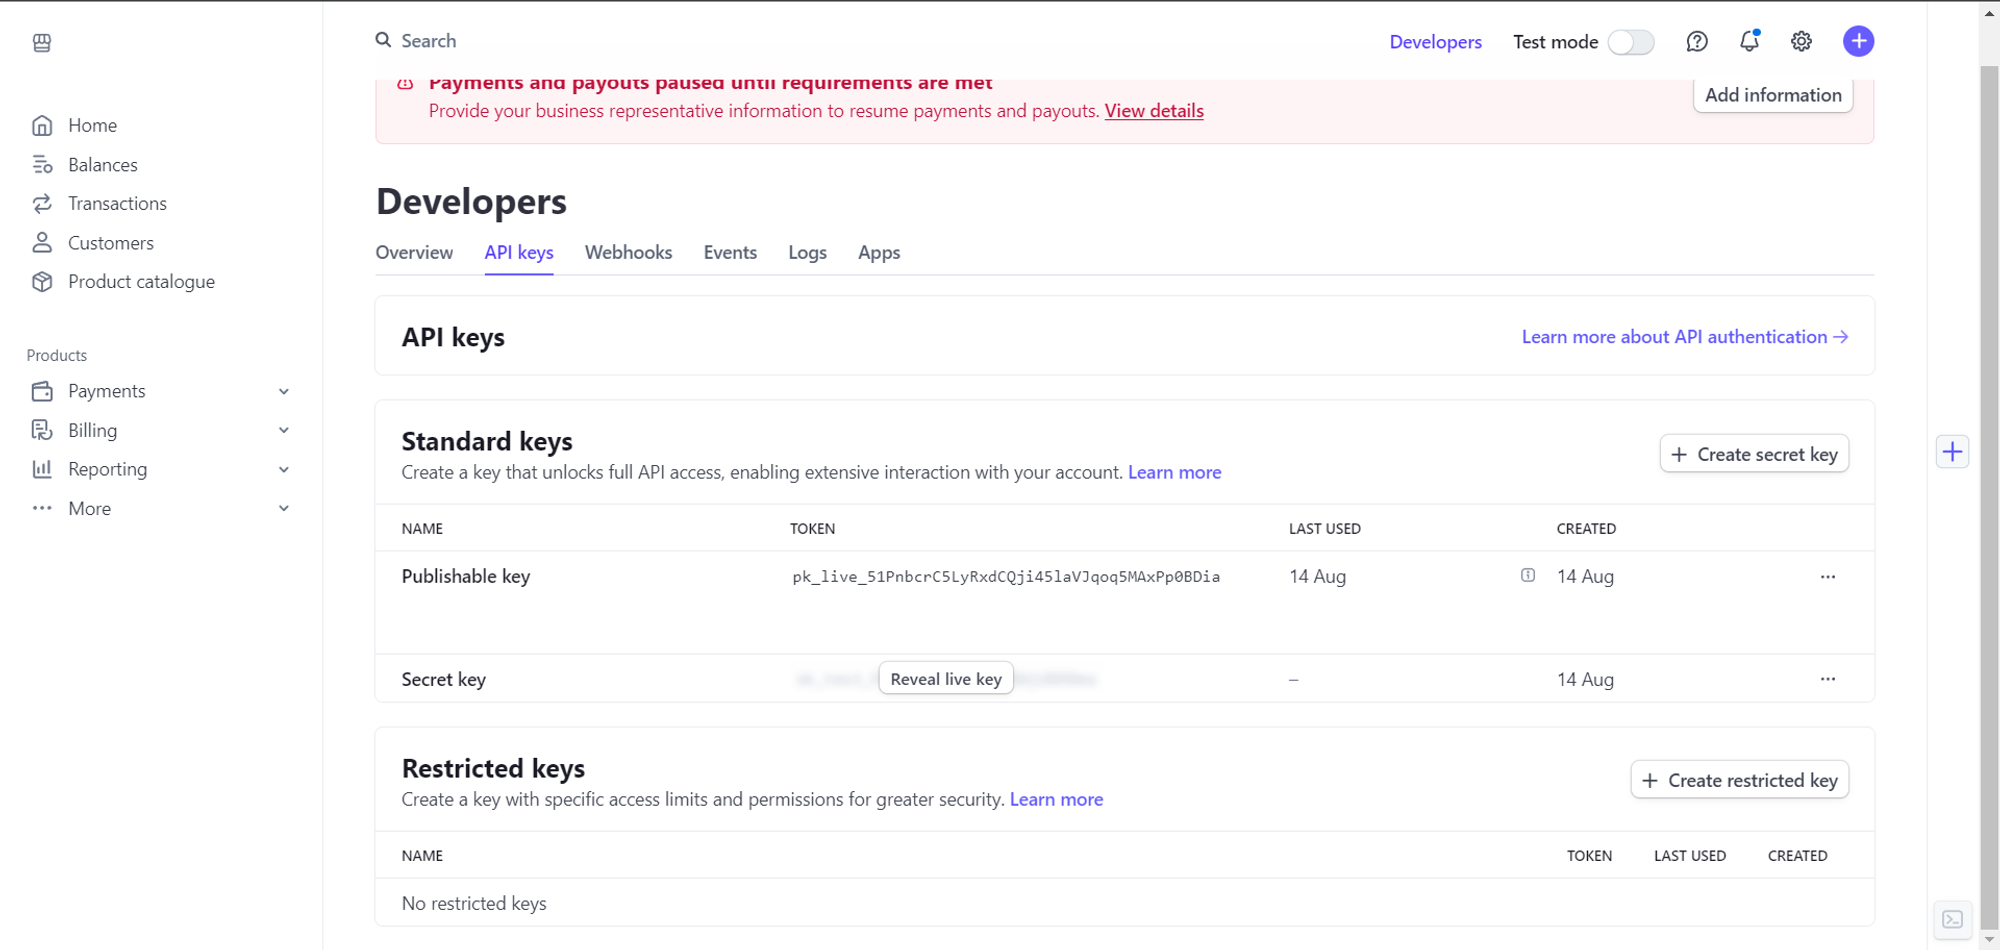
After this, all you have to do is to copy the “Publishable key” and then the “Secret key” to Booknetic, for Booknetic to be able to use Stripe, and for you to be able to use your Stripe account to receive the payments
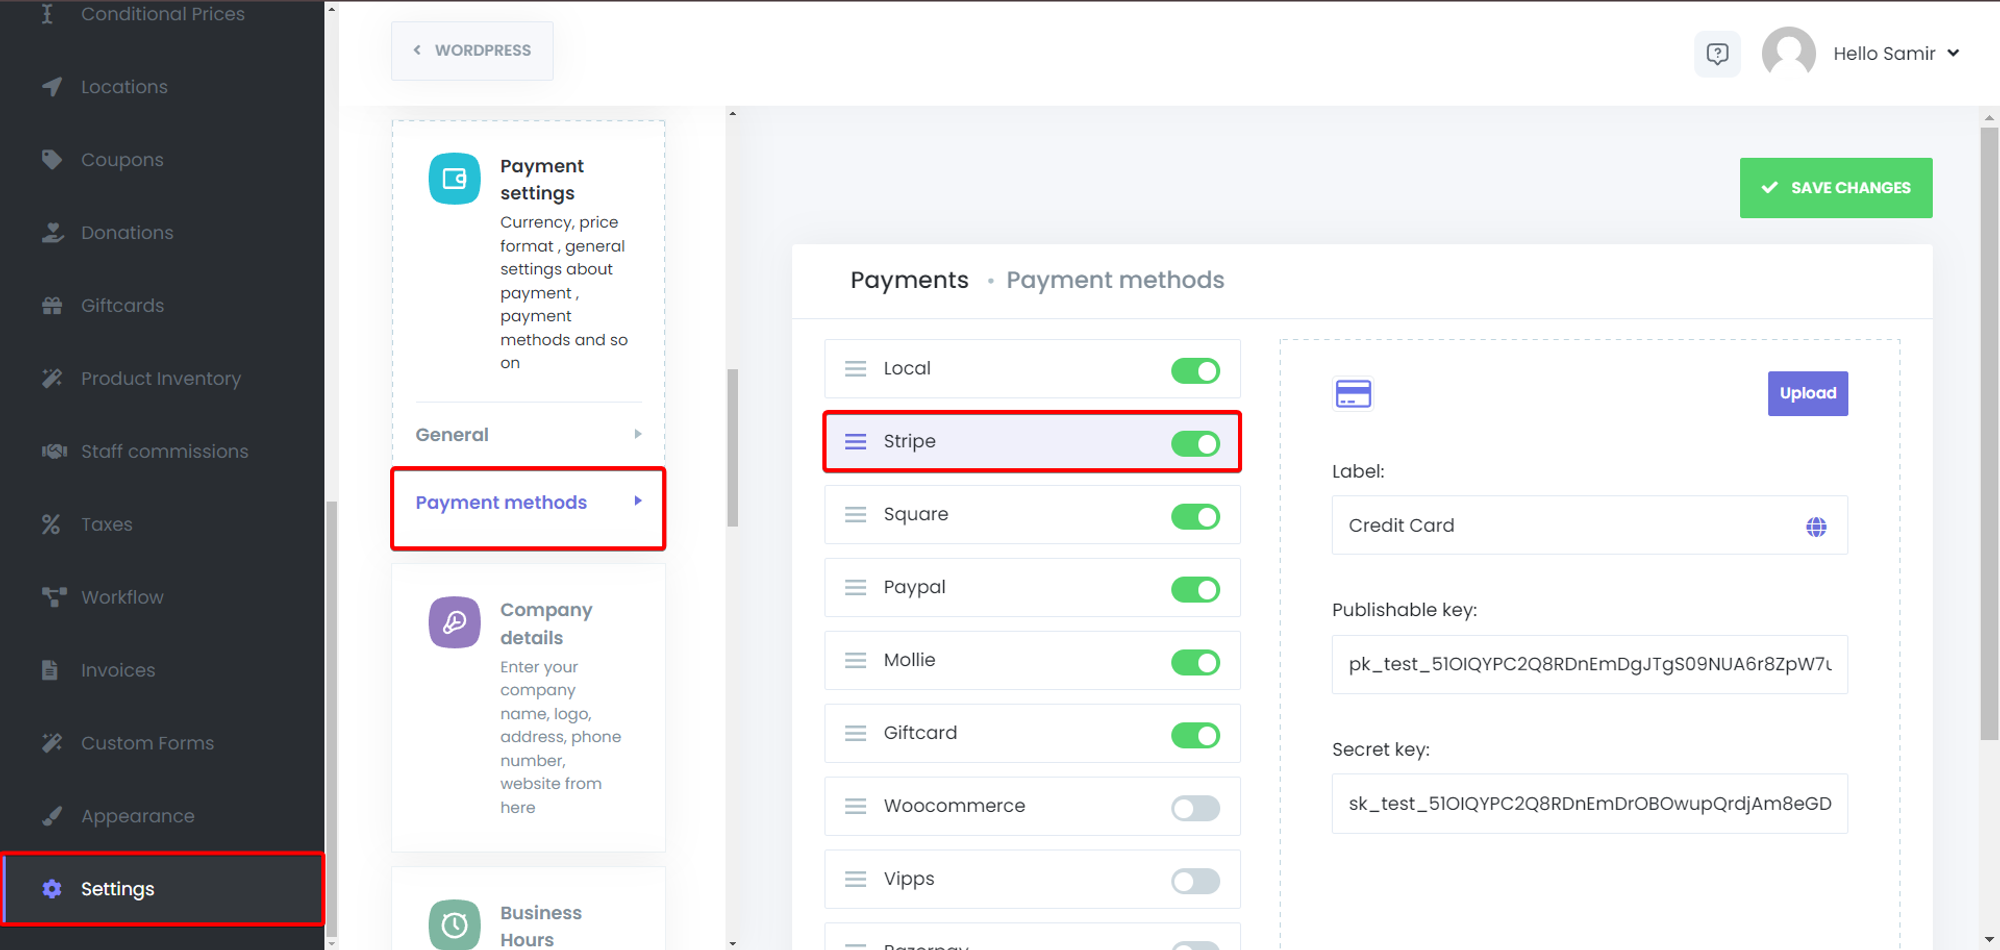
After you put in the keys, click on the “Save Changes” button on the top right side of the page, and that’s the last step that has to be done in order to use the Stripe add-on.