Setting Up Staging Environment
Booknetic WordPress Appointment Booking Solution Provides Staging Environment For Safety Checkings
We use cookies on our website to provide you with the best possible user experience. By using our website or services, you agree to their use.
Booknetic WordPress Appointment Booking Solution Provides Staging Environment For Safety Checkings
Setting up a staging environment for Booknetic allows you to safely test updates, customizations, and configurations without affecting your live website. This guide will walk you through the recommended steps for creating a staging environment and ensuring Booknetic functions correctly within it.
A staging environment is a clone of your live website used for testing changes before deploying them to production. It allows you to:
Most hosting providers offer one-click staging site creation. Check your hosting dashboard for options like "Create Staging Site." If you prefer to set up a new WordPress site from scratch on a staging subdomain, follow these steps:
This method allows you to develop on a completely clean WordPress installation, ensuring that your tests and developments do not interfere with your live site.
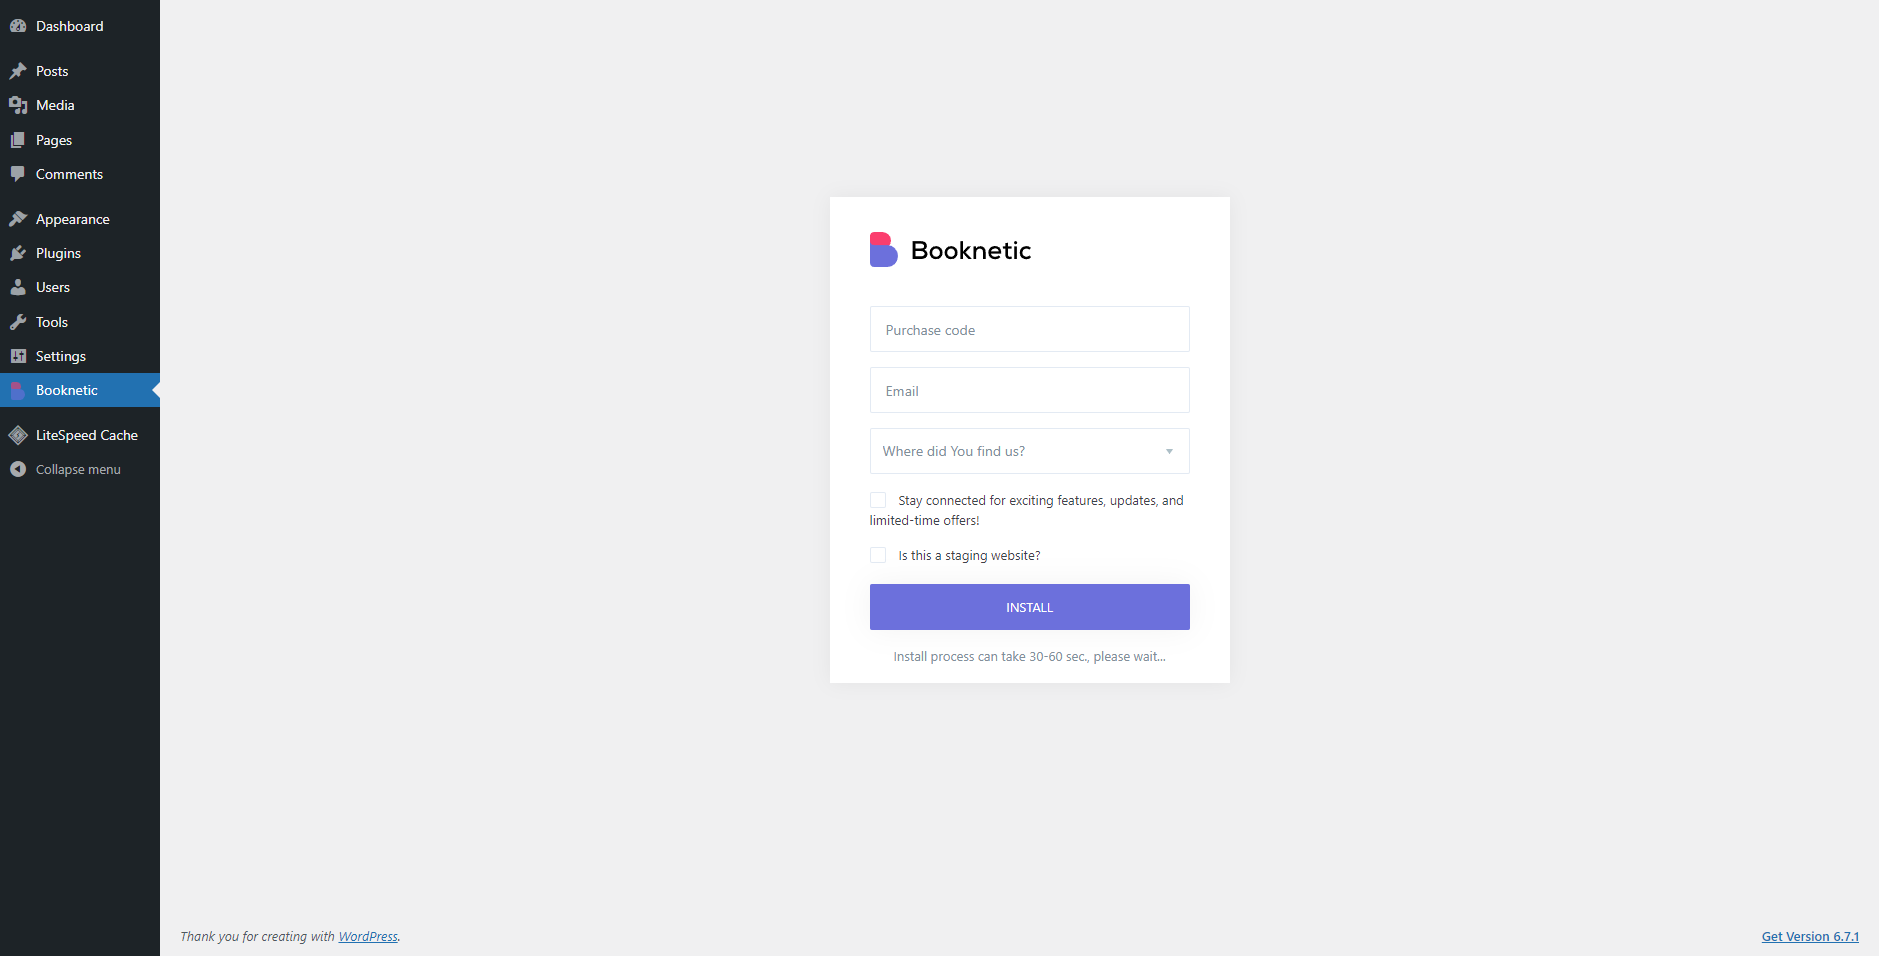
For setting up the Booknetic on your new WordPress site, you can refer to the Booknetic Installation Guide. Aside from that, when you set up Booknetic for the staging site, make sure that you enable the “is this a staging website?” option:
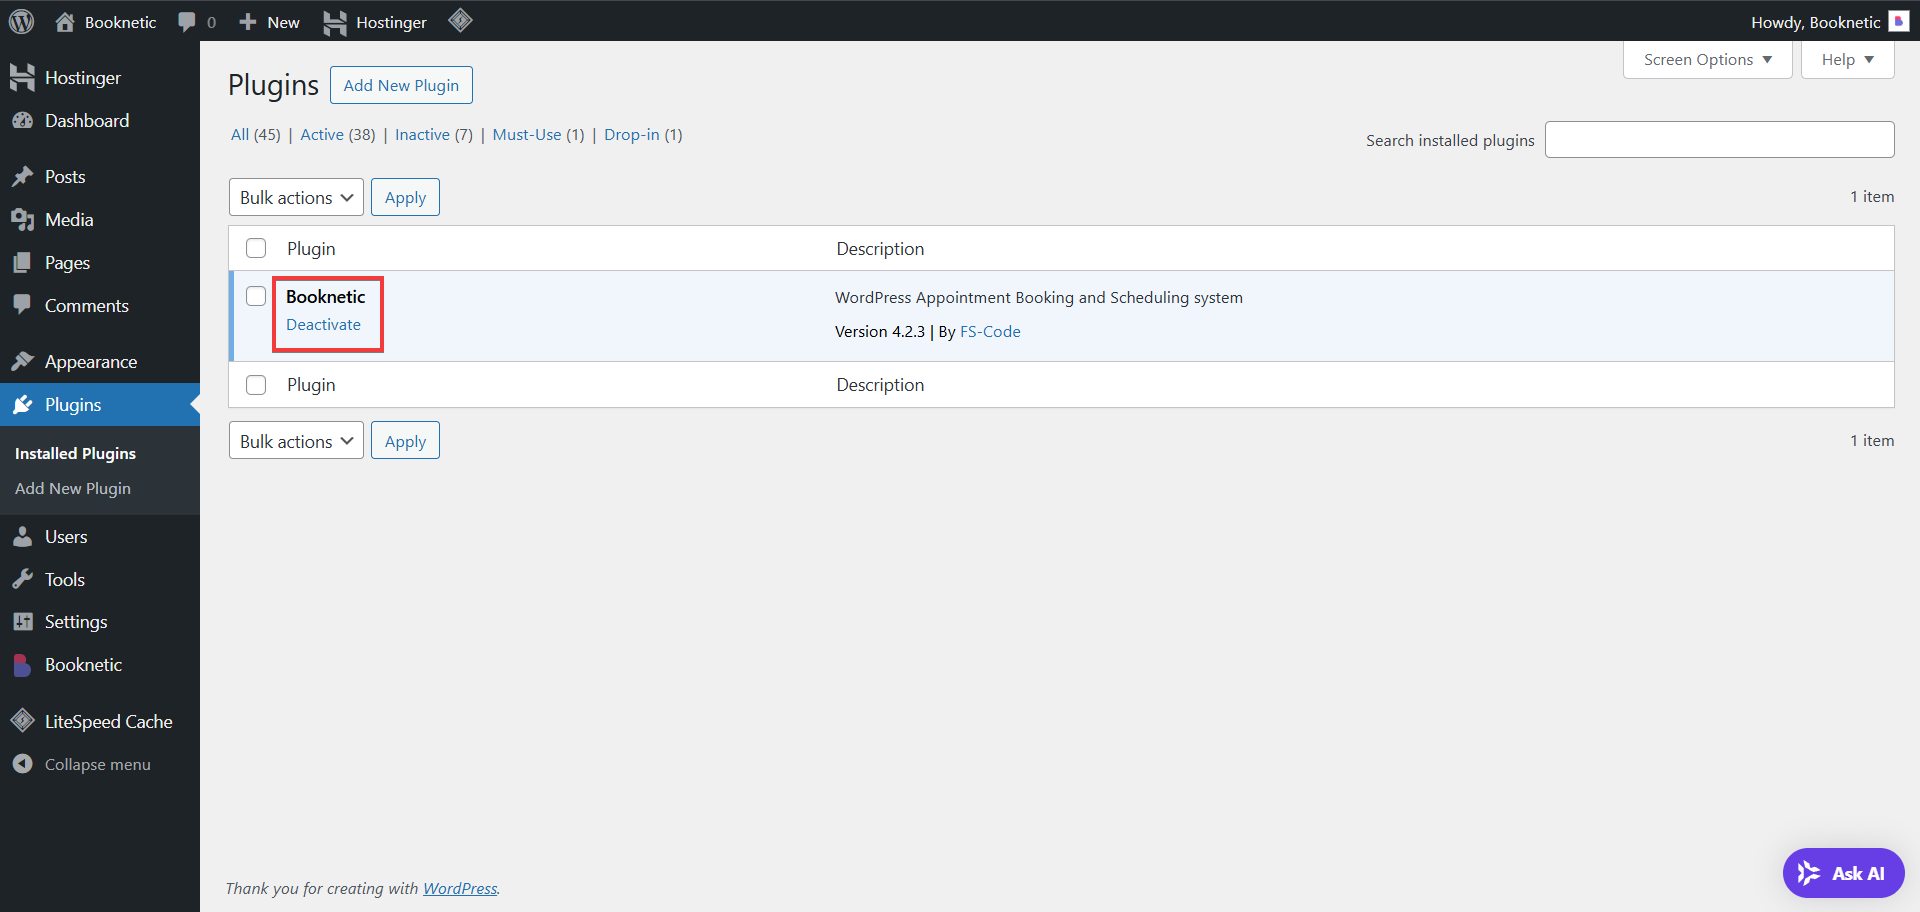
Once your staging site is set up, to double check that everything is alright, ensure Booknetic is properly installed and activated:
Since WordPress stores URLs in the database, you’ll need to update them to match your staging domain. This is especially important for Booknetic’s booking forms and assets.
You can update URLs using:
Example:
Replace https://yoursite.com with https://staging.yoursite.com
To avoid sending real booking confirmation emails to customers from your staging site, it’s recommended to disable notifications in Booknetic:
This step helps prevent confusion for your real customers.
Once your staging site is fully set up, go through the following checklist: