Booknetic Outlook Calendar add-on enables seamless integration of Microsoft Outlook calendars with the Booknetic system. This add-on allows staff members to sync their appointments and schedules directly with their Outlook calendars, ensuring consistency and up-to-date information across platforms.
Installation and Setup
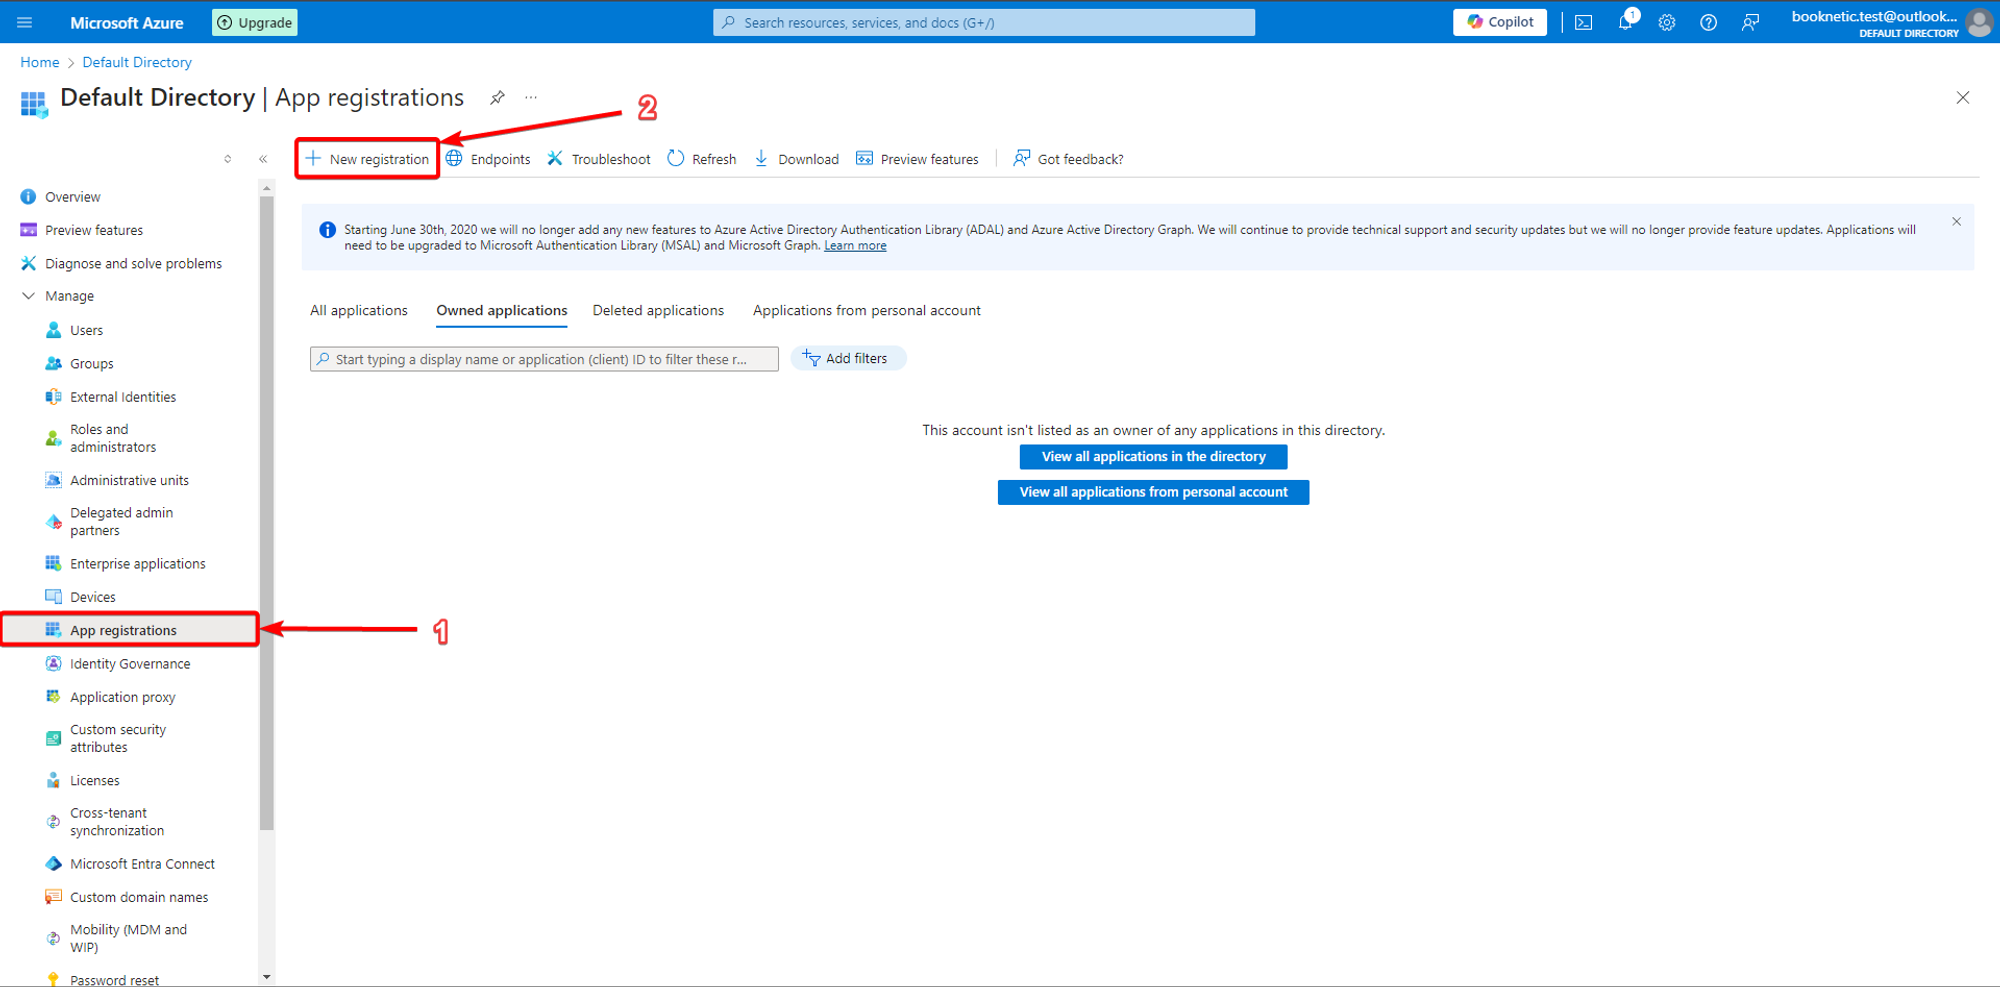
Step 1: Access Microsoft Entra ID
- Navigate to the Microsoft Azure Portal.
- In the Azure services section, click on "Microsoft Entra ID".

Step 2: Register a New Application
- In the left sidebar, select "App registrations".
- Click on "New registration" at the top.
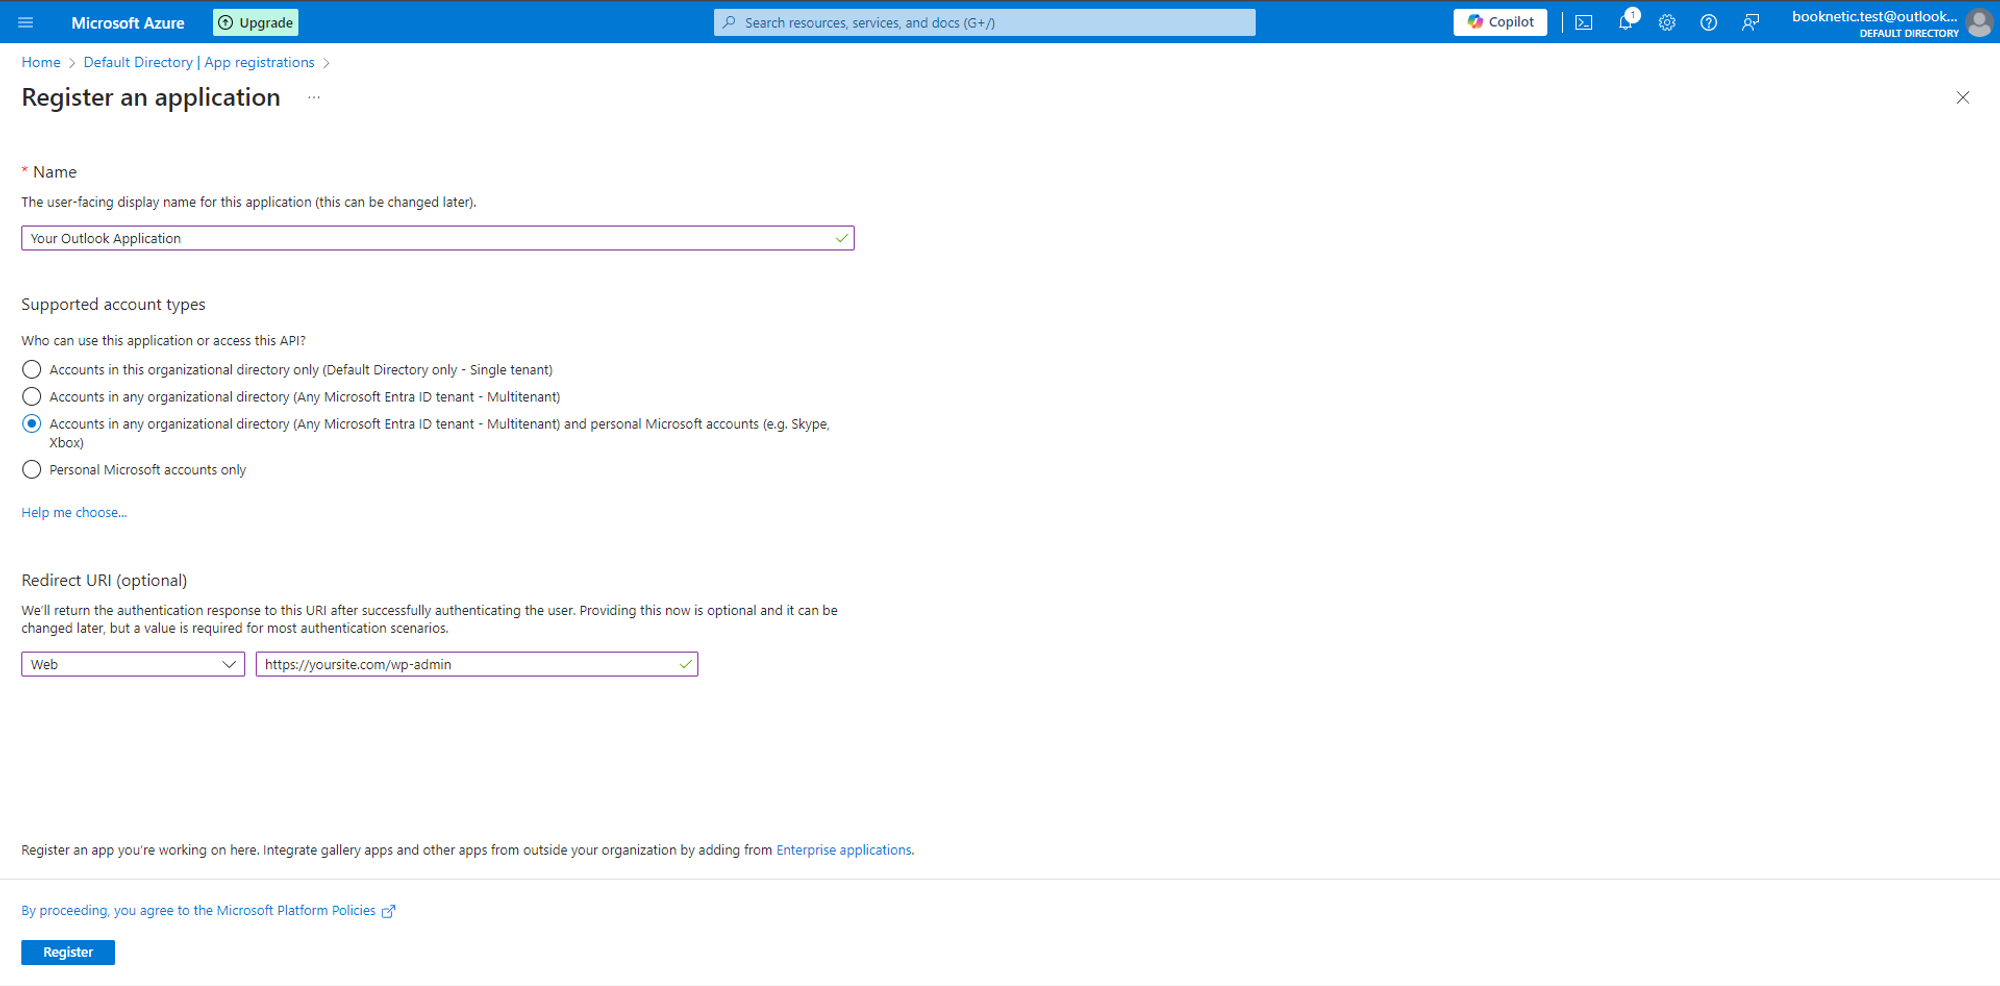
Step 3: Fill in Application Details
- Provide a name for your application (e.g., "Your Outlook Application").
- Select the appropriate account type based on your needs. For most cases, "Accounts in any organizational directory and personal Microsoft accounts" is recommended.
- Enter the Redirect URI (e.g., https://yoursite.com/wp-admin).
- Click "Register".
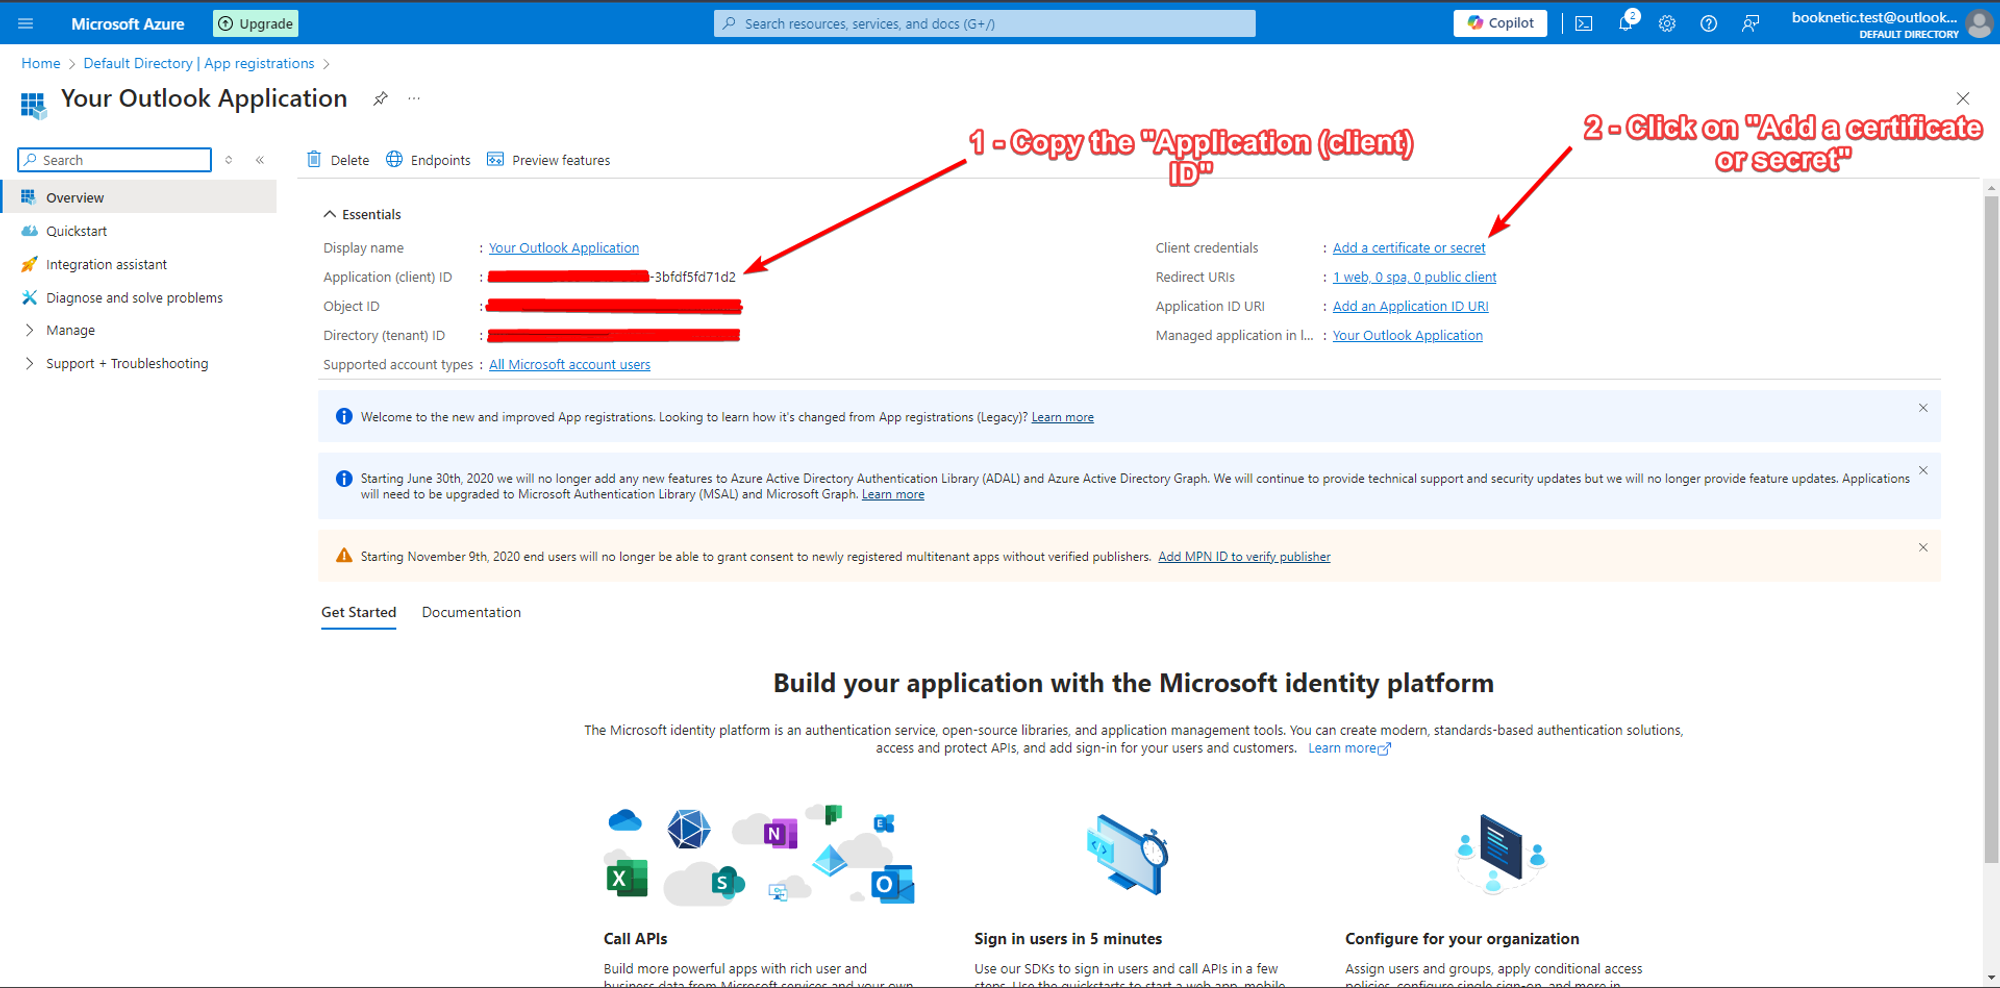
Step 4: Configure Application Credentials
- After registration, copy the "Application (client) ID".
- Click on "Add a certificate or secret" under the "Client credentials" section.
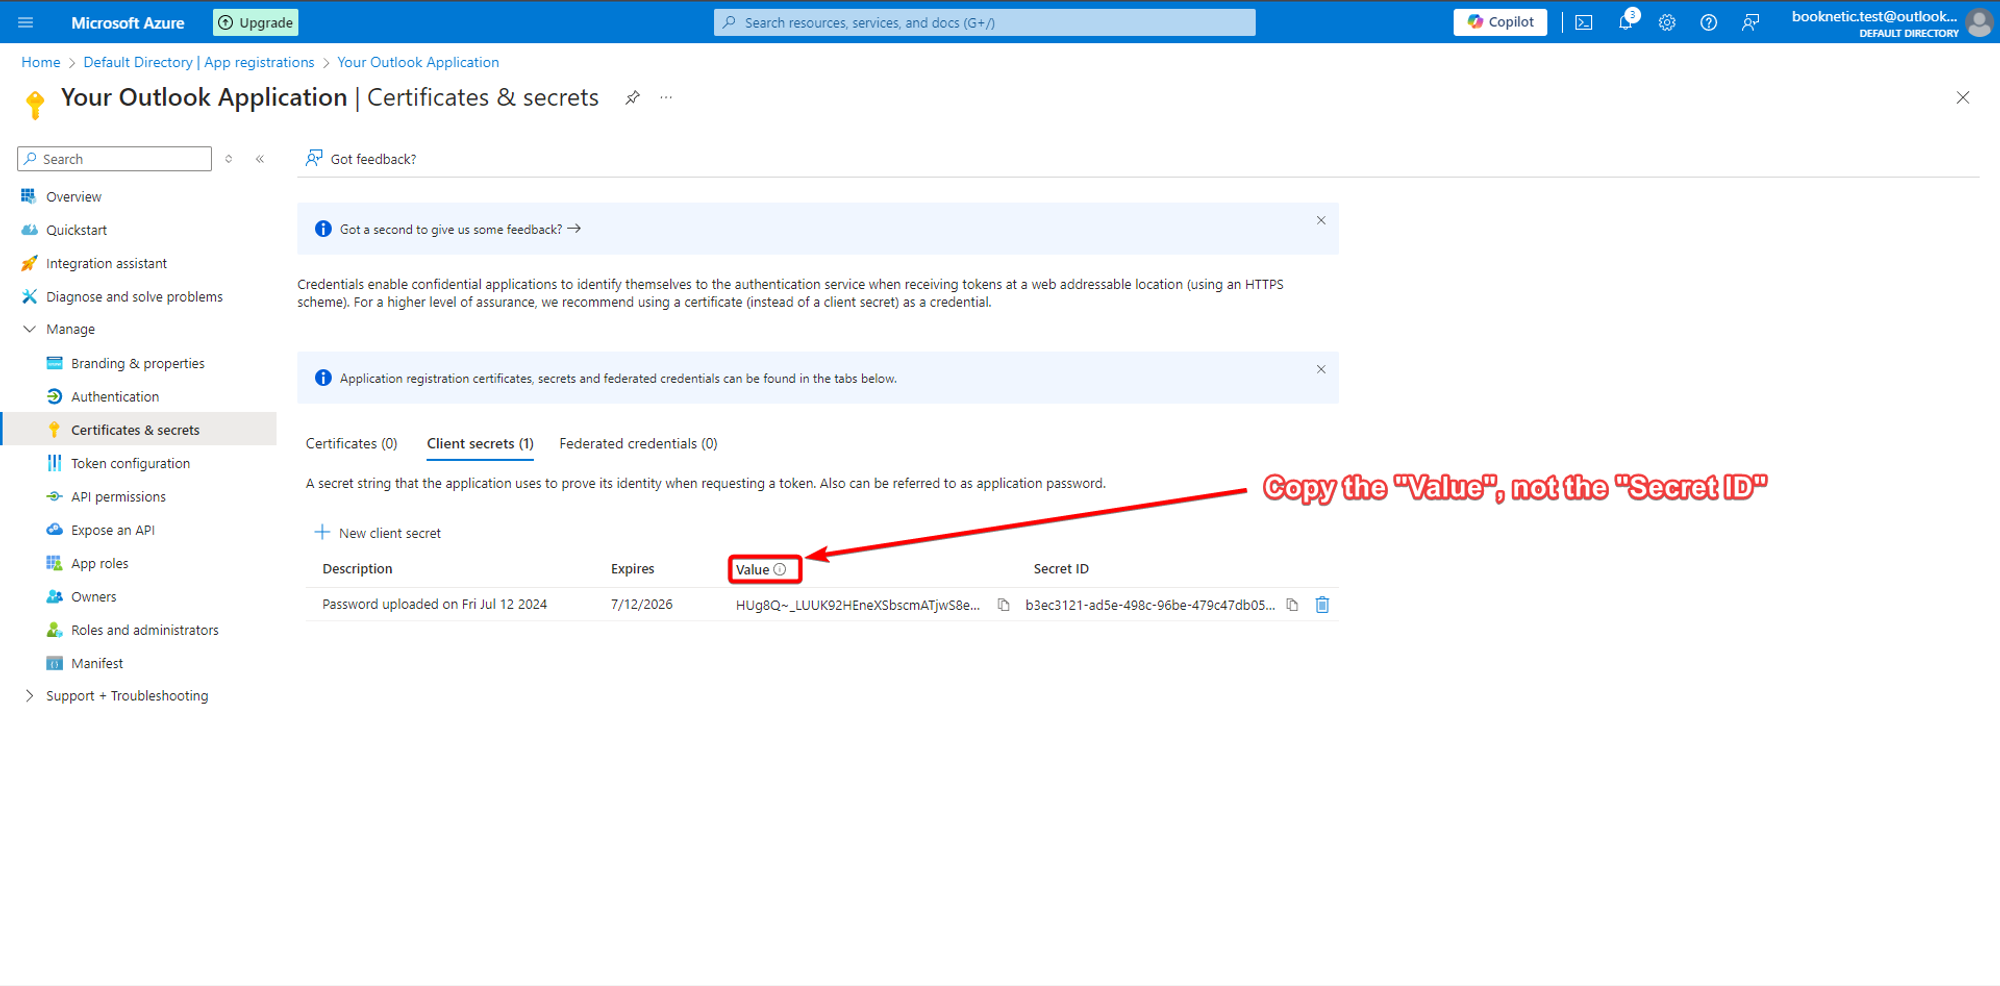
Step 5: Add a Client Secret
- Click on "New client secret".
- Enter a description for the client secret.
- Select the expiration period (e.g., 6 months).
- Click "Add".
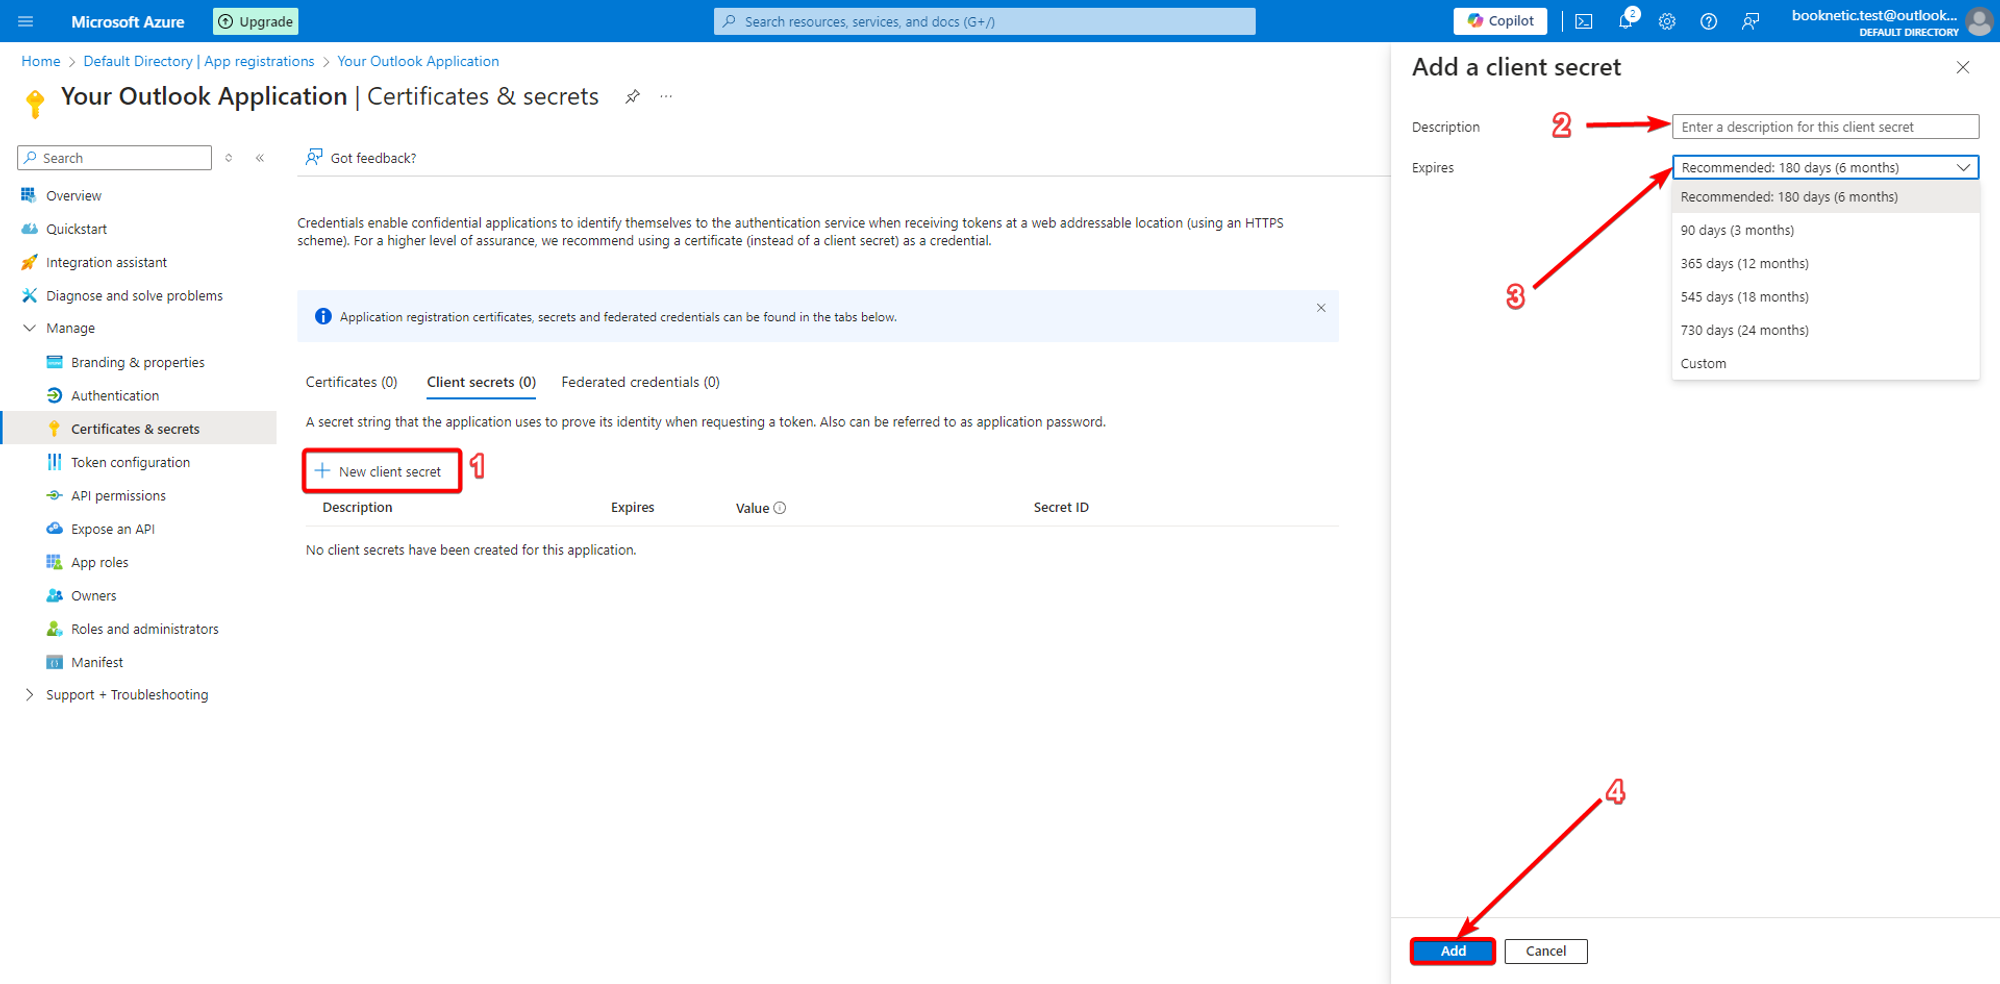
- Copy the "Value" of the client secret. This value will be used for integration and should be stored securely.
Integrating with Booknetic
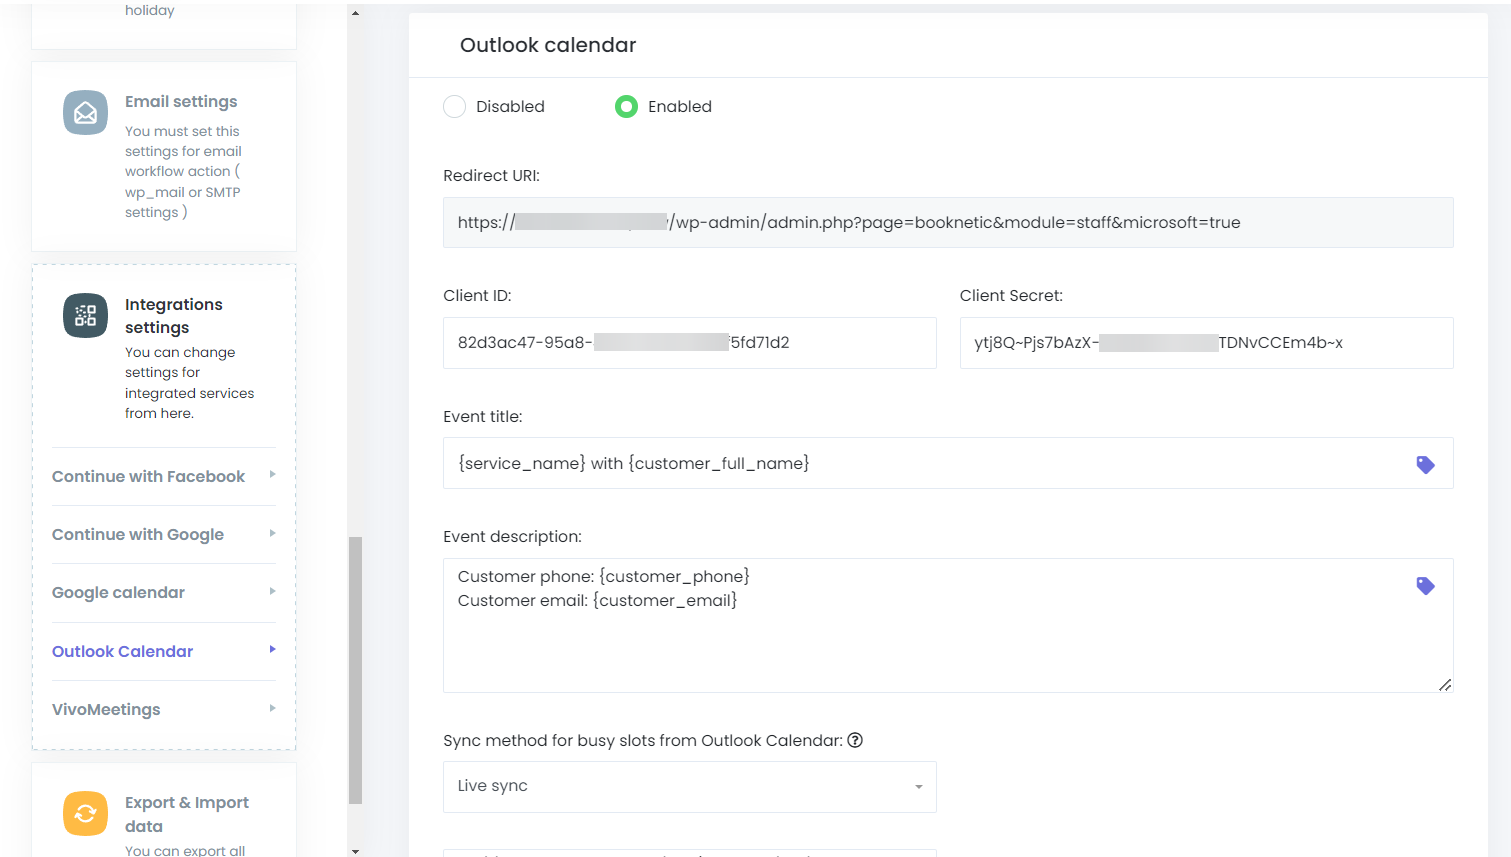
Step 1: Navigate to Booknetic settings and put the obtained API credentials on Outlook Calendar settings.
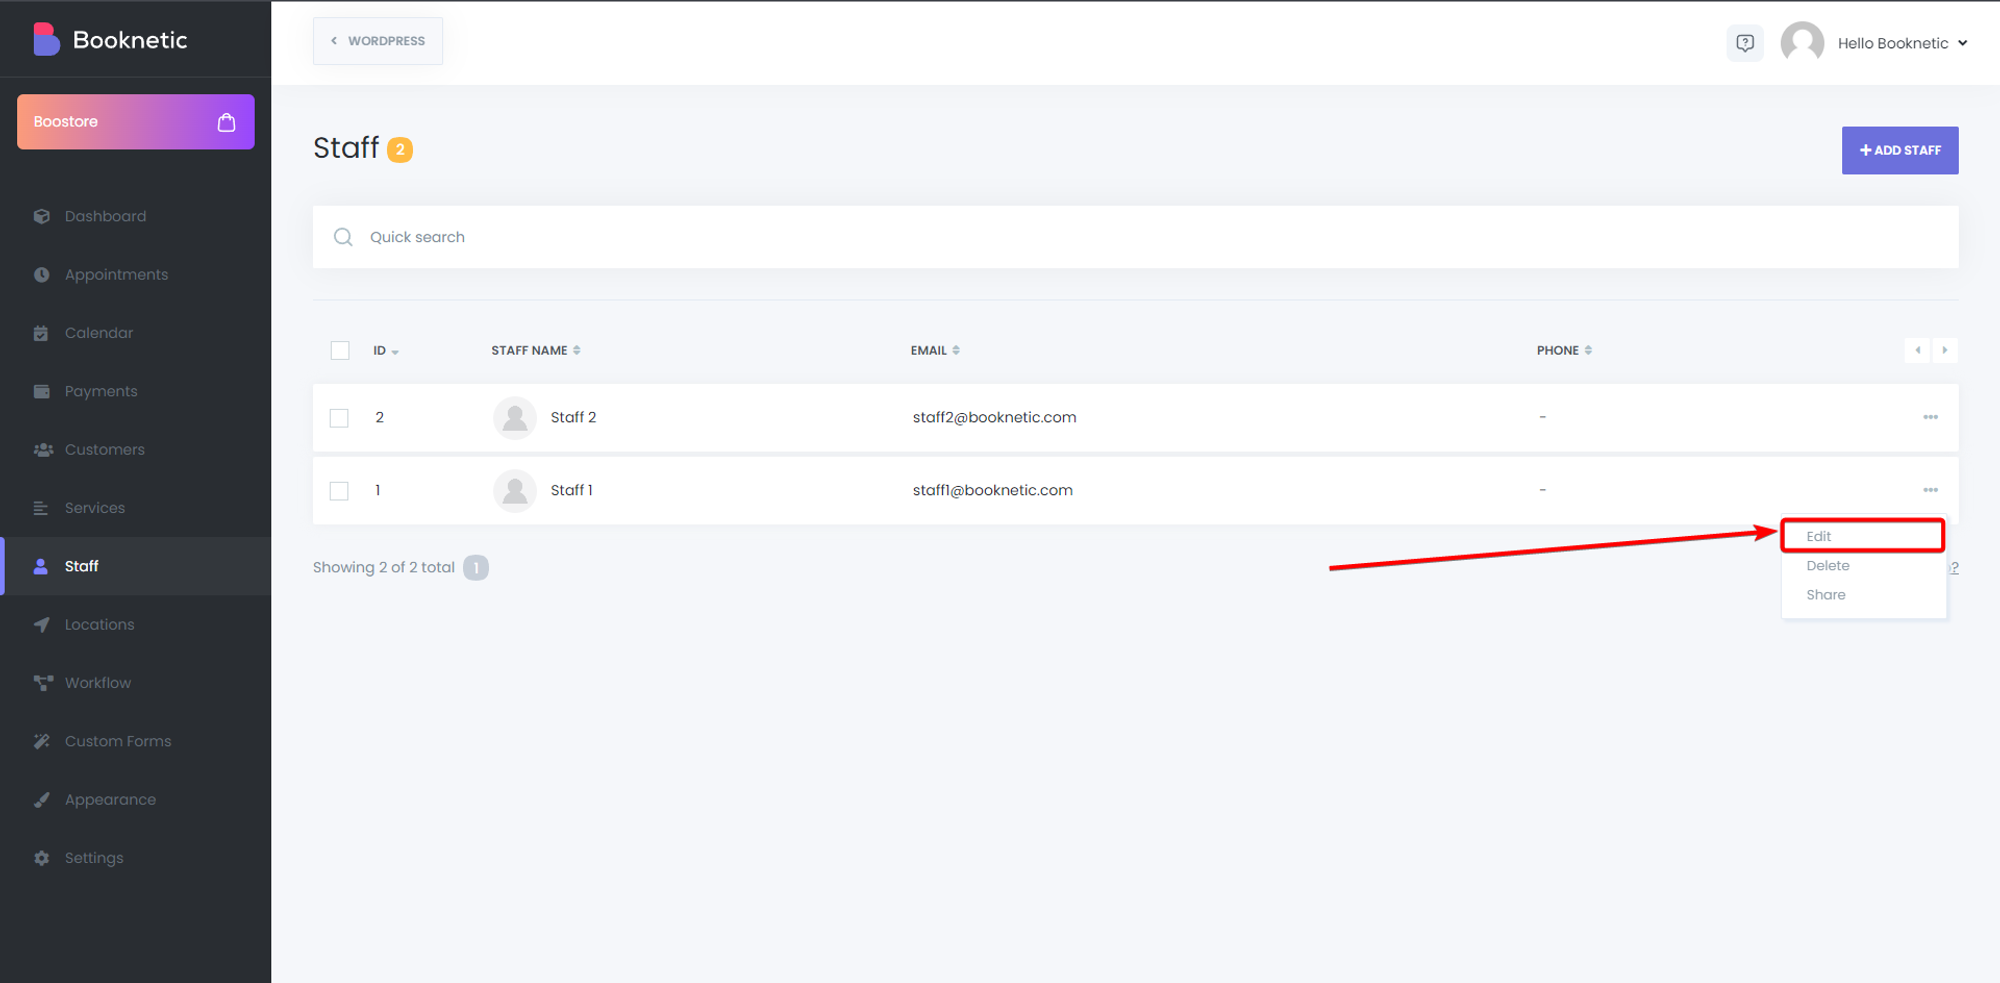
Step 1: Access Staff Settings
- In the Booknetic dashboard, navigate to the "Staff" section.
- Select the staff member you want to link with Outlook and click "Edit".
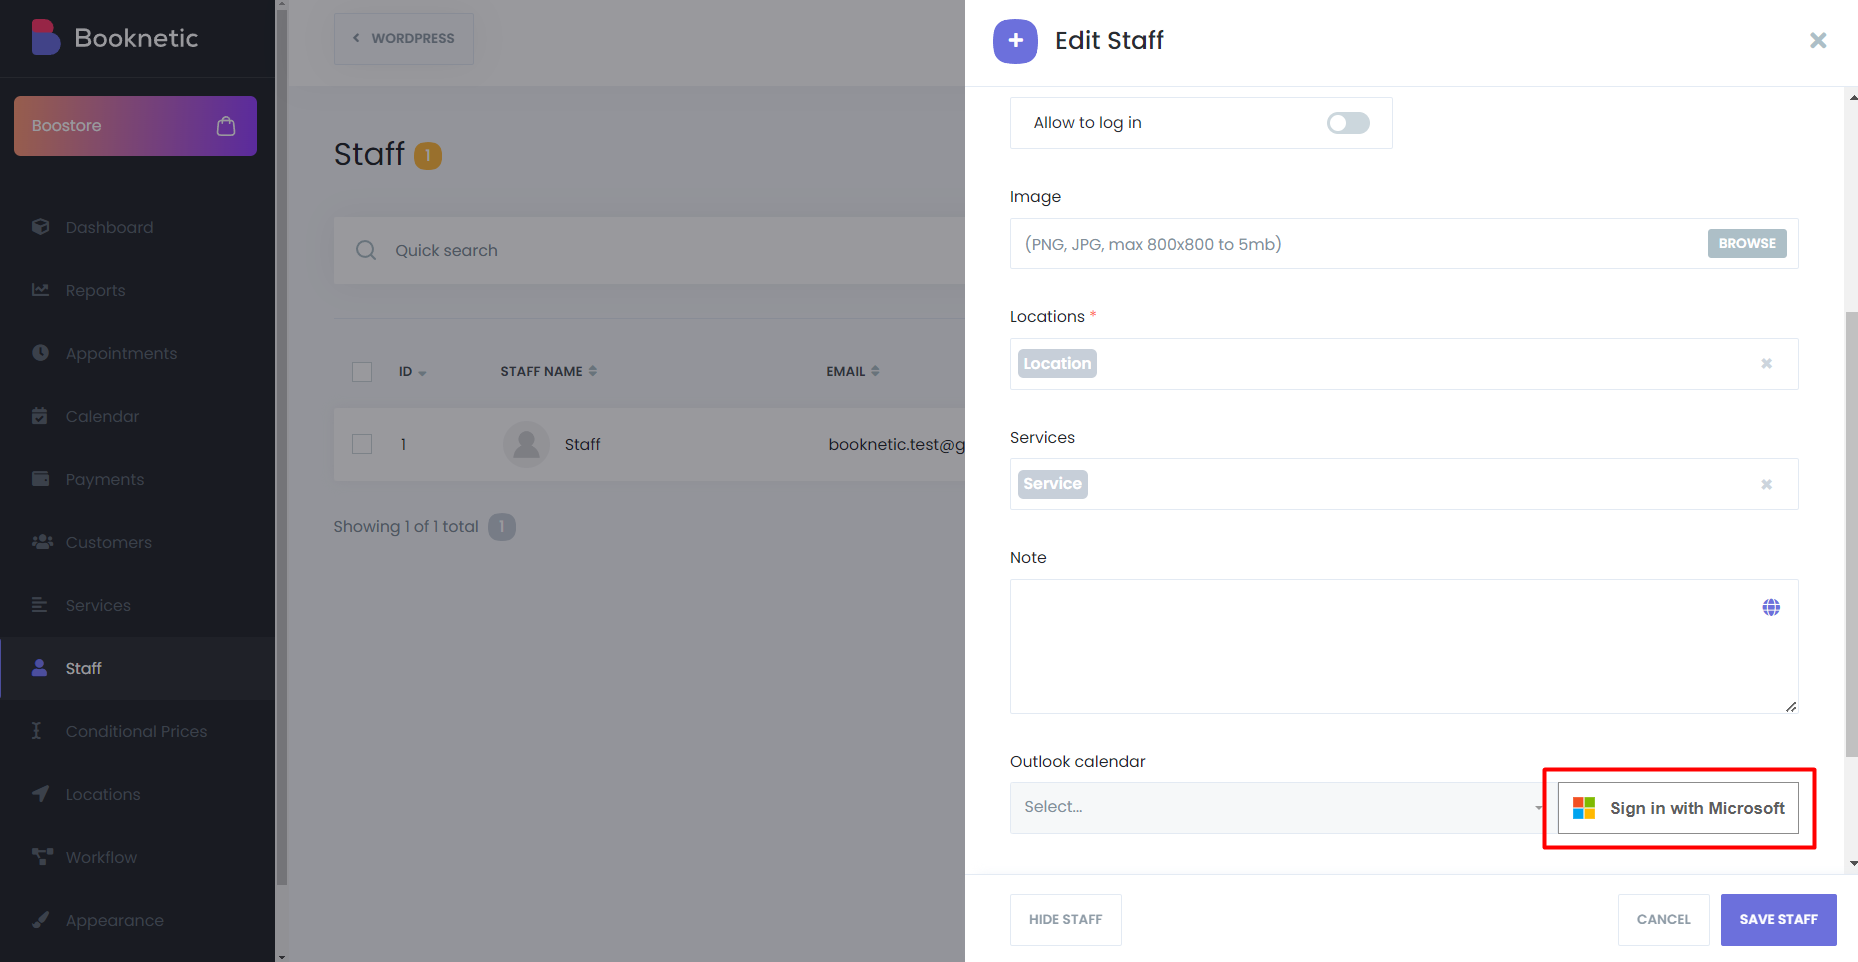
Step 2: Connect to Outlook Calendar
- In the staff edit window, find the "Outlook calendar" section.
- Click on the "Sign in with Microsoft" button.
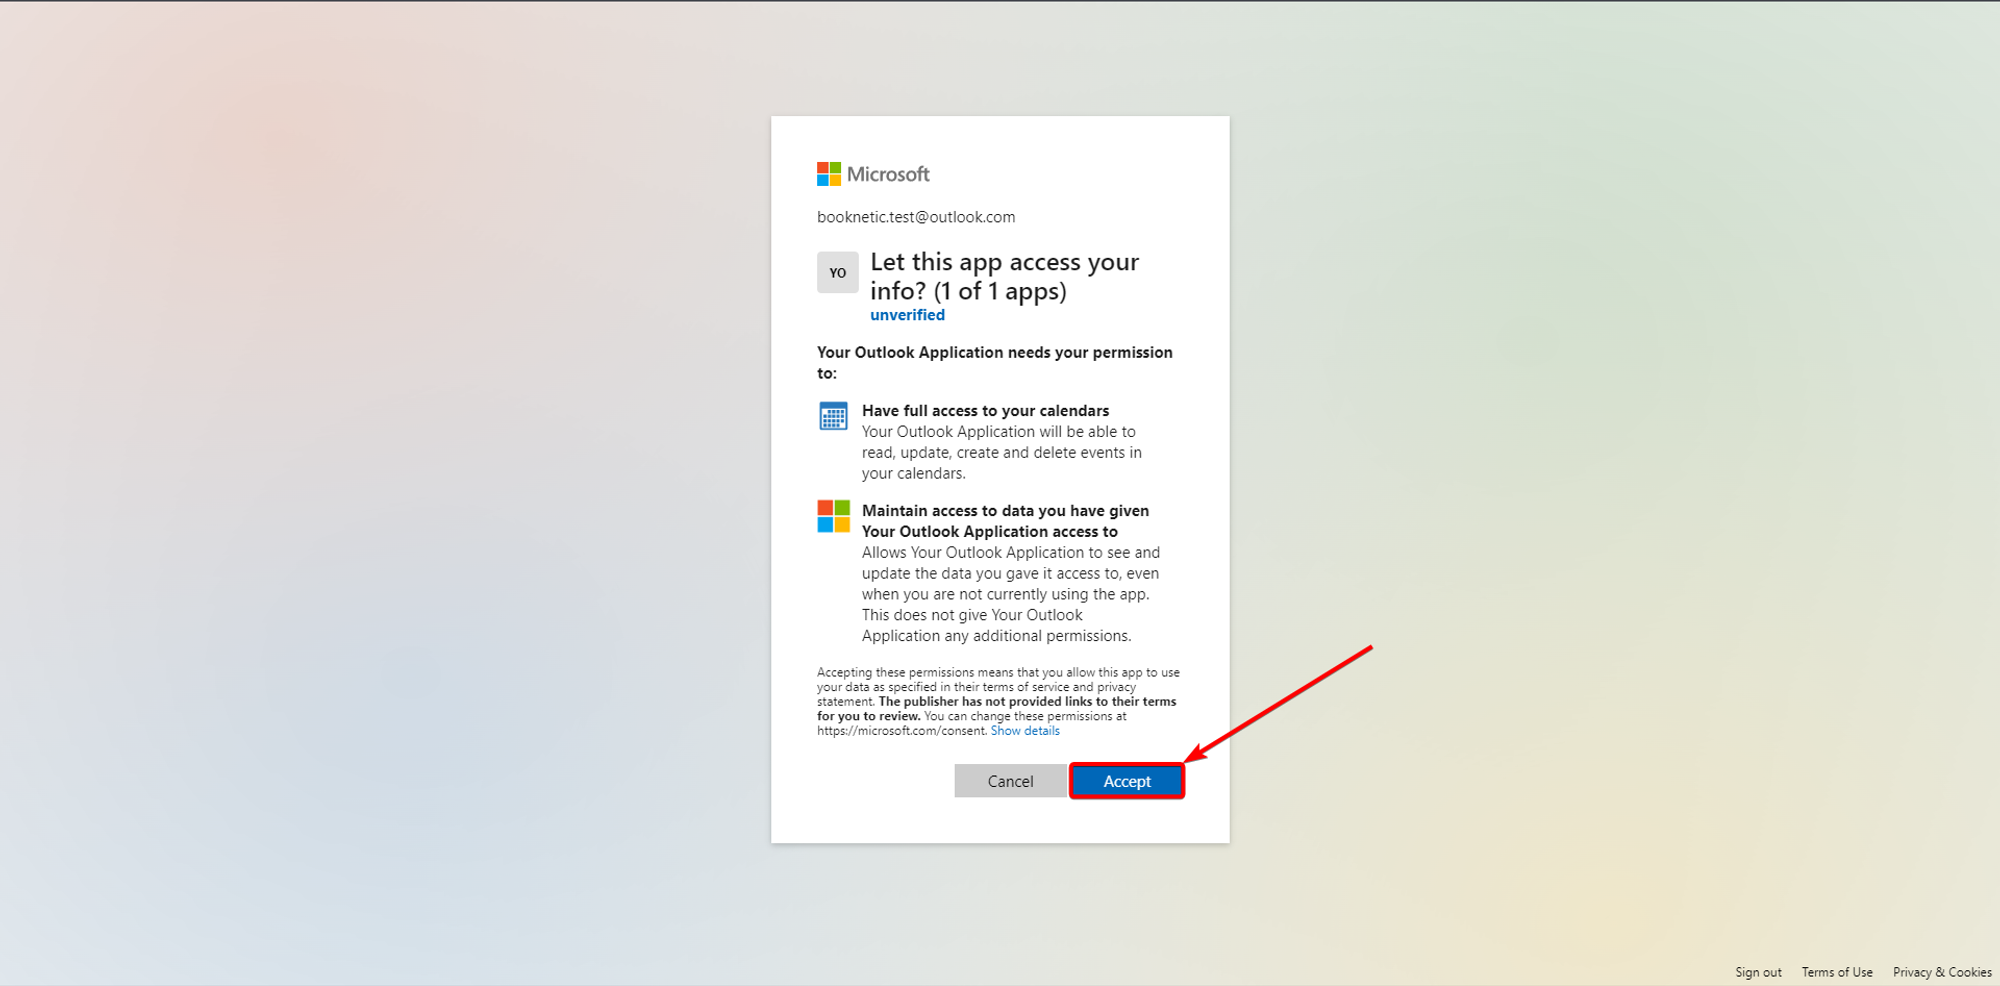
Step 3: Grant Permissions
- Log in with your Microsoft account.
- Grant the necessary permissions for the application to access calendar data by clicking "Accept".
Step 4: Select Calendar
- After granting permissions, select the calendar you want to sync from the dropdown menu.
- Save the changes.
