Integrating Zoom to Booknetic SaaS
Integrating Zoom to Booknetic SaaS. Multi-purpose Appointment Booking Plugin For WordPress.
Integrating Zoom to Booknetic SaaS. Multi-purpose Appointment Booking Plugin For WordPress.
To use the Zoom integration in the SaaS version, you have two options to continue.
The OAuth method - If you continue with this method, you need to build an OAuth Application on the Zoom App Marketplace and submit it for review. Once you submit your app, Zoom will conduct a functional and security review of your app. Your app will be published to the Zoom App Marketplace on a successful review, and your Tenants can connect their Zoom accounts to the plugin. We would like to inform you that Zoom is extremely tough about its Zoom App and it is almost impossible to approve the App.
The JWT method - If you continue with this method, each Tenant needs to create their personal JWT app and connect the Zoom account via the JWT app. It is easy to implement and does not need any approval from Zoom. Here is how to connect the Zoom account via the JWT app.
Please note that Zoom testers strictly test every application created in Zoom App Marketplaces.
You need to have the below pages and requirements on your website to start creating a Zoom App:
- Privacy policy,
- Terms and Conditions,
- Documentation,
- A support system,
- A development and production websites and websites have to be separated.
Follow the steps below to create an App on the Zoom Marketplace.
- Go to the Zoom App Marketplace and login with your account;
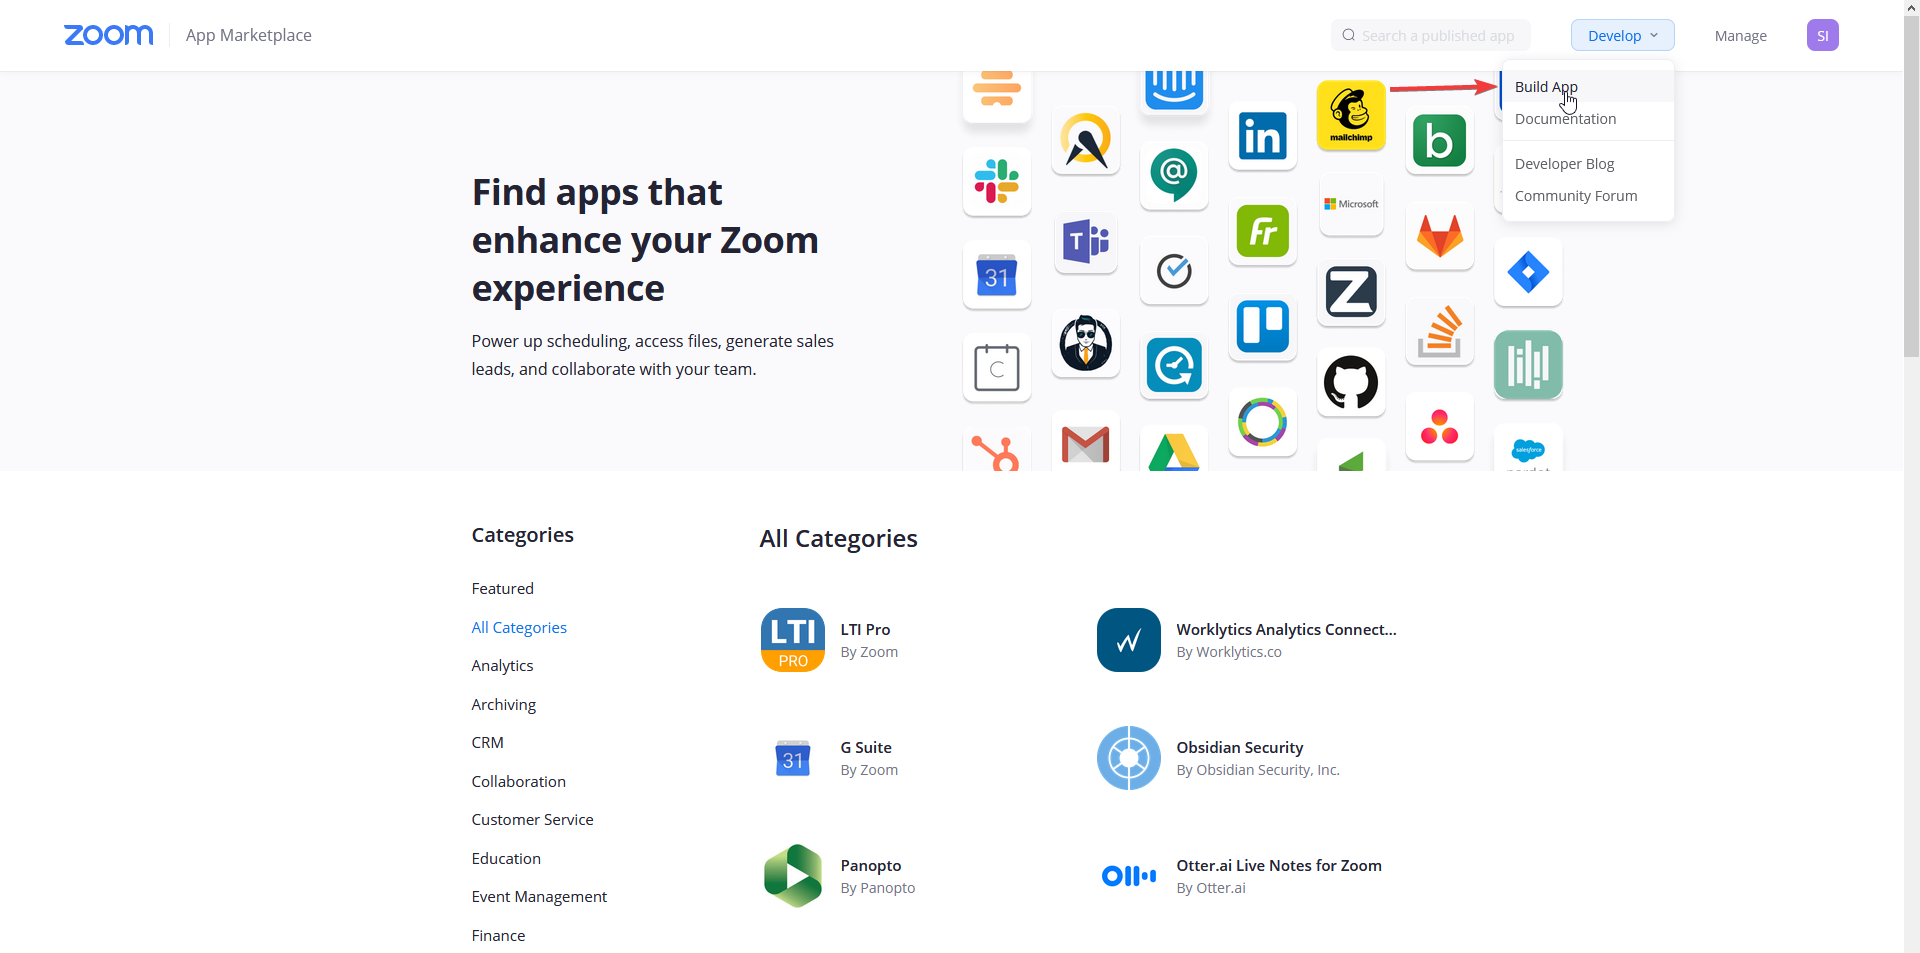
- Click the Develop button in the upper right corner and select Build App from the drop-down menu;
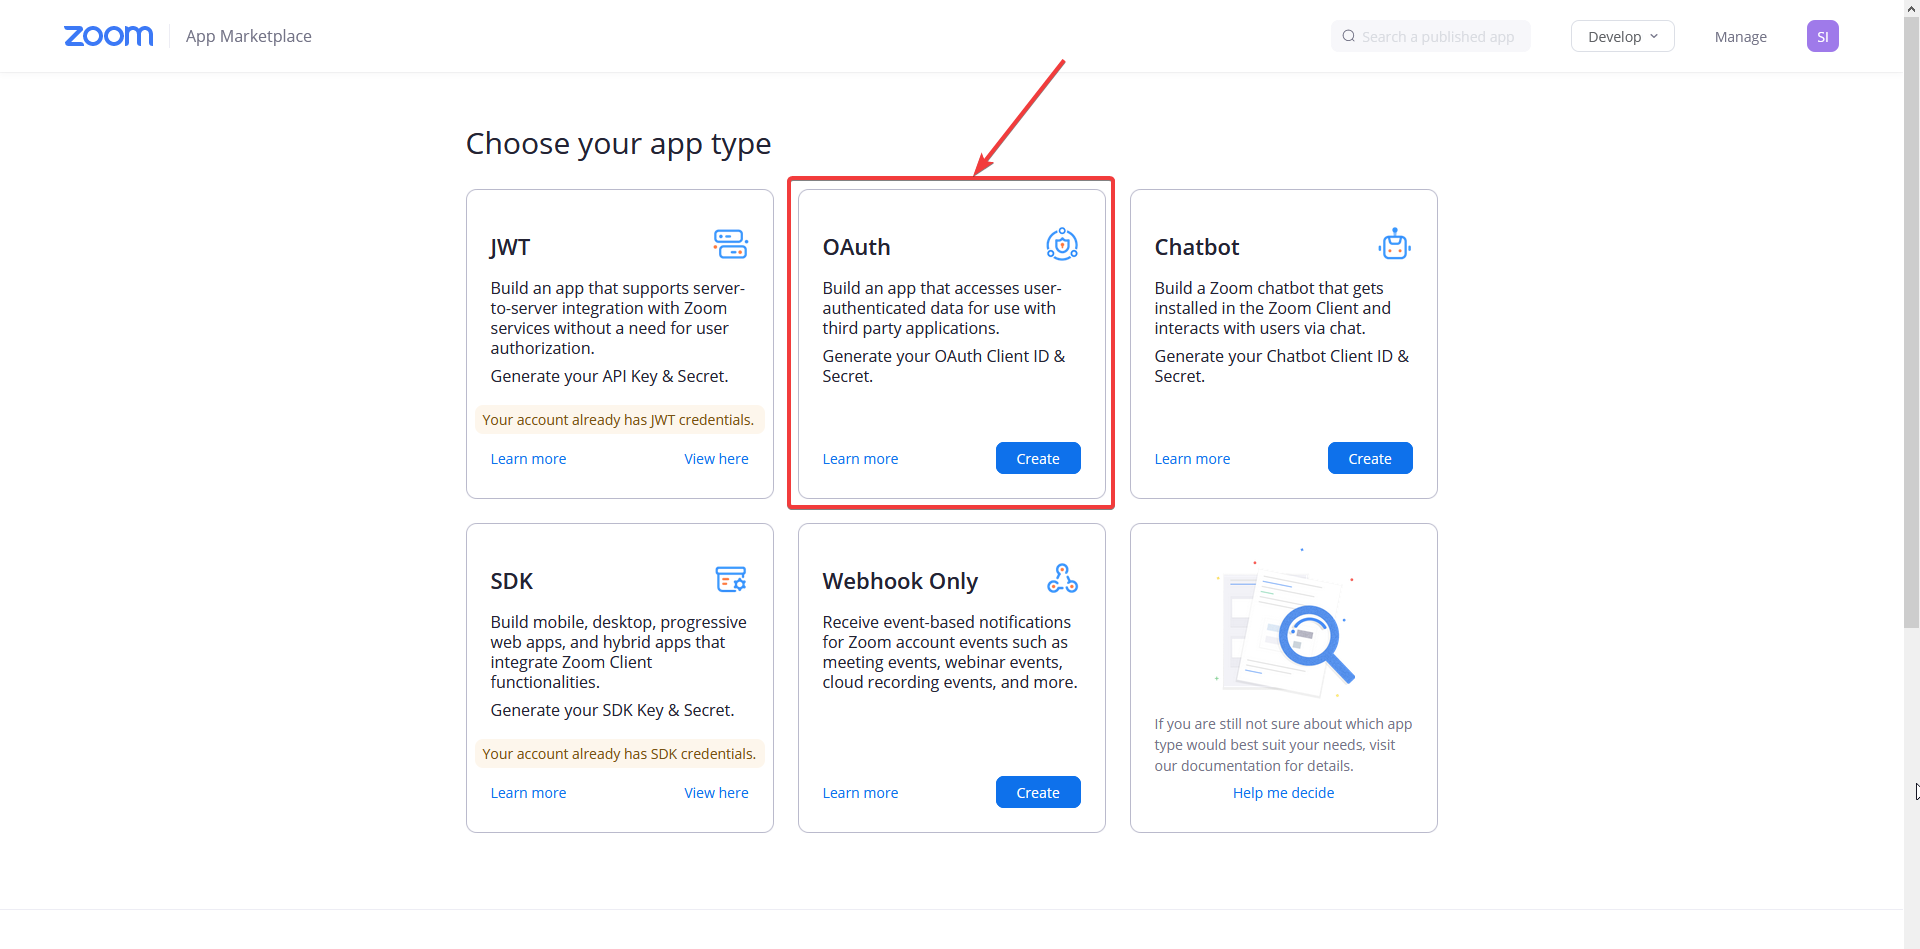
- You will be asked to choose the type of App. In this step, select the OAuth type and click the Create button;
- In the popup, type the name of your App and select the User-managed App option;
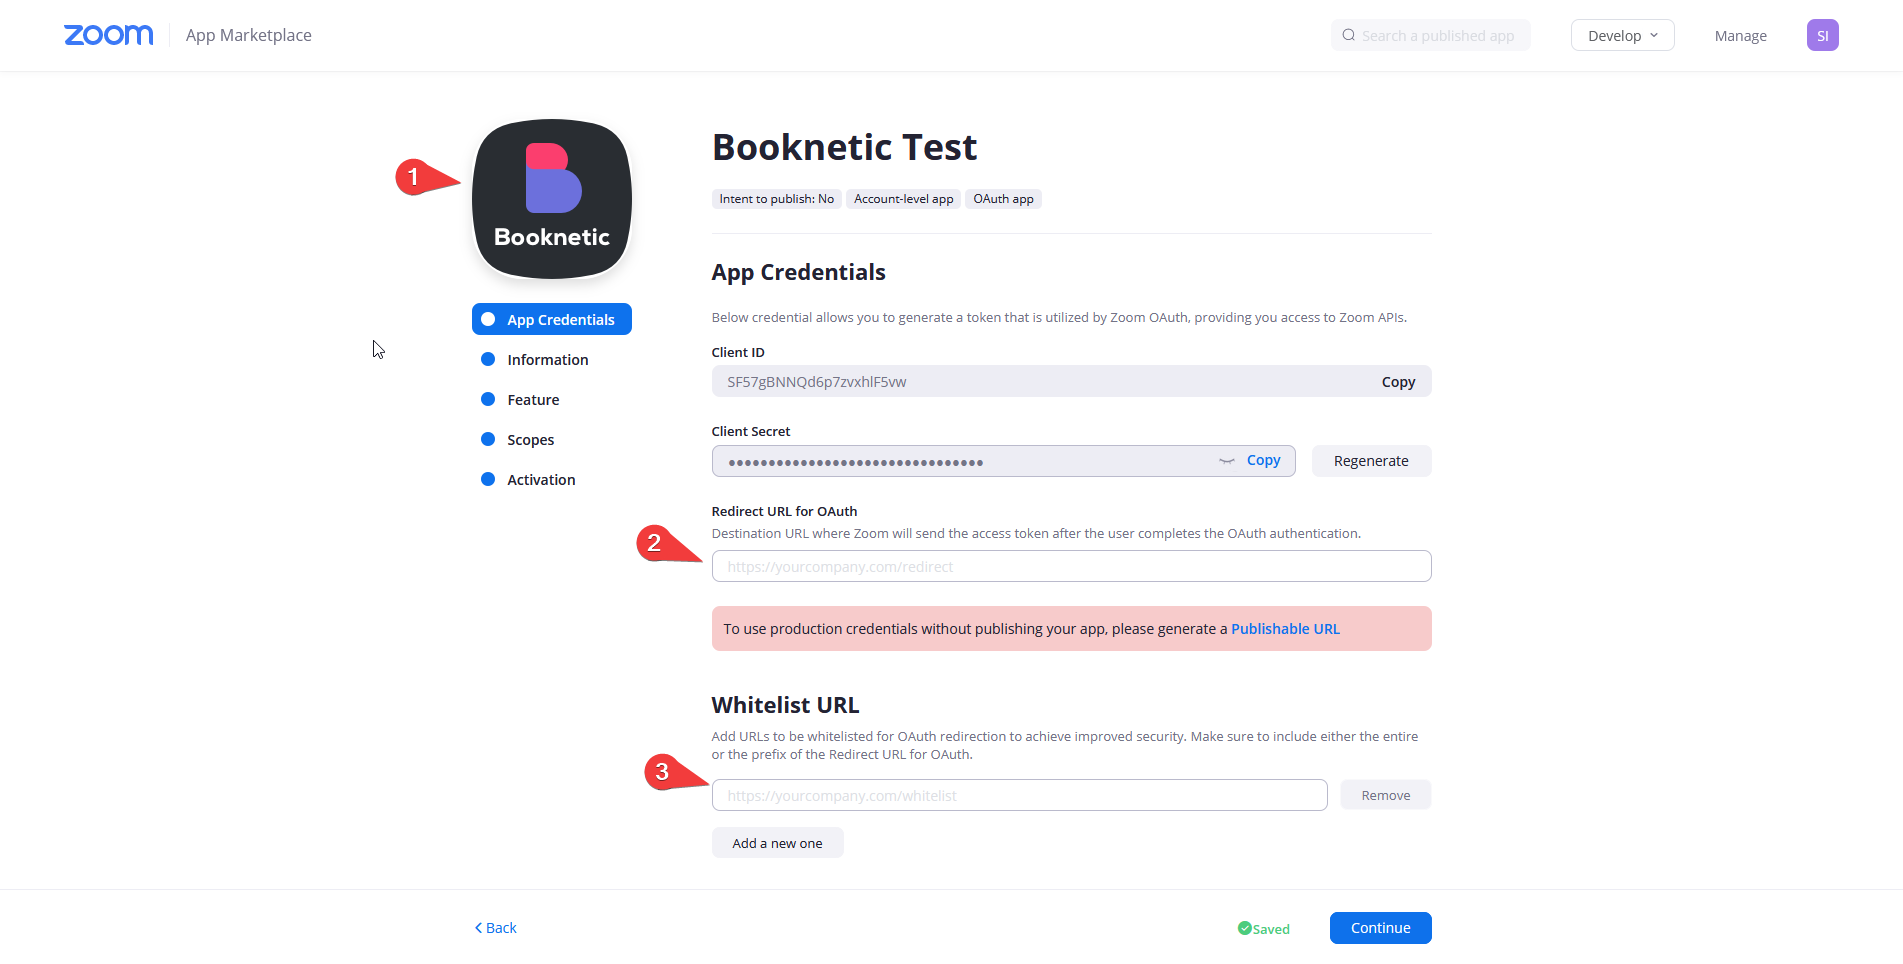
- Select an image for your App, enter the Redirect URL and the Whitelist URL:
- You can copy the Redirect URL and Whitelist URL in the Super Admin panel by going to Settings > Integrations settings > Zoom:
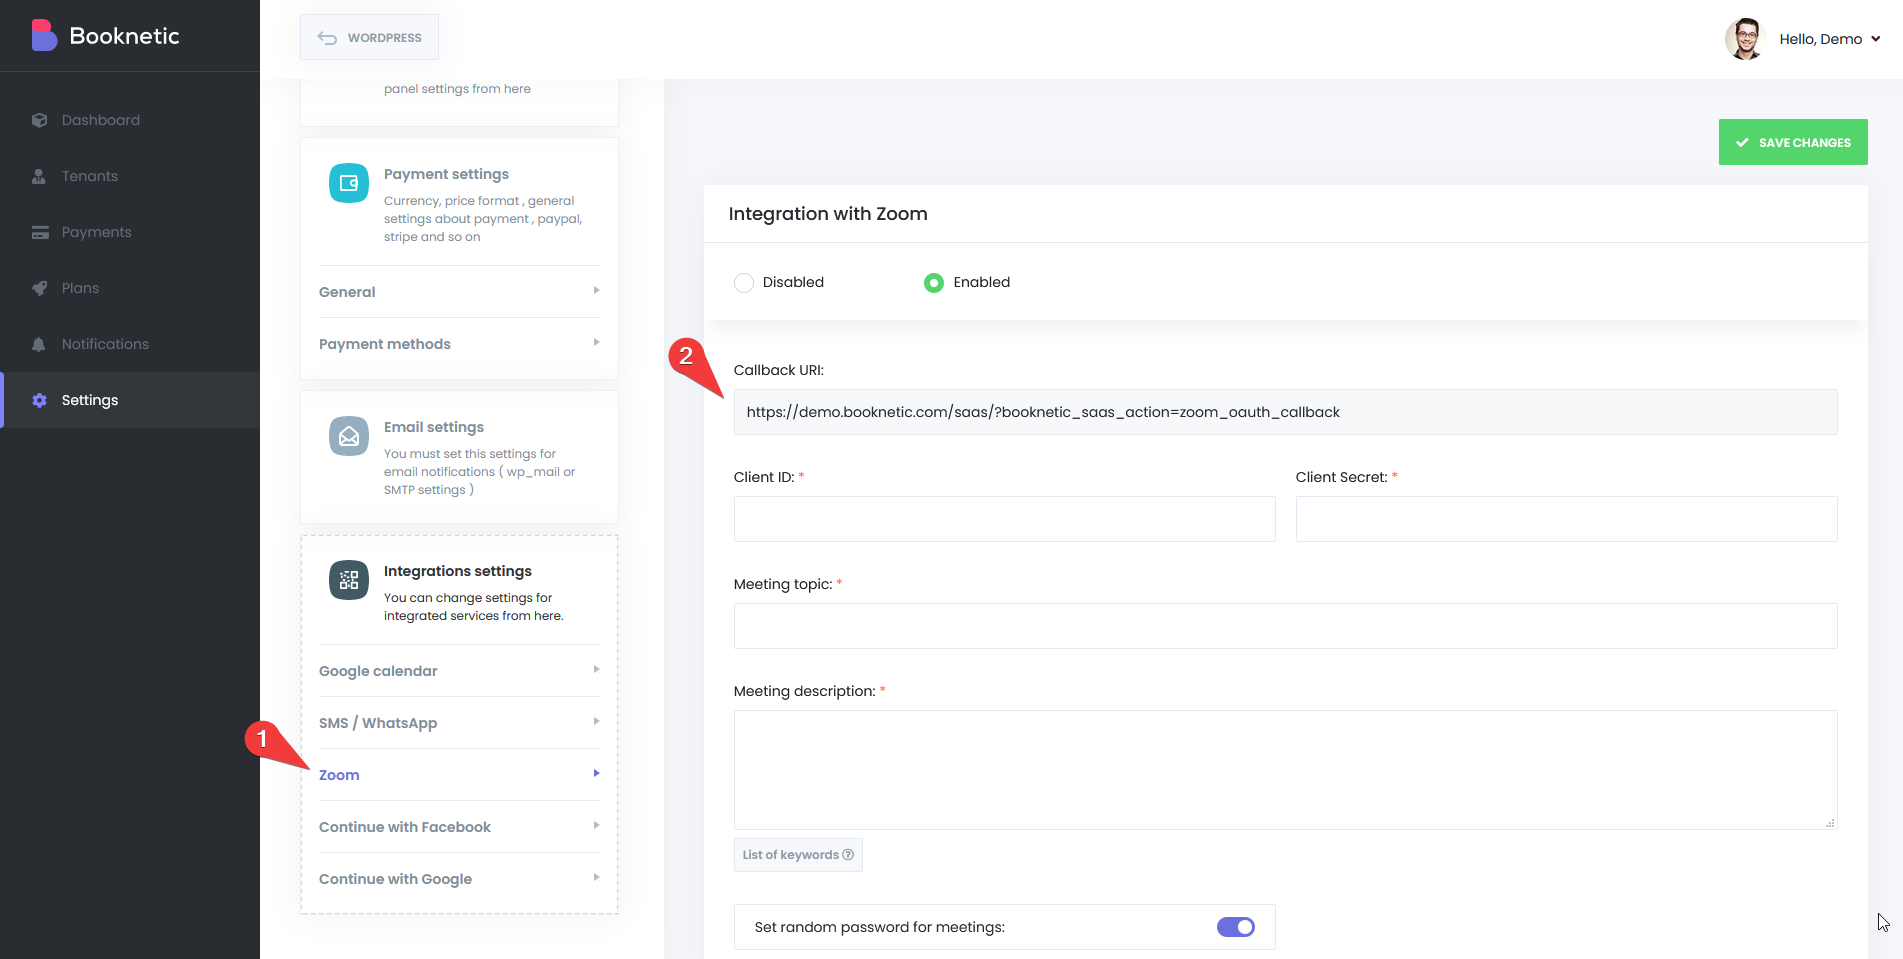
- Paste the copied URLs into both the Redirect URL and the Whitelist URL. Enter the same Redirect URL for both the Production and Development.
- Then copy the Client ID, and Client Secret provided for Development and paste it in the appropriate inputs in Settings > Integration settings > Zoom in the Super Admin Panel and save it:
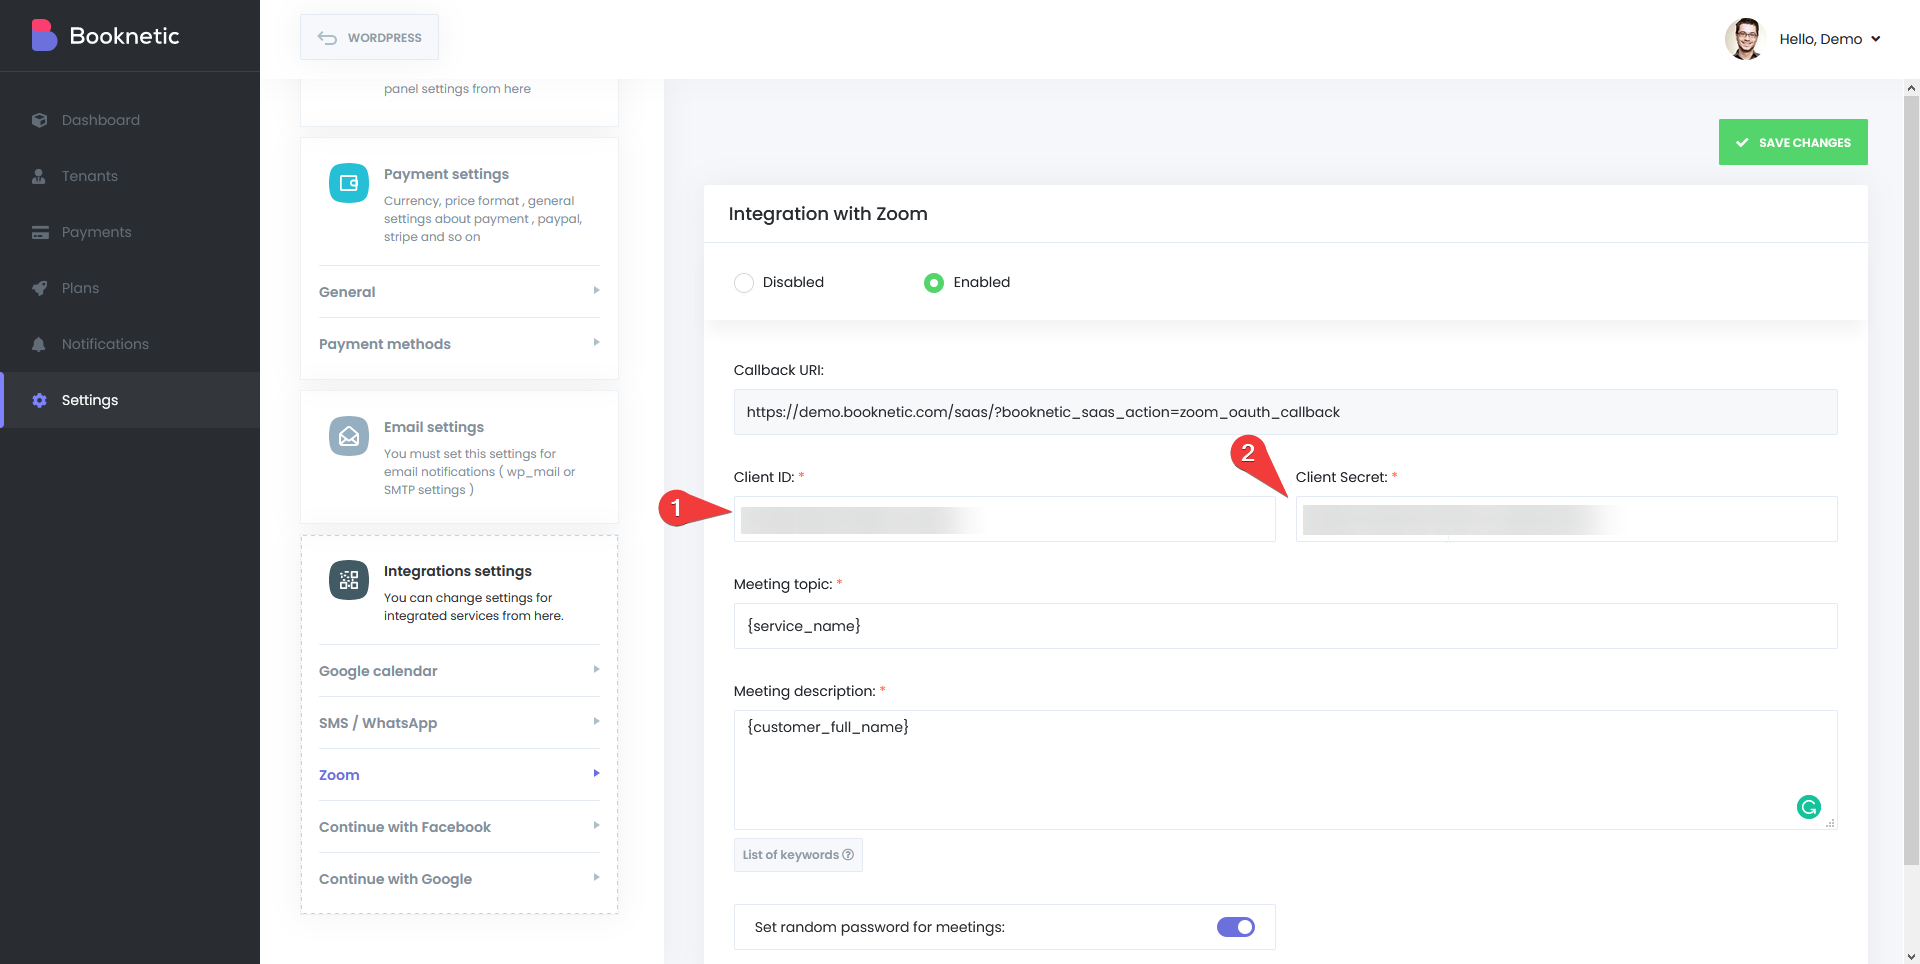
- Meeting topic and Meeting description fields are also essential fields. Do not forget to fill them in.
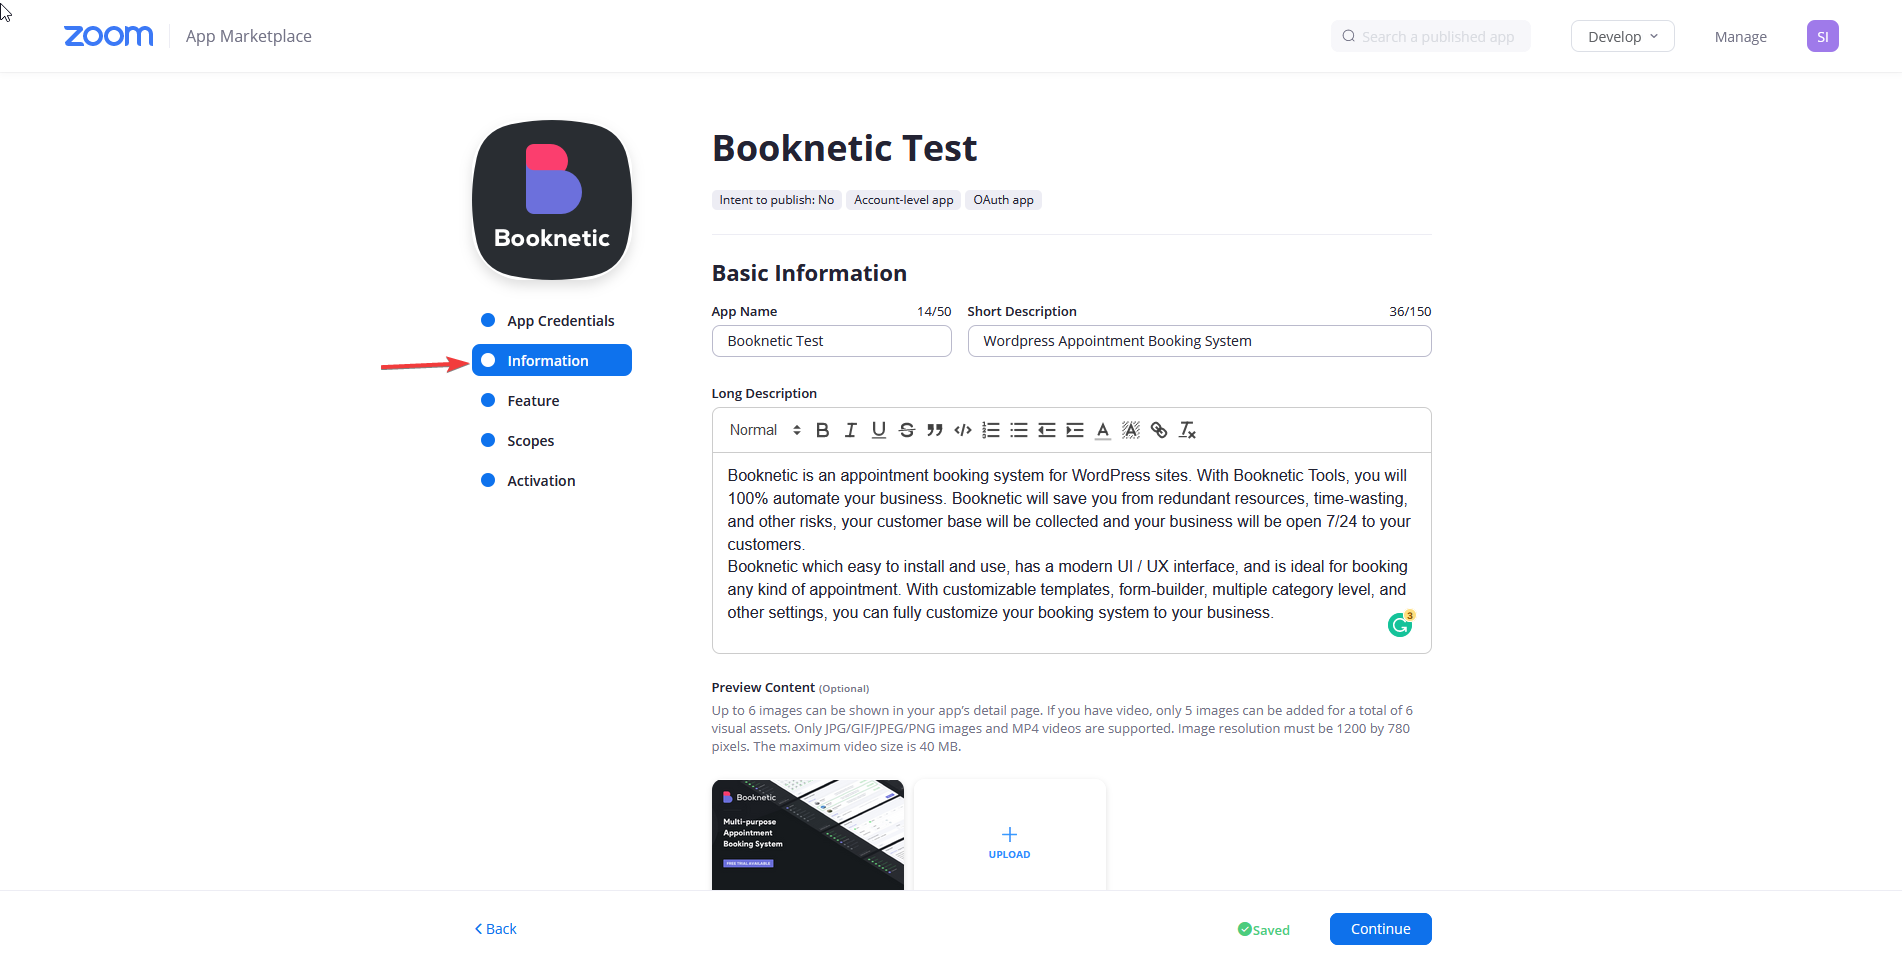
- Go to the Information step and fill in all the information about your company and service as required.
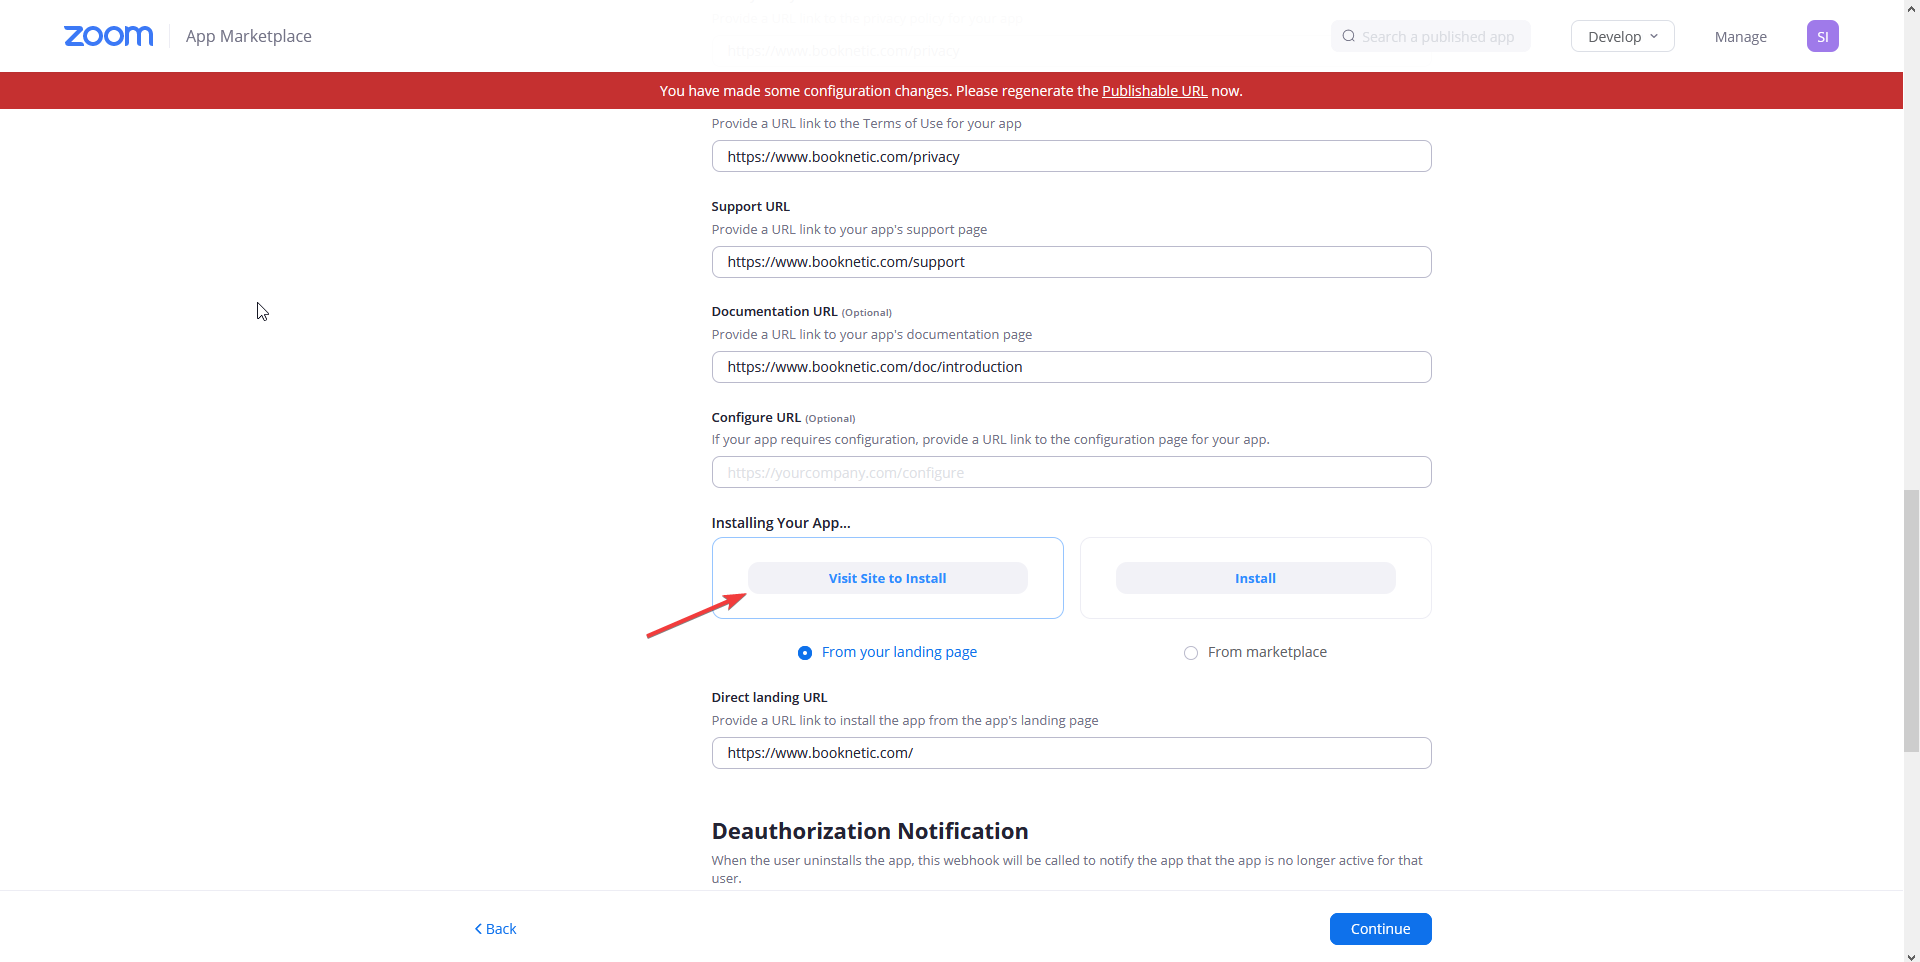
- In the Installing Your App section, select "Visit site to install"
- Then proceed to the next Features step. No action is required in this step, and continue to the Scopes step.
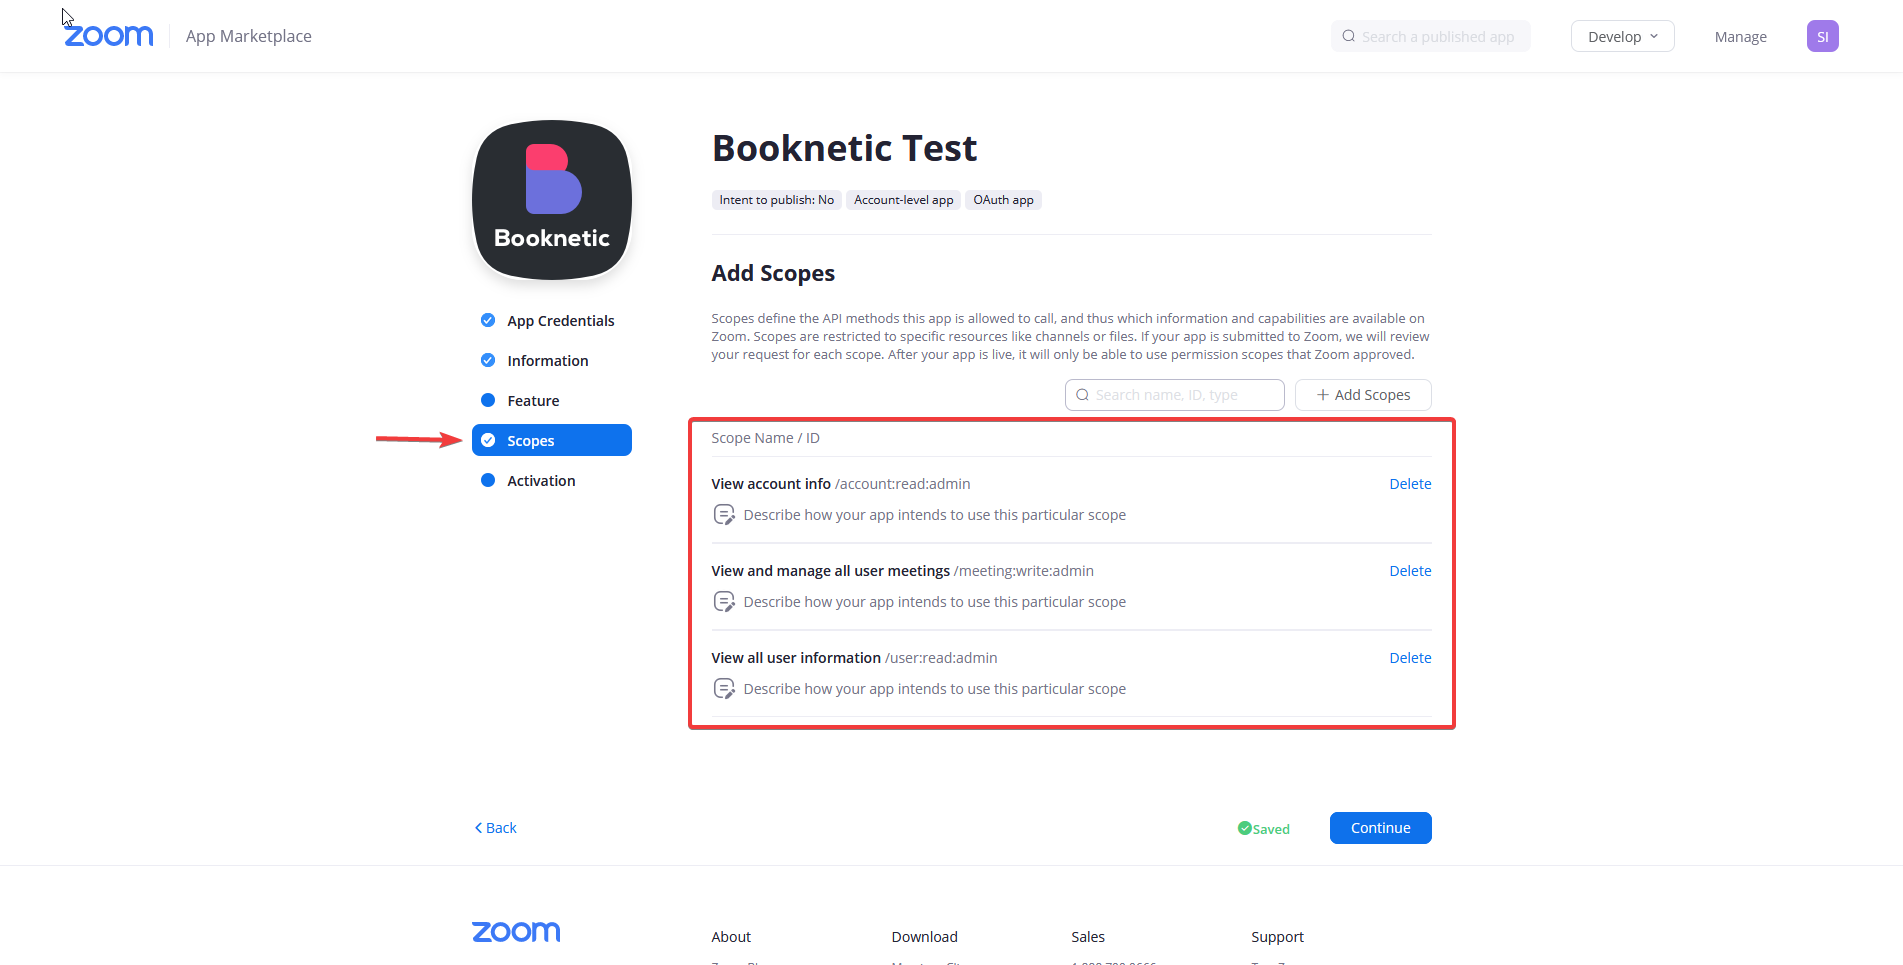
- You need to search and select the following three scopes:
account: read: admin
meeting: write: admin
user: read: admin
- Click the Continue button. No action is required in this section. Continue to the last Submit stage.
- At this stage, we submit the App, and the Zoom testers will review it. First comes the Validate the domain stage. Enter your domain name here and download the verifyzoom.html file offered to you. Upload this file to the document root of the site.
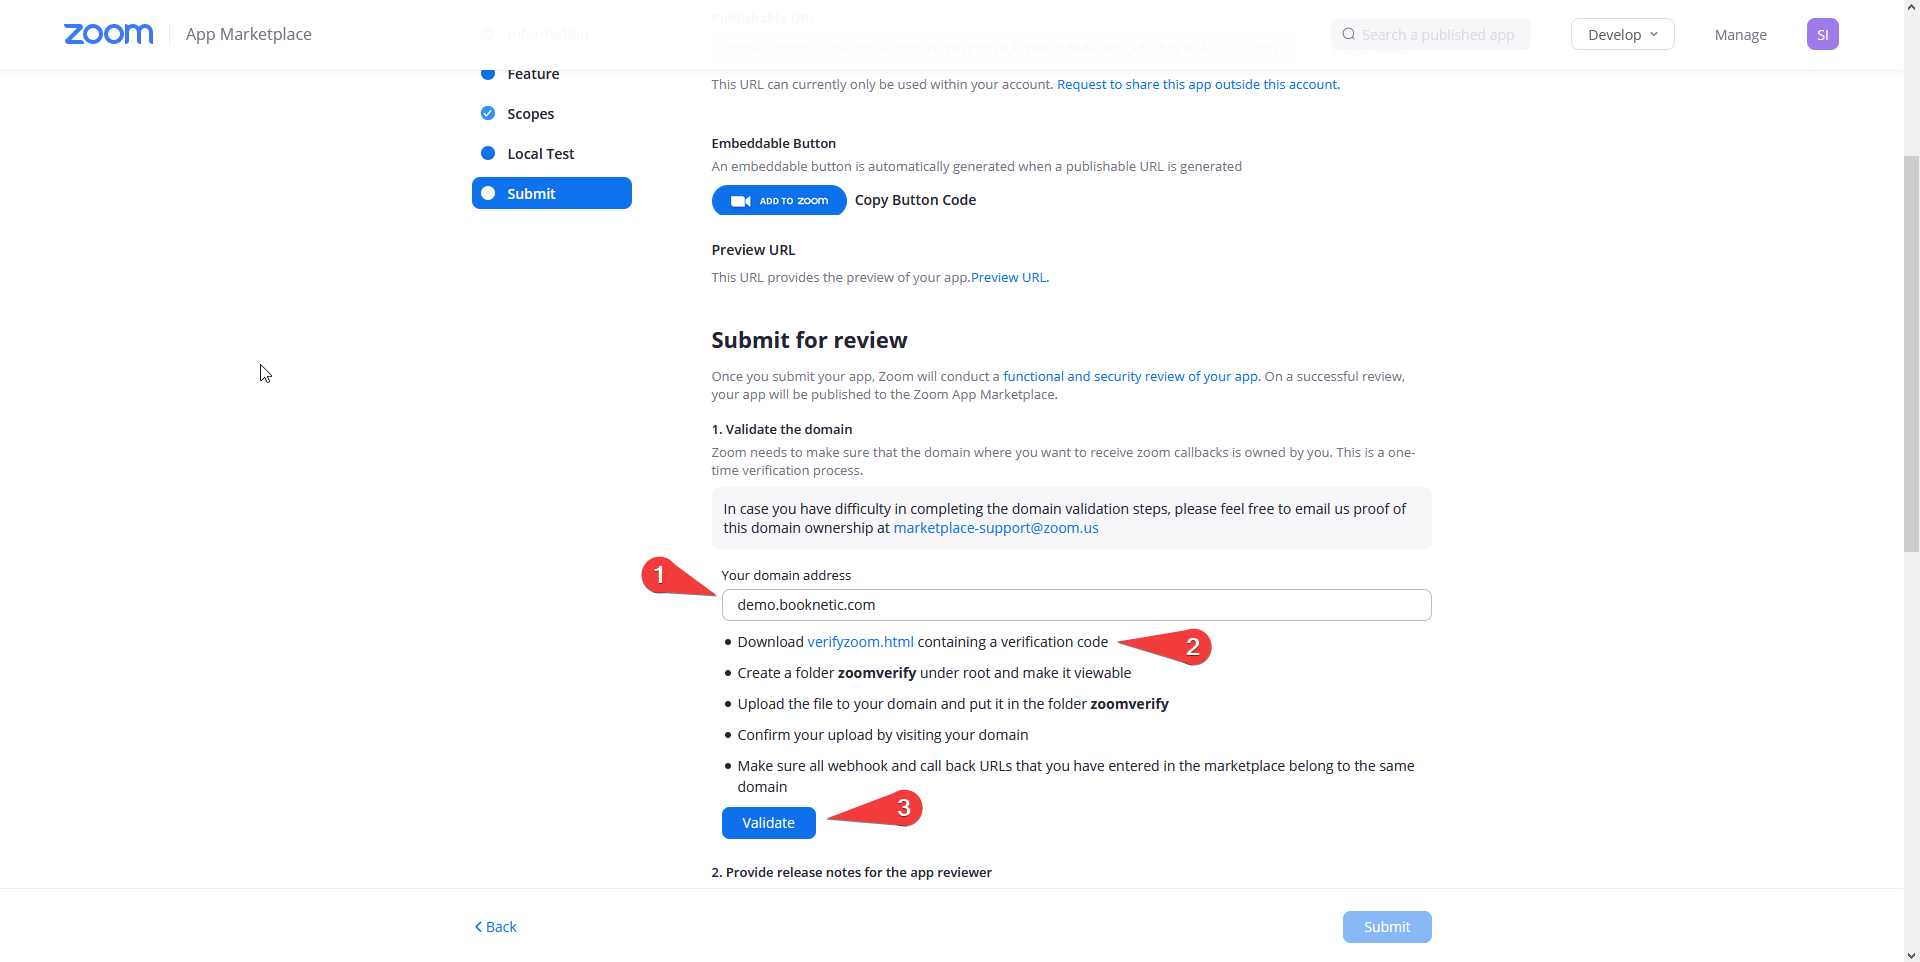
- Make sure you manually enter the URL and check that you have uploaded the file to the right place: http: //YOUR_DOMAIN/verifyzoom.html
- When everything is ready, click the Validate button. If you do everything right, you will see the message Validated in Green.
- Copy the text below and paste it to the "Provide release notes for the app reviewer" section:
- In the next step, you need to make sure that the Zoom testers will easily test the plugin. To do this, register and activate one private Tenant for the Zoom testers. Ensure Zoom integration permission in the Settings so that the tester can visually witness how the Zoom integration works. After creating the Tenant and giving the necessary permissions, In the "Test account and credentials" section, enter credentials for Zoom Testers:
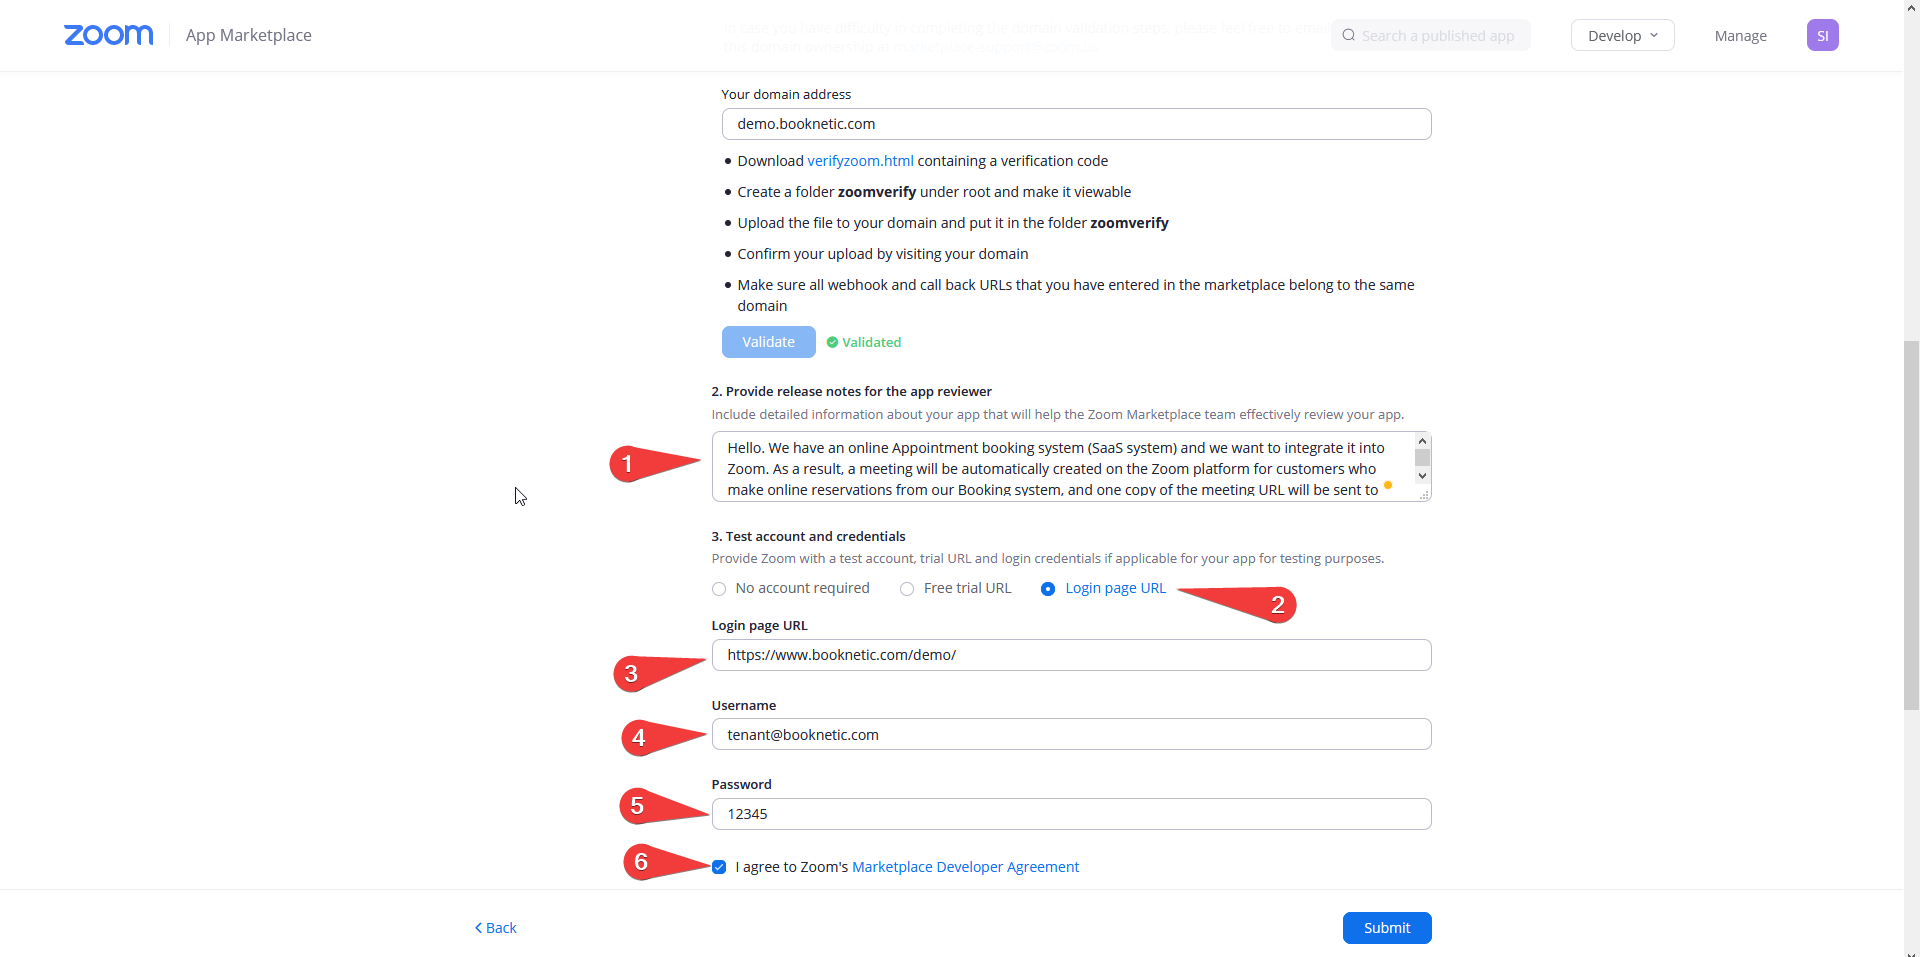
- Finally, confirm the Zoom Agreements by ticking the checkbox and click the Submit button.

As mentioned, the revision of the application can take up to 7 working days on average. Once the App is approved, you will receive an email notification. This time, you will enter the App, copy the Production credentials, the Client API, and Client Secret, and paste them into the dedicated inputs in the Super Admin panel Settings > Integrations Settings > Zoom.
When your App is approved, it will be listed on the home page of the App Marketplace.